Enable SSO with Okta SAML
Single Sign-On (SSO) is an authentication method that enables users to log in to multiple applications and websites with one set of credentials. SSO uses certificates to establish and maintain a trust relationship between the Service Provider (SP) and an Identity Provider (IdP). Palette supports SSO based on either the Security Assertion Markup Language (SAML) or OpenID Connect (OIDC).
The following steps will guide you on how to enable Palette SSO with Okta Workforce Identity Cloud based on SAML.
Prerequisites
-
For Okta SAML to work correctly with self-hosted Palette, ensure that HTTPS is enabled and TLS is configured. For additional information, refer to the appropriate Palette or VerteX System Address Management guide.
-
A free or paid subscription with Okta. Okta provides free developer subscriptions for testing purposes.
Enablement
Create Teams in Palette
Follow this guide to create teams in Palette that will be used for Okta SAML and give them the appropriate permissions.
In this example, you will create an Okta Team and give the team Tenant Admin permissions. You can repeat this
process for any other team with group claims.
-
Log in to Palette as a tenant admin.
-
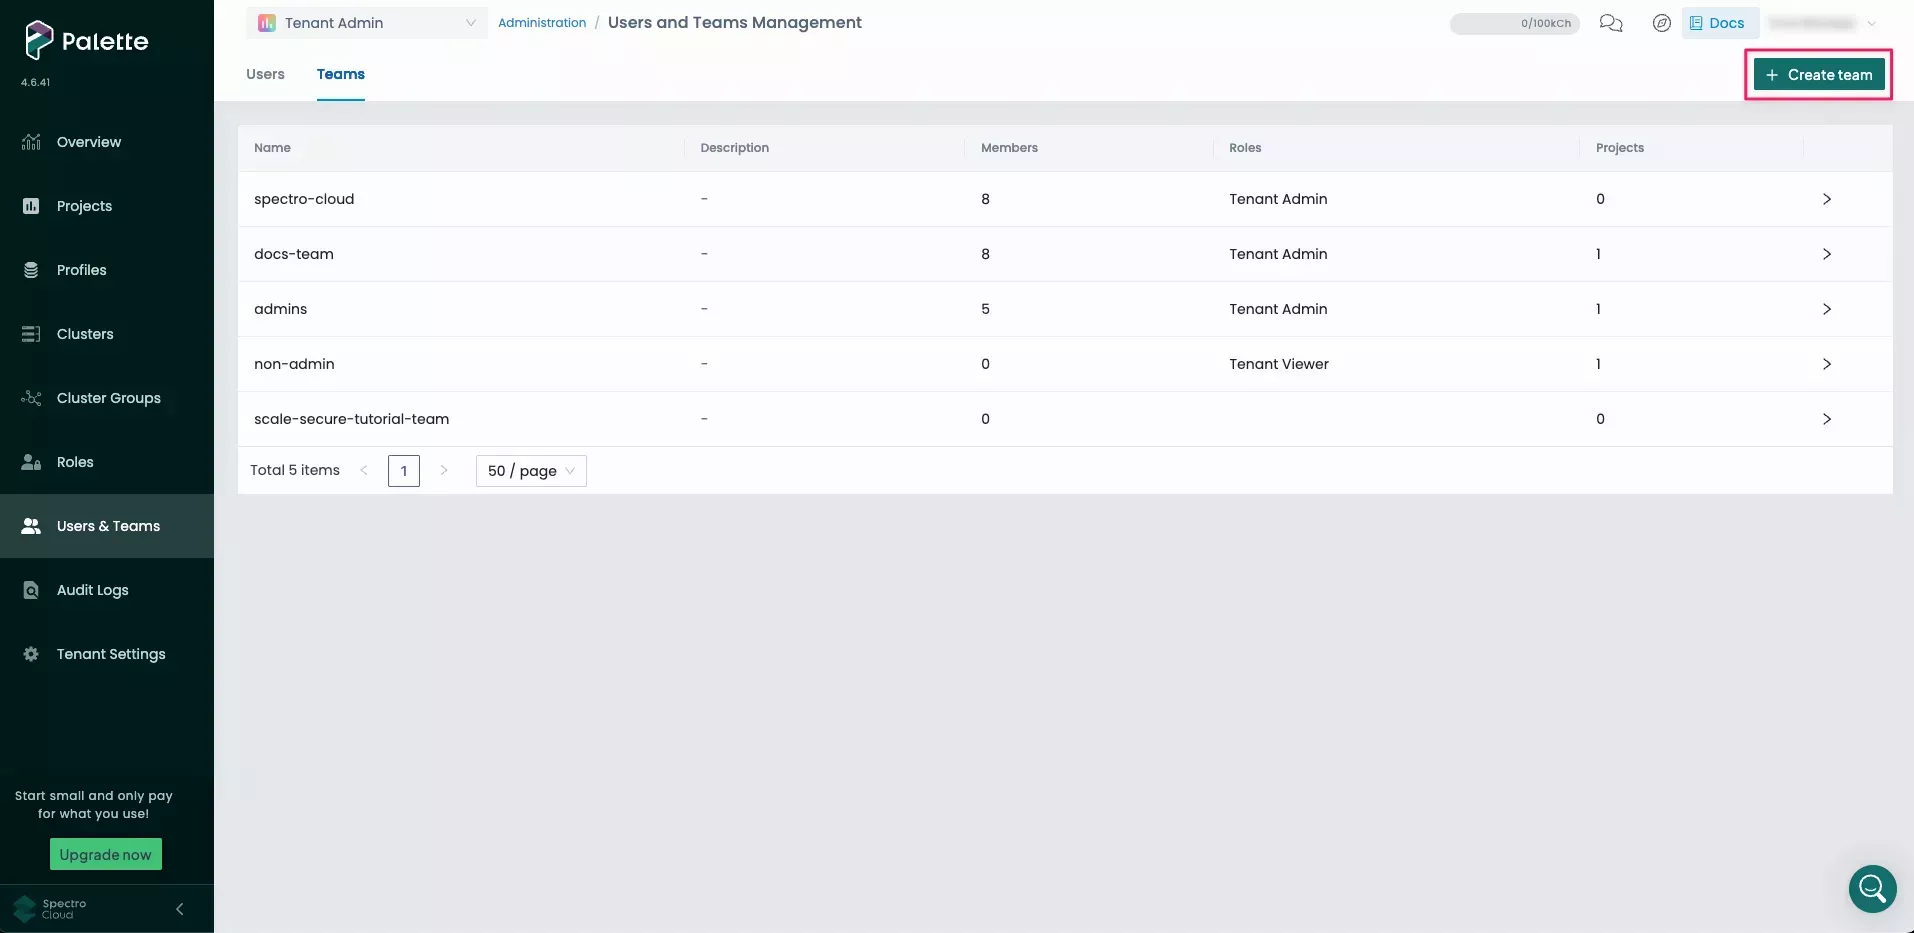
From the left main menu, select Users & Teams.
-
Navigate to the Teams tab and select Create Team.
-
Enter
Okta Teamfor the Team name. You do not need to add any members, as members will be added automatically with SSO. Select Confirm to create the team.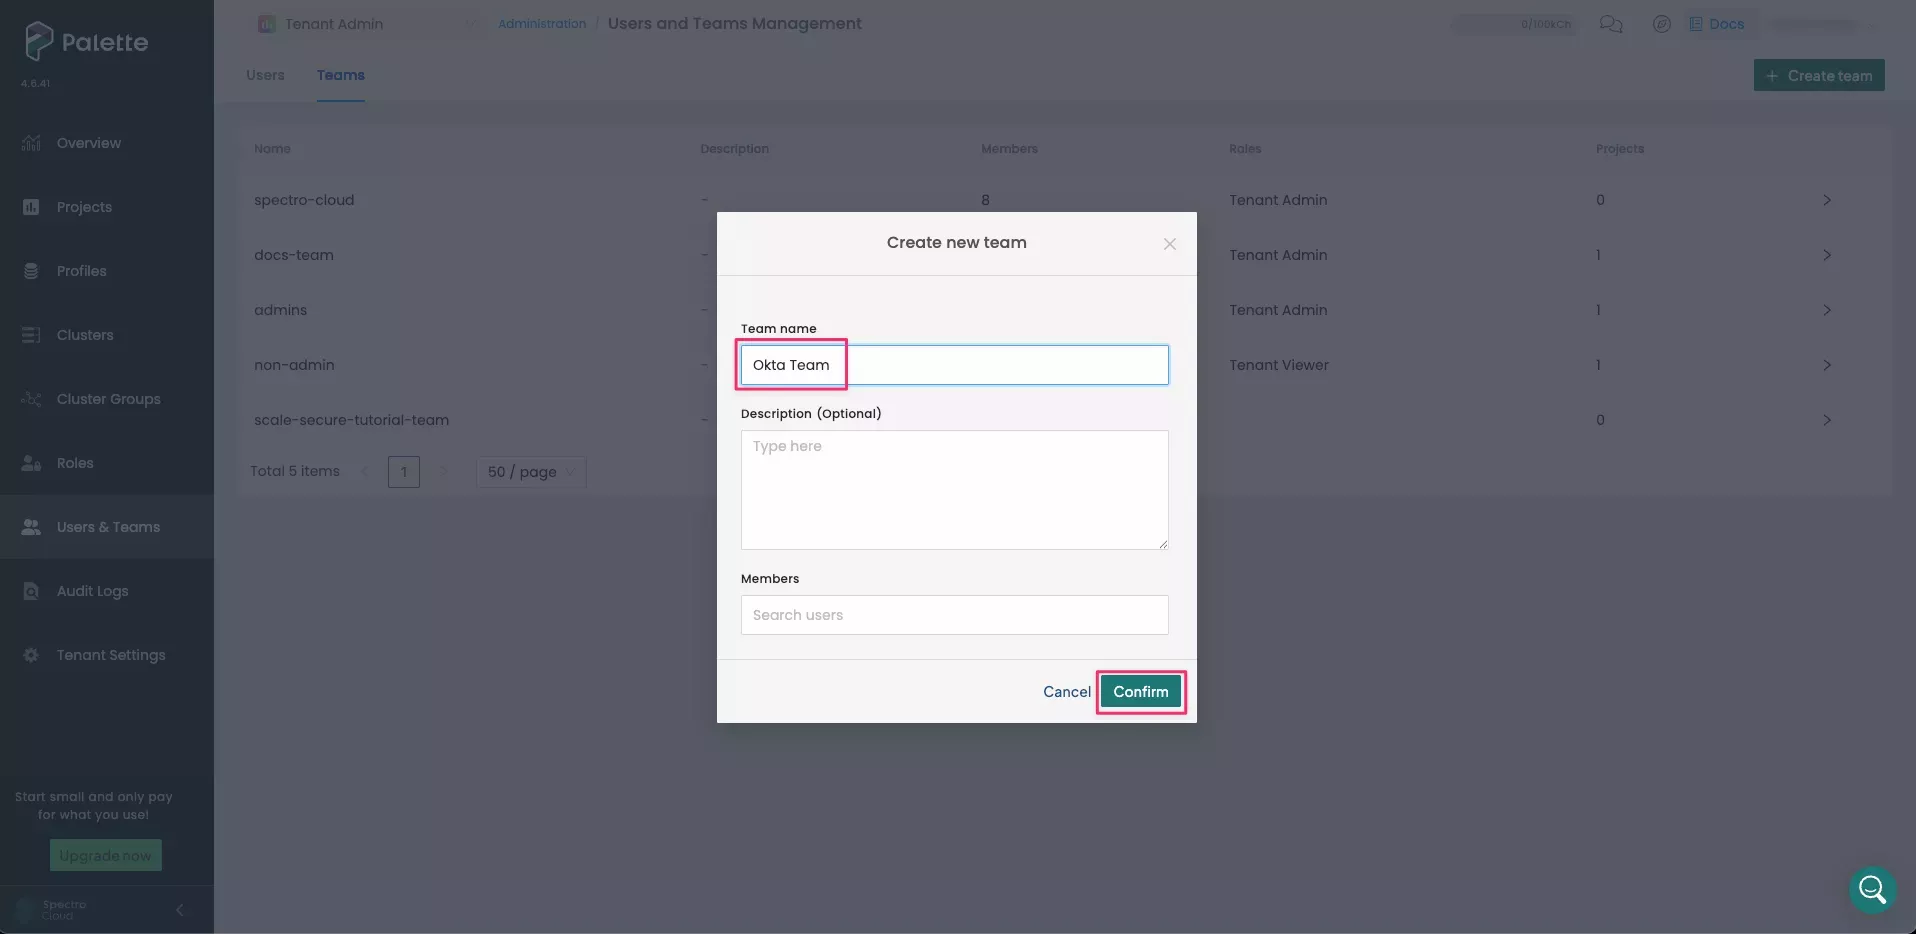
-
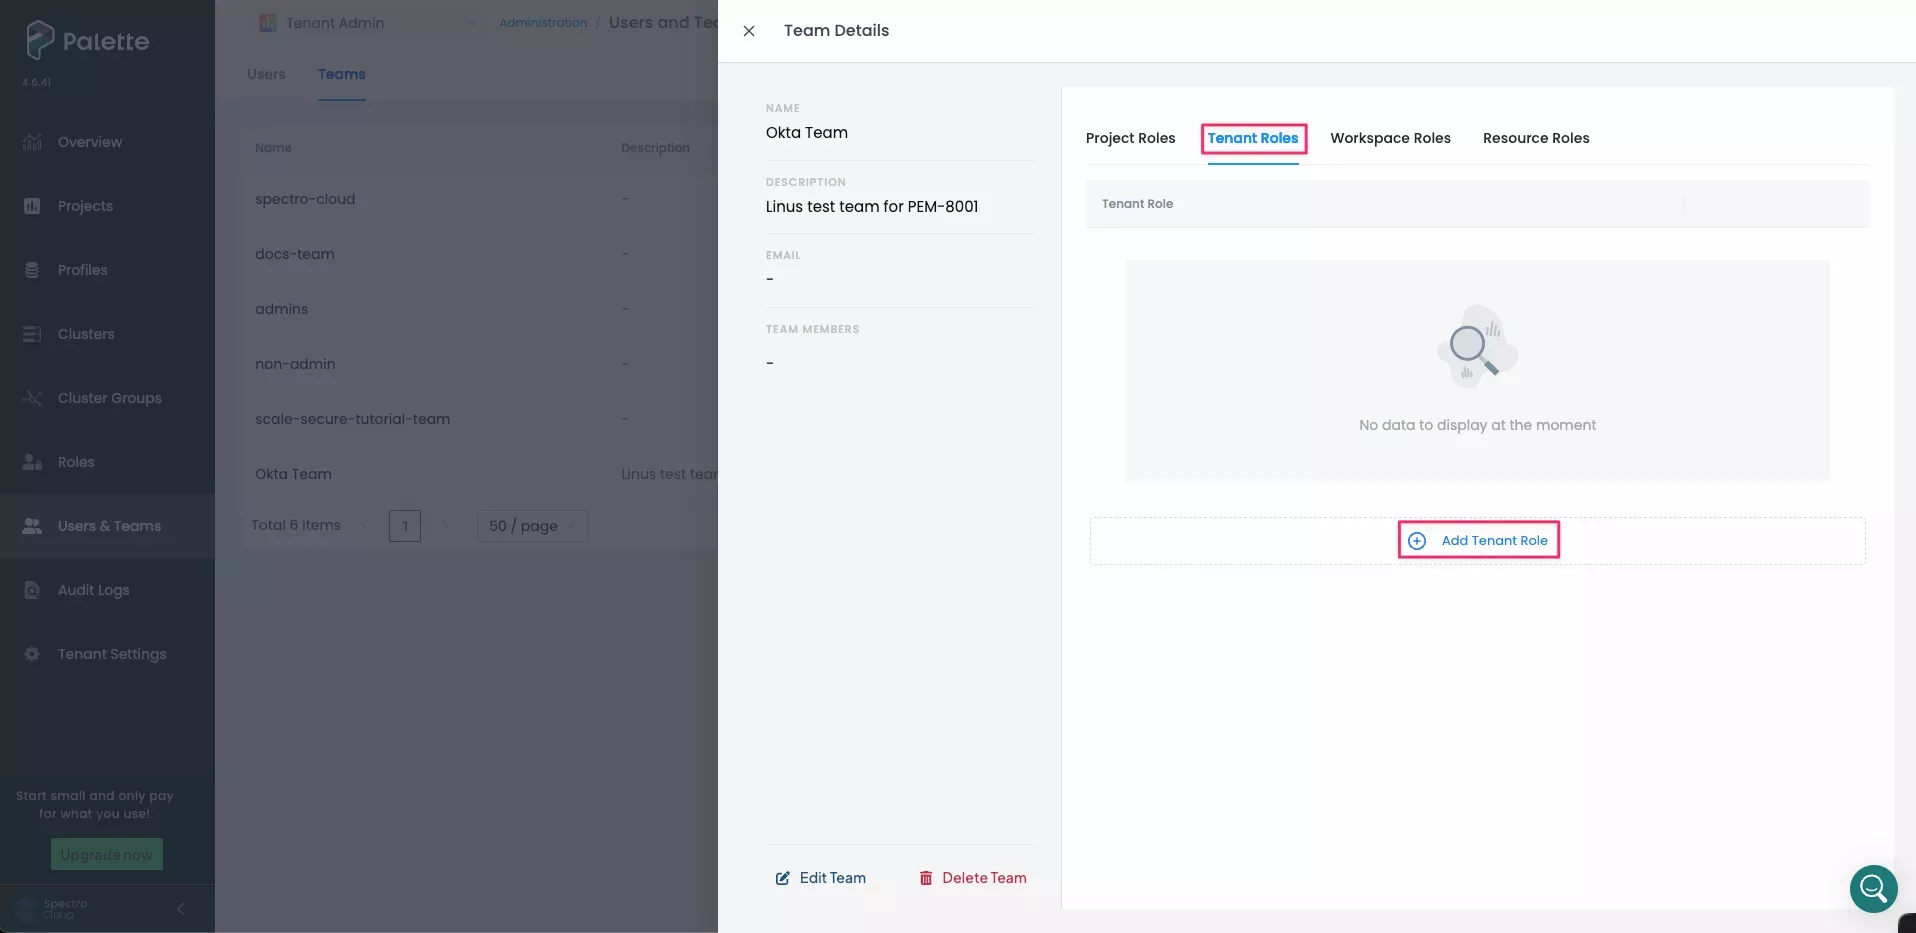
A message states that the team was created. Select the newly created
Okta Teamto review the team's details. -
To give the team administrative access to the entire tenant and all projects within the tenant, select the Tenant Roles tab and click Add Tenant Role.
-
In the Add Roles dialog, select Tenant Admin. Click Confirm to add the role.
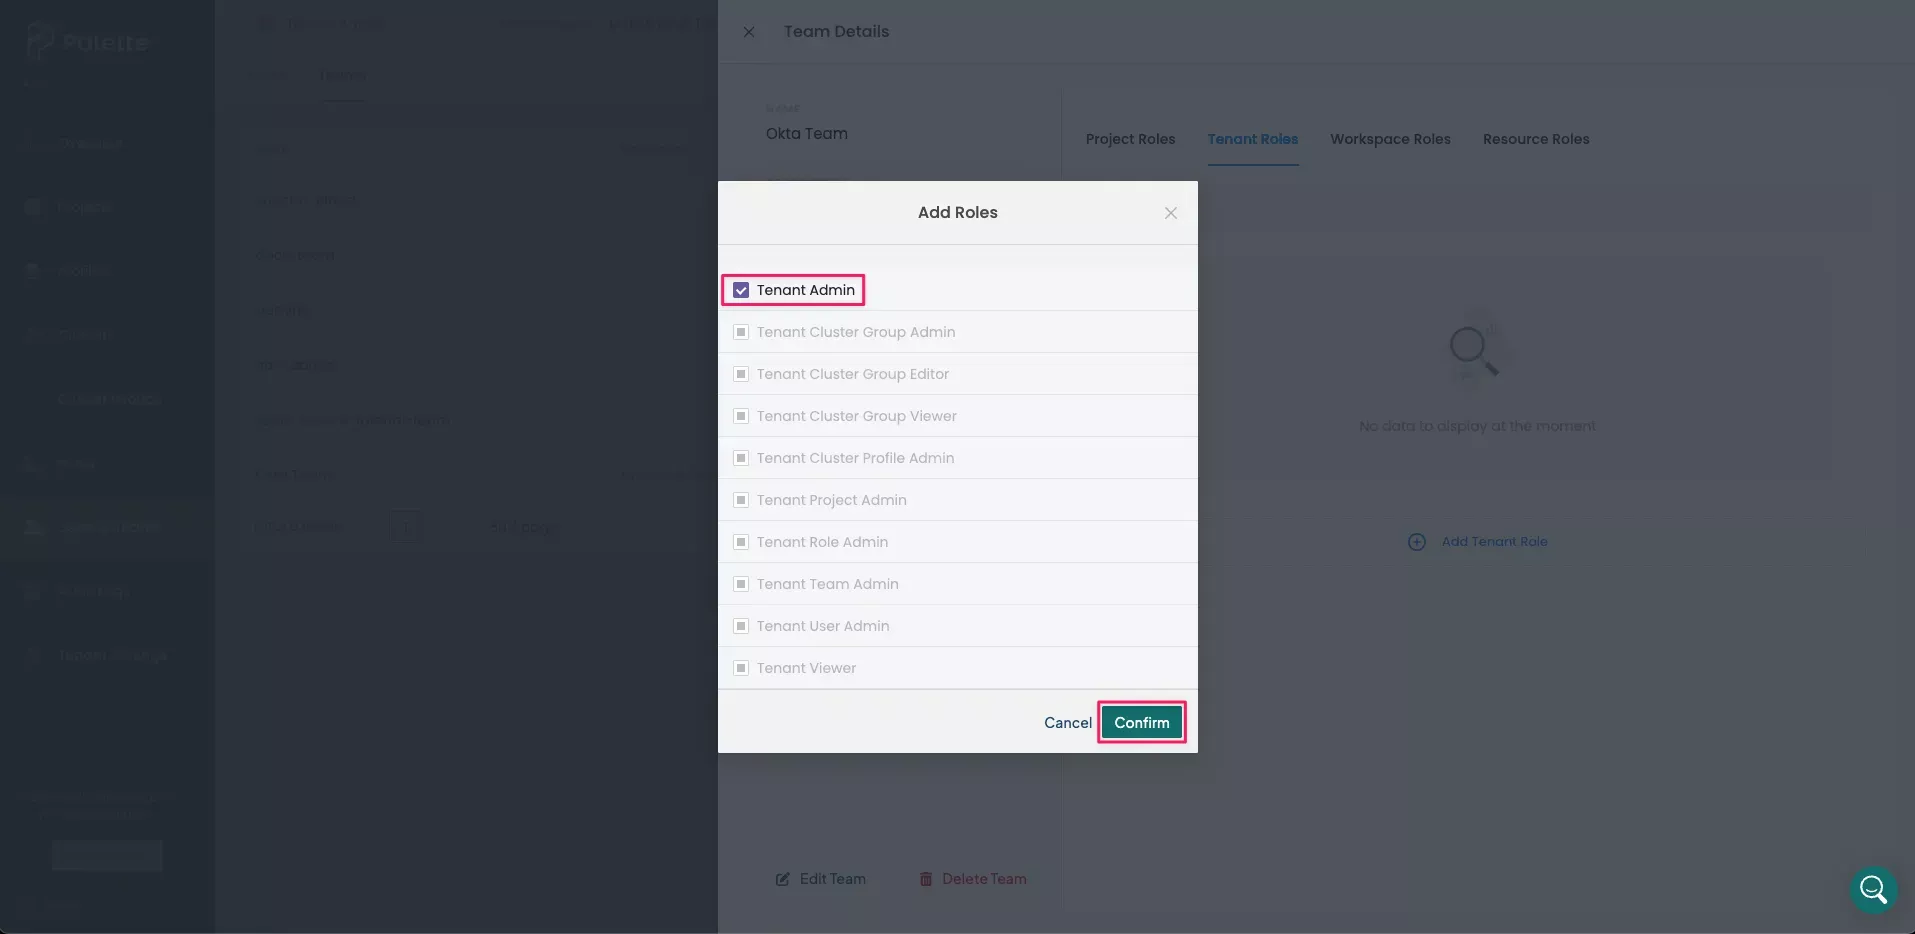
A message states that Roles have been updated. Repeat this procedure for any other necessary teams, taking care to ensure they are given the appropriate permissions.
Create the Okta Application
-
Open a new browser tab and log in to your Okta Admin console.
infoYour Okta login URL follows the format
https://<your-okta-account-id>-admin.okta.com/admin/getting-started. Replace<your-okta-account-id>with your Okta account ID. -
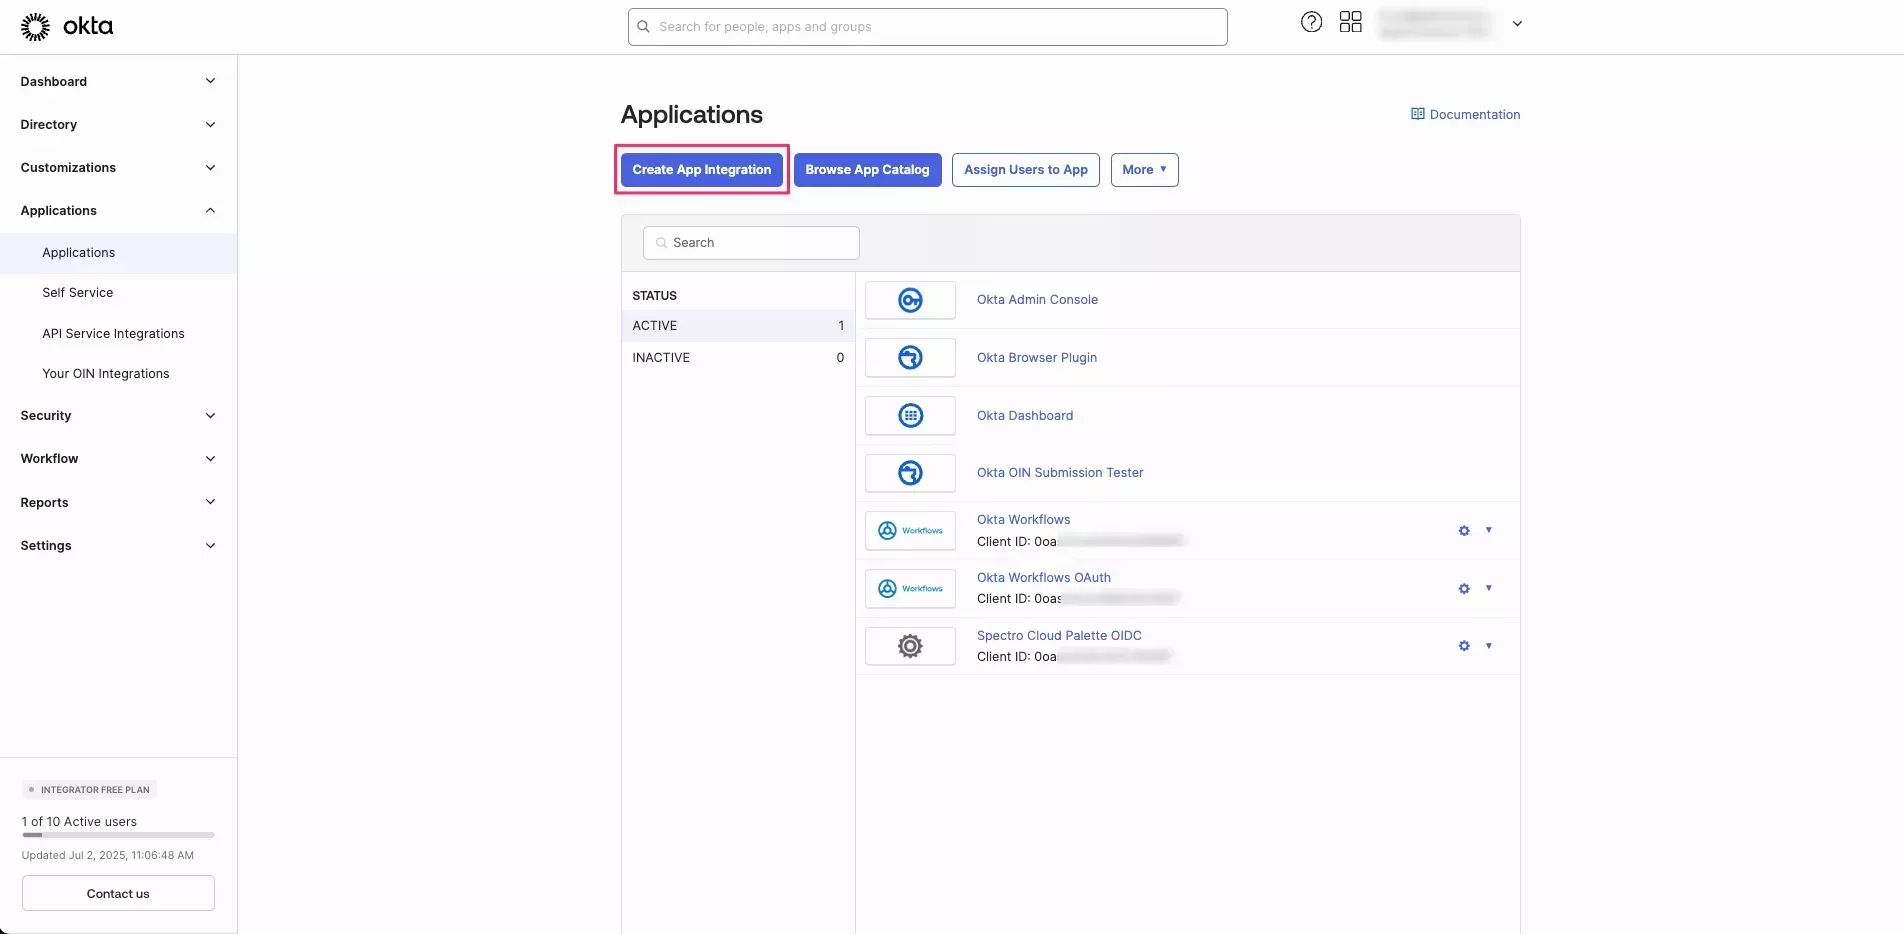
Navigate to Applications > Applications, and select Create App Integration.
-
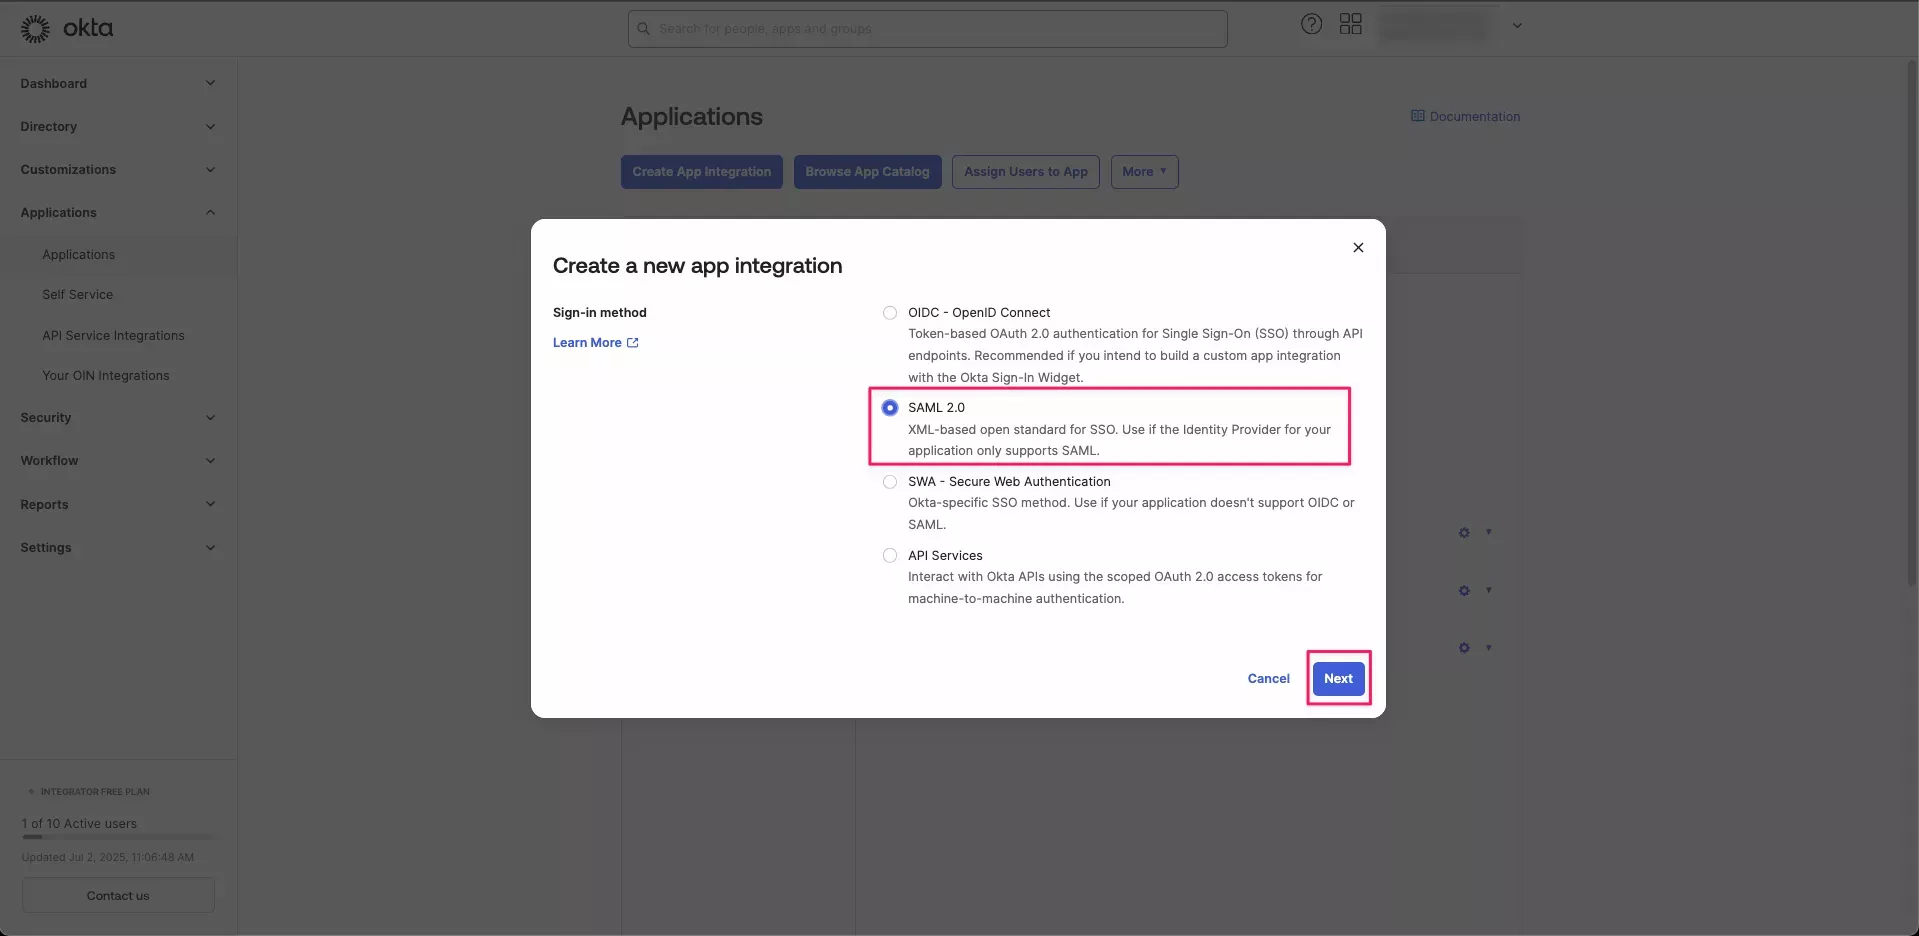
Select SAML 2.0 and click Next.
-
On the General Settings page, enter
Spectro Cloud Palette SAMLfor the App name. If desired, upload a logo for the application. -
Return to Palette. If you have been logged out, sign in again as a tenant admin.
-
From the left main menu, select Tenant Settings.
-
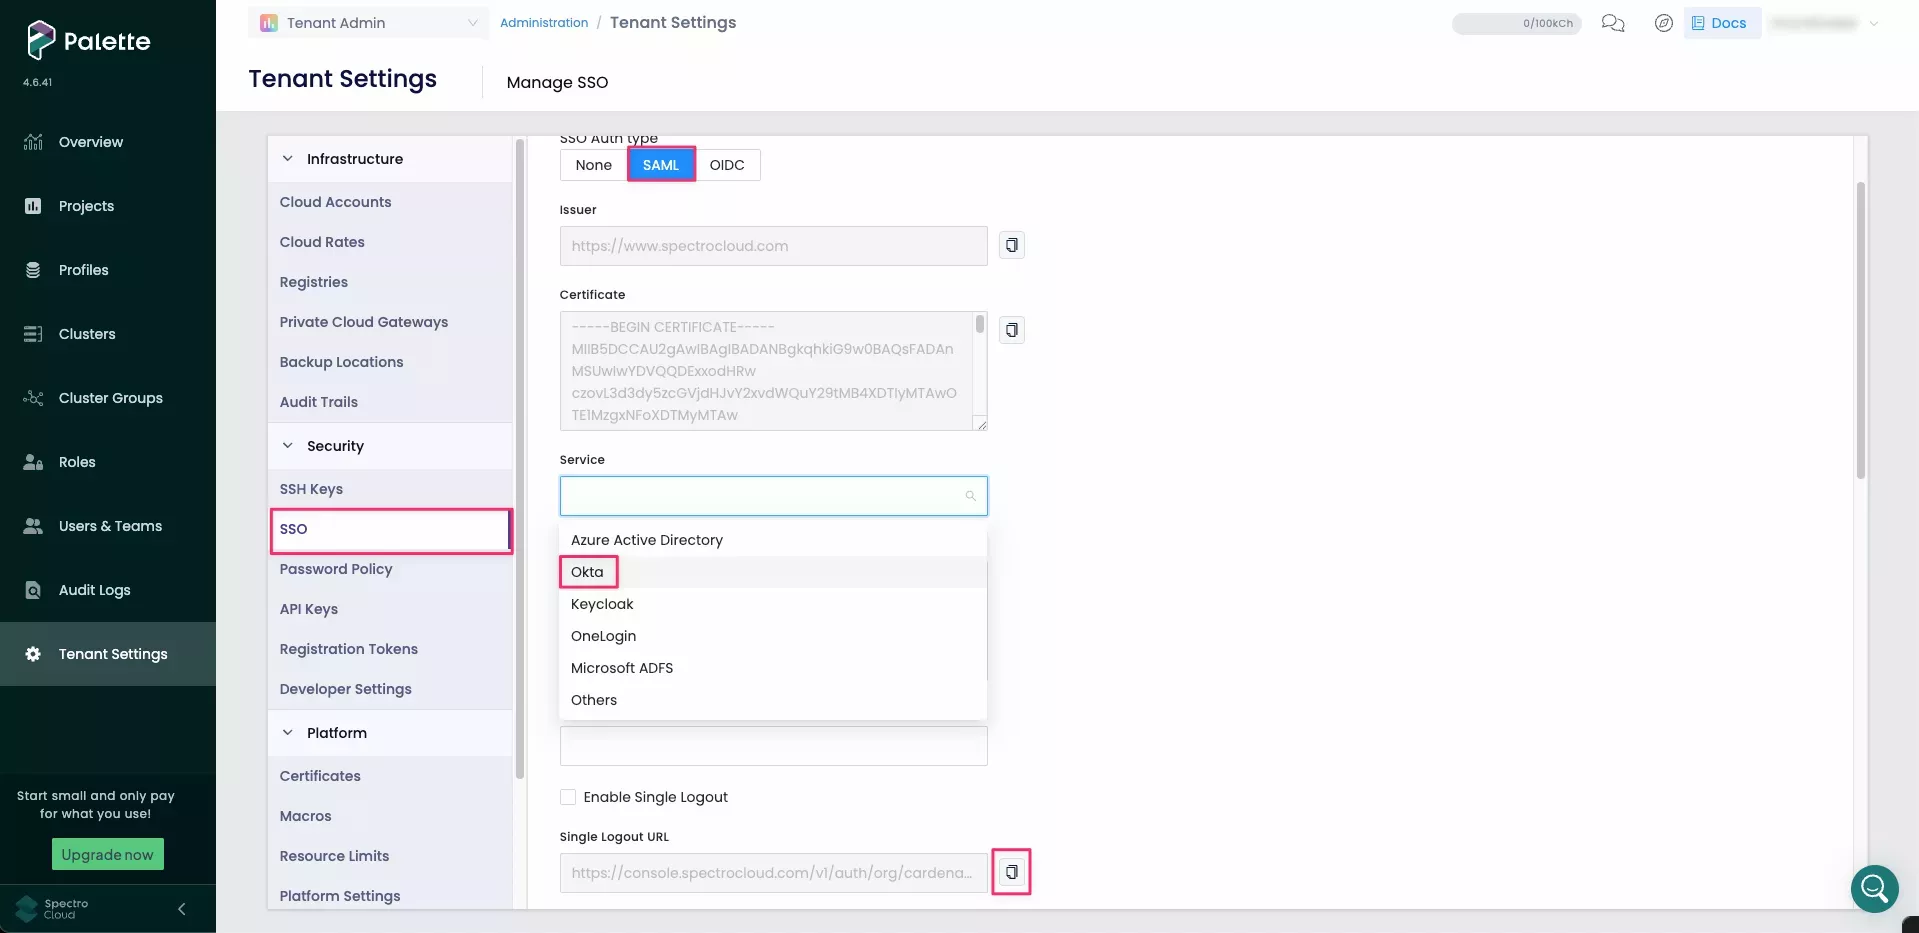
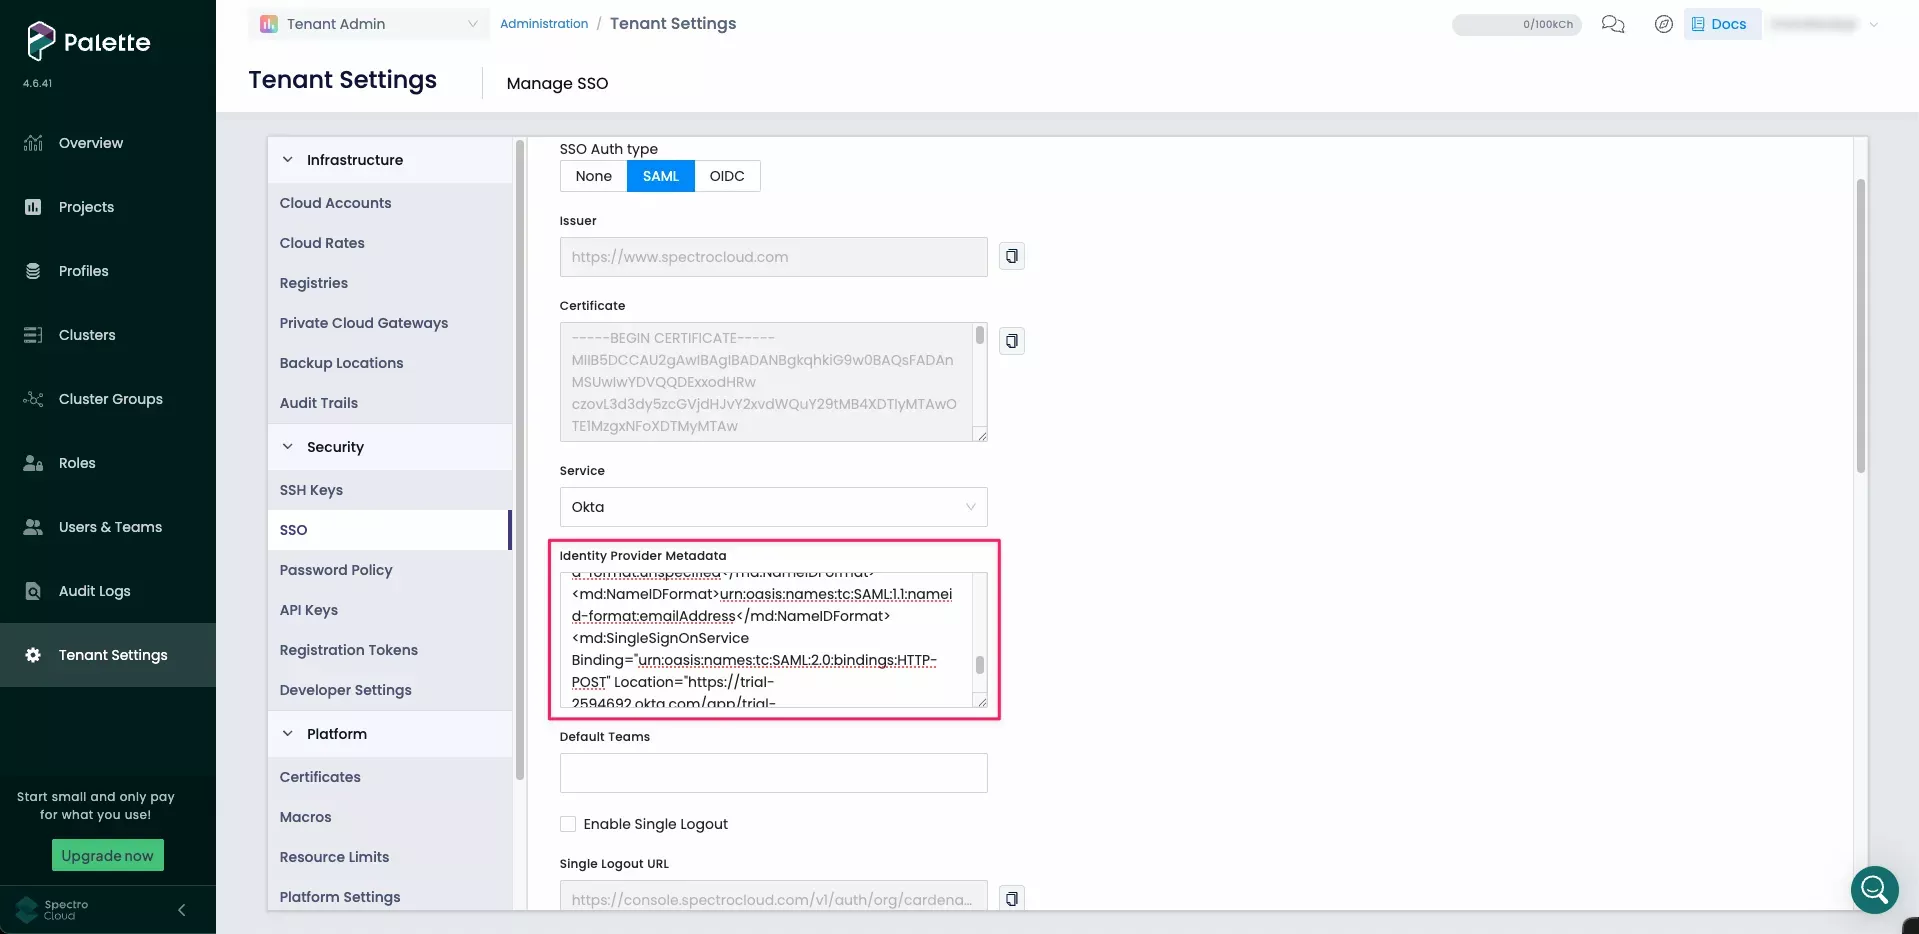
On the Tenant Settings Menu, select SSO, and choose an SSO Auth type of SAML.
-
From the Service drop-down, select Okta.
-
Scroll to the Login URL field and select the clipboard icon to copy the URL.
-
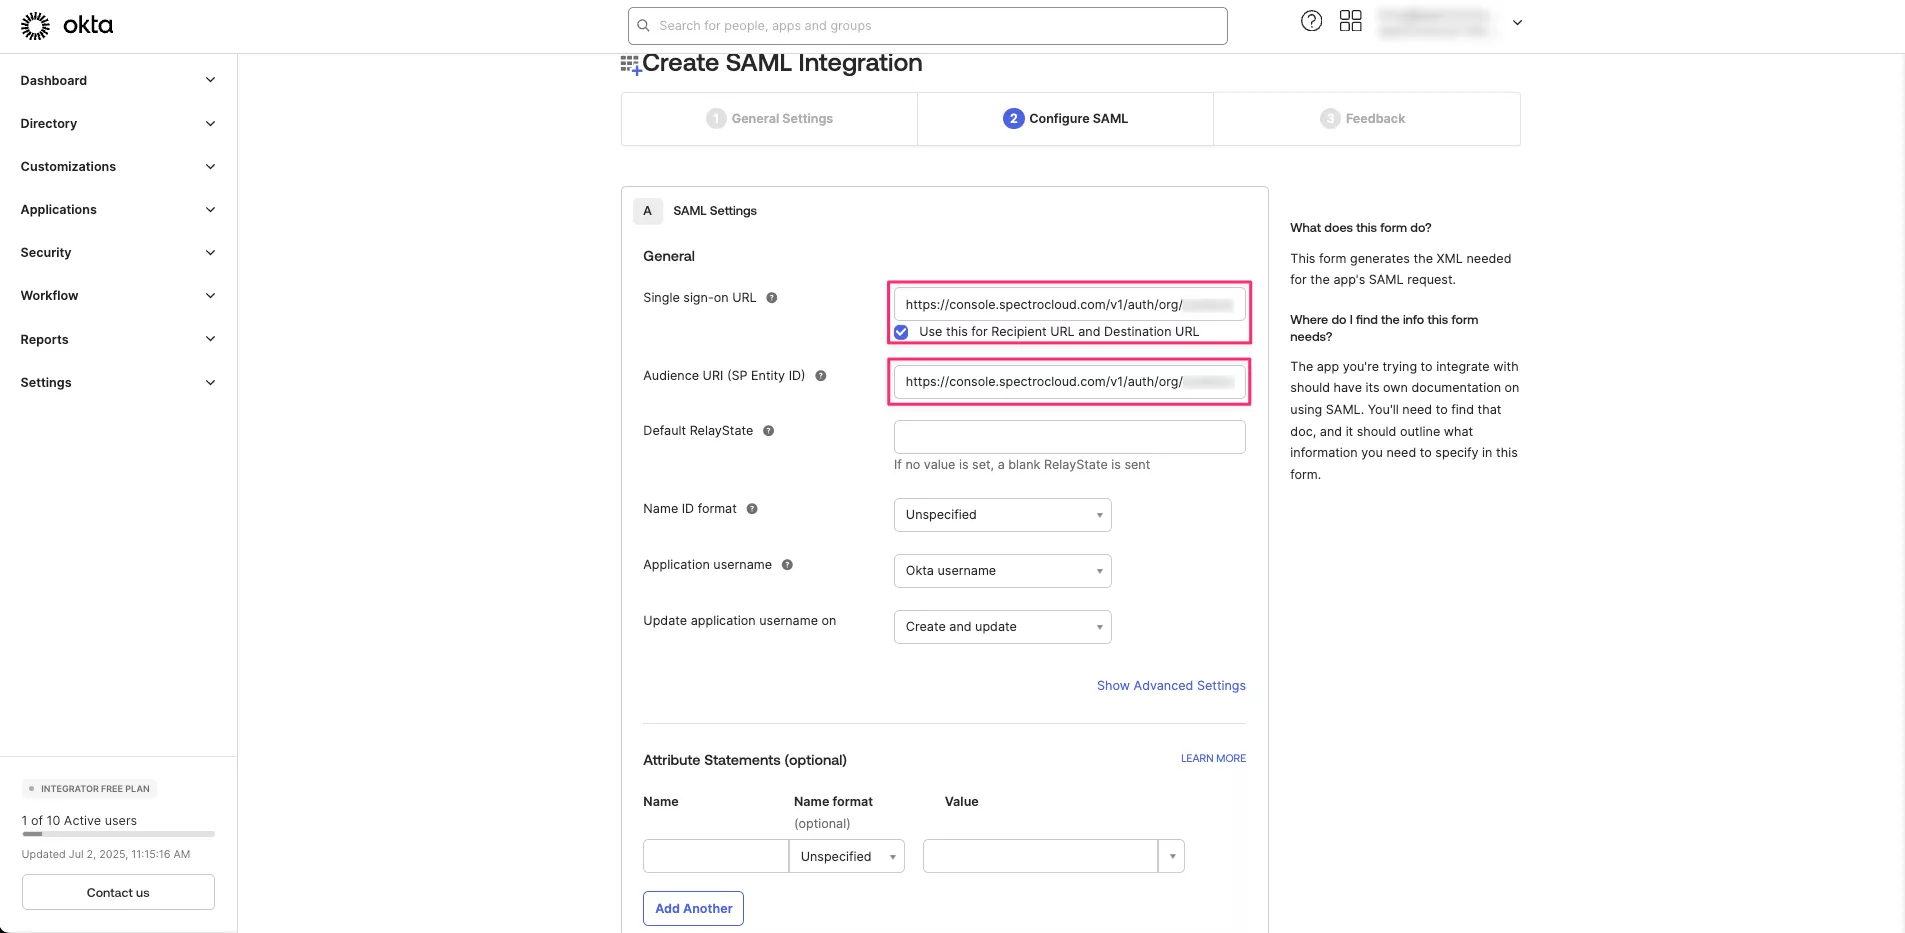
Return to your Okta Admin page. Paste the Login URL into the Single sign-on URL and Audience URI (SP Entity ID) fields.
-
Navigate to Attribute Statements (Optional) and enter the following values.
Name Name Format Value FirstNameUnspecifieduser.firstNameLastNameUnspecifieduser.lastNameEmailUnspecifieduser.email -
Under Group Attribute Statements (Optional), enter the below values.
Name Name Format Filter Value SpectroTeamUnspecifiedMatches RegexBlank 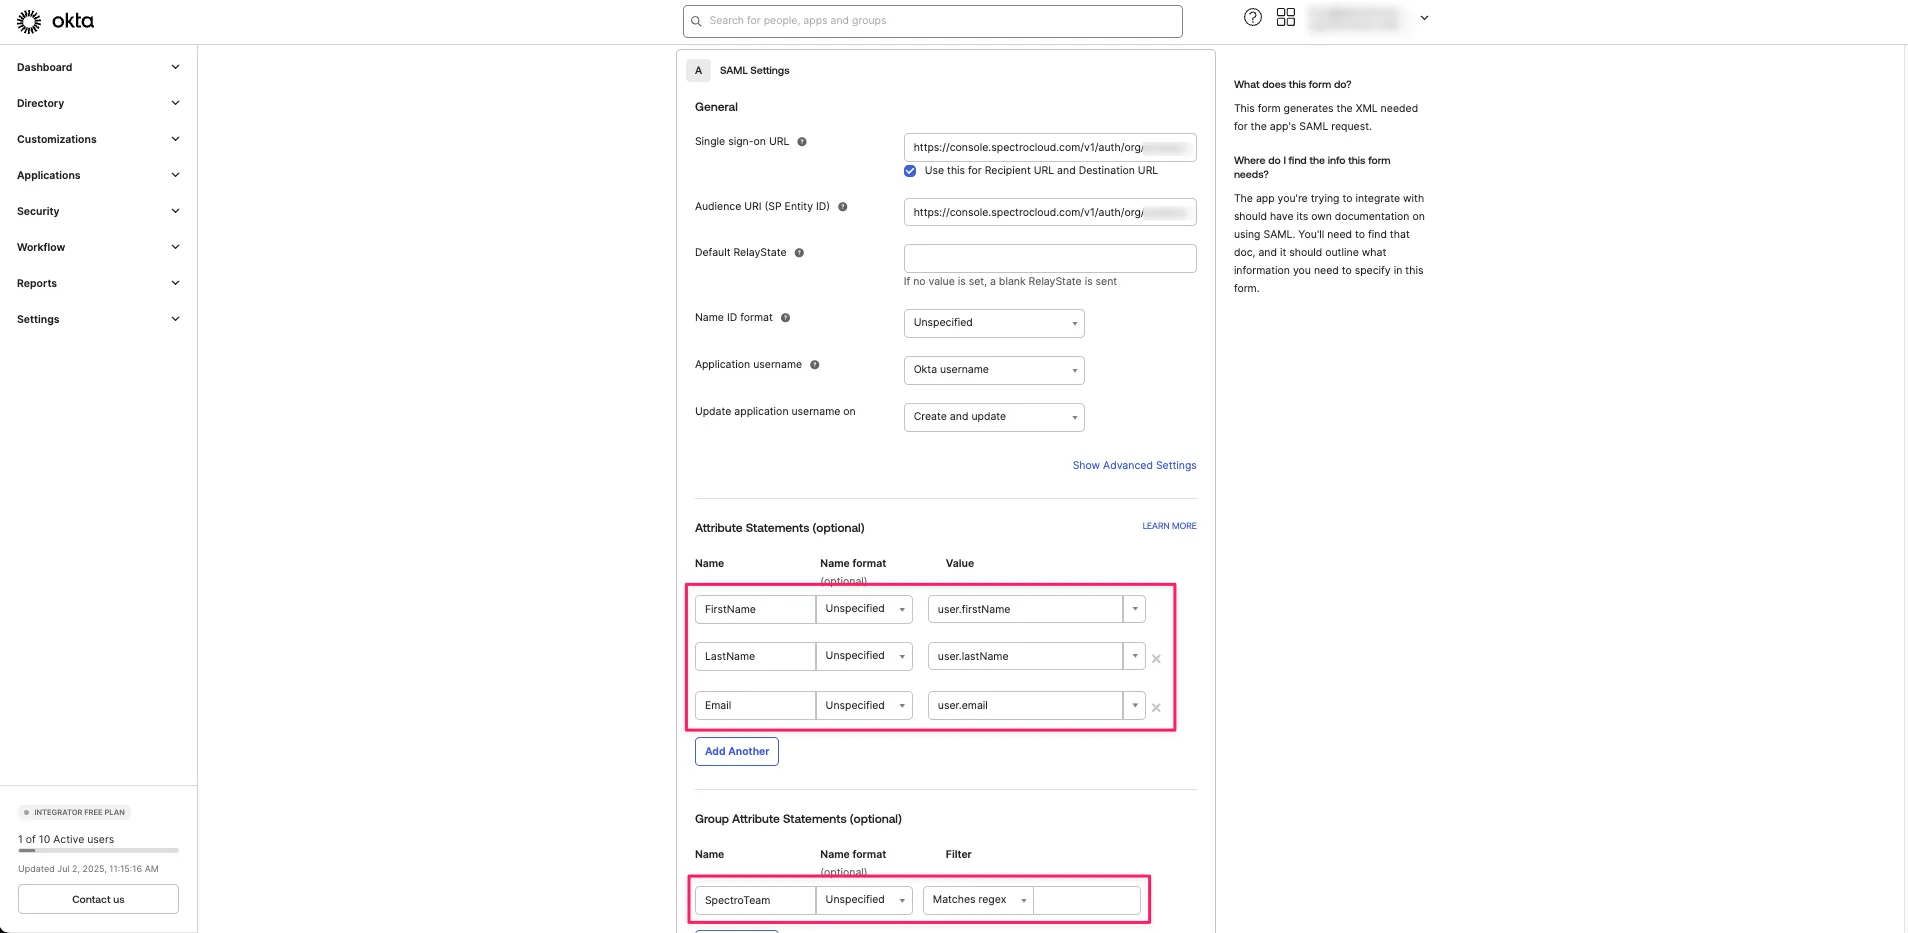
-
Select Next, then Finish.
-
On the Sign On tab of your Okta application, in the SAML 2.0 section, select Copy beneath Metadata URL.
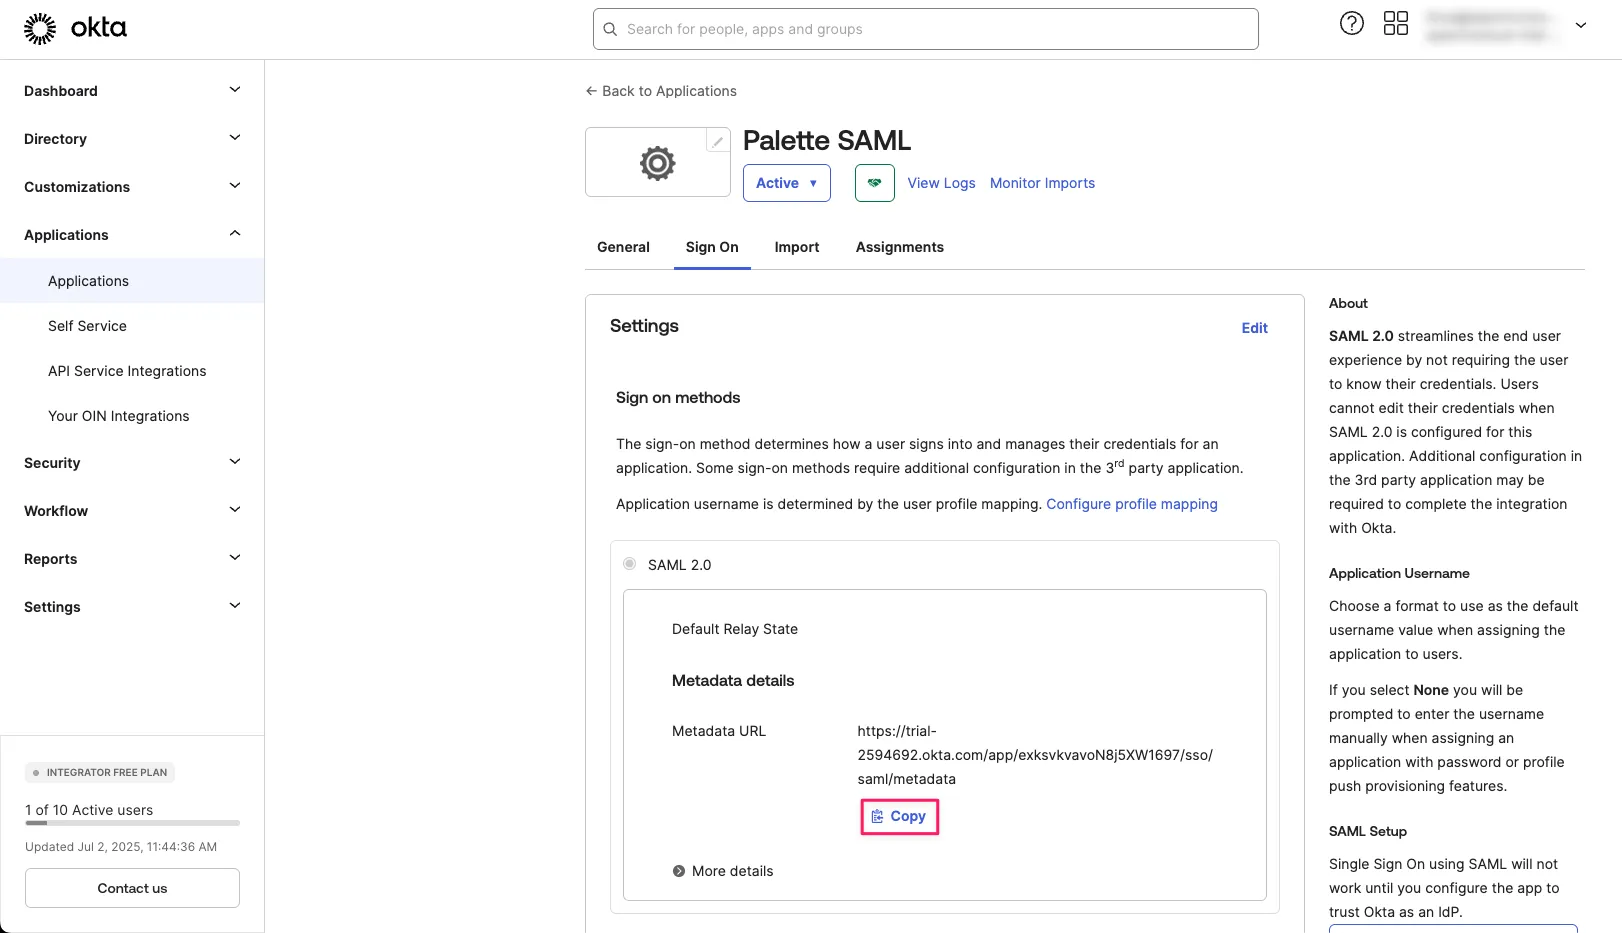
-
Open a new browser tab and paste the URL in the address bar. Copy the XML.
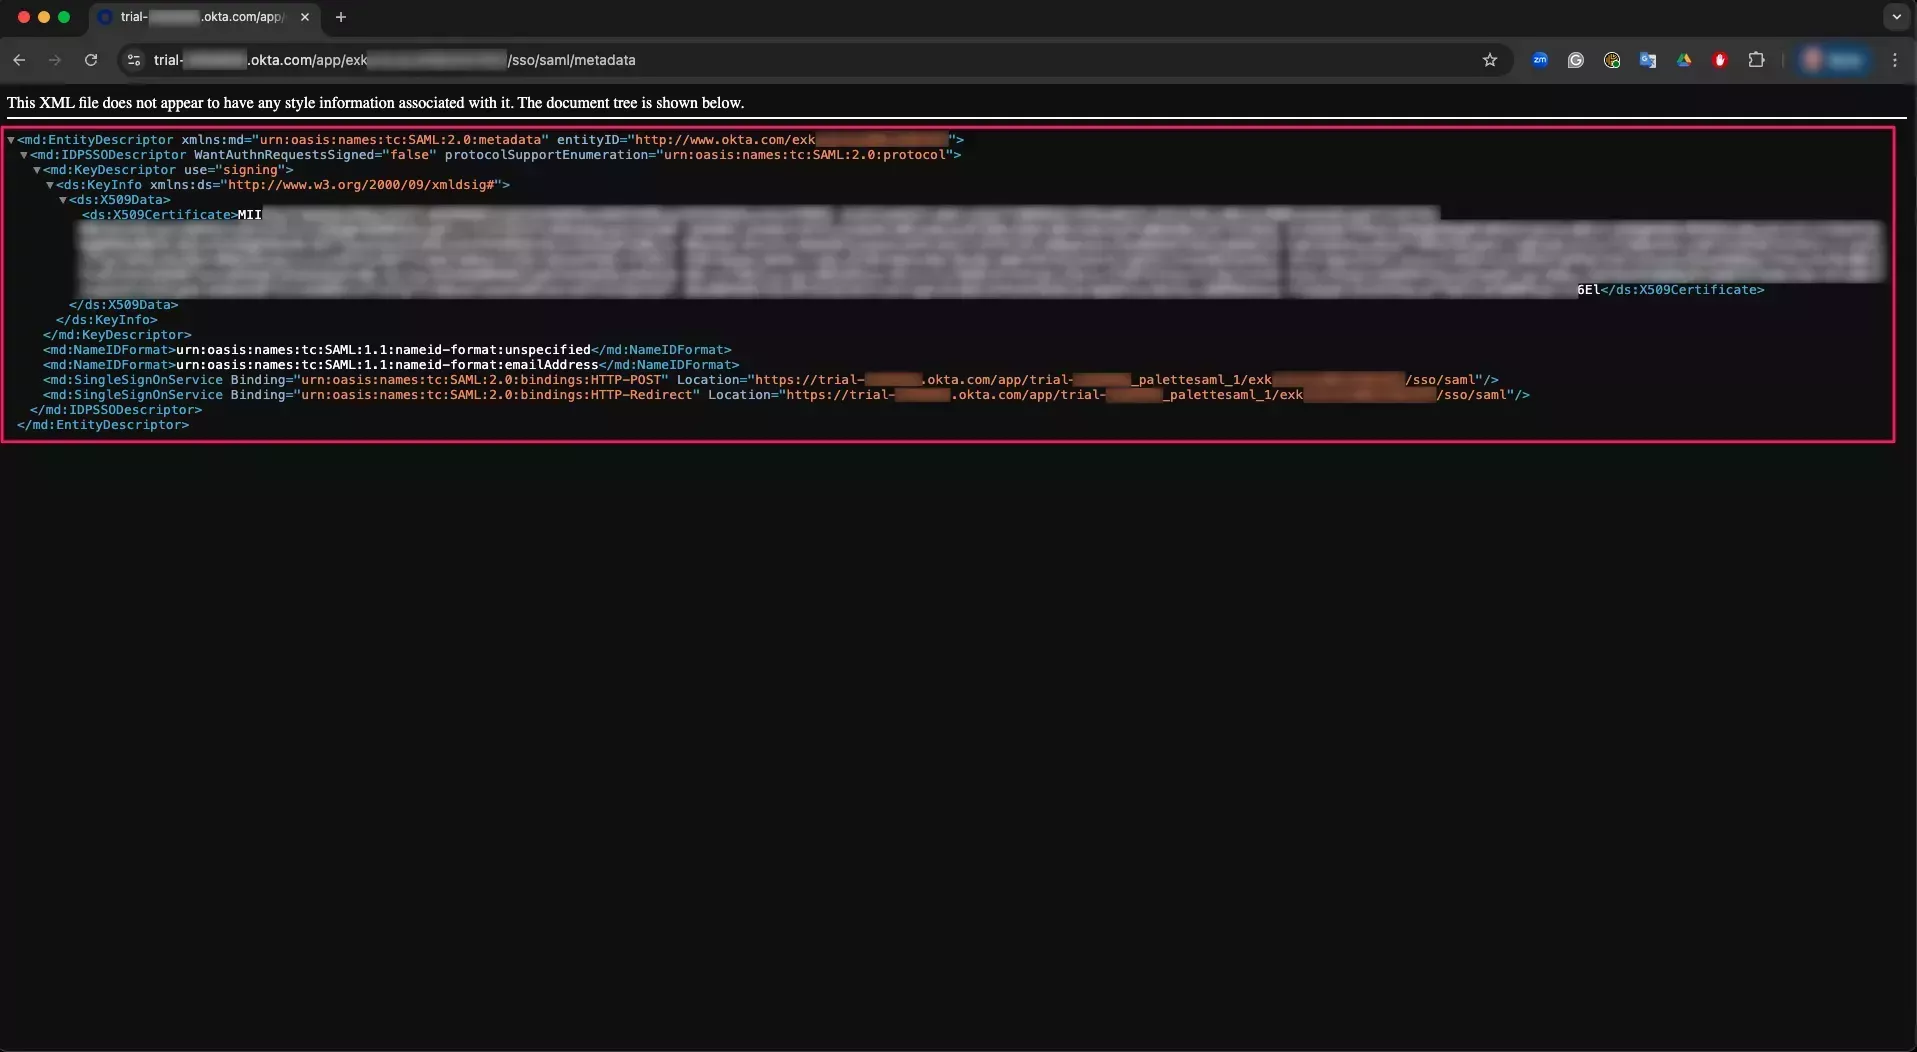
-
Return to Palette. On the Manage SSO page, paste the XML into the Identity Provider Metadata field.
-
In the Default Teams field, search for and select
Okta Team. This connects all Okta users with the team and the team permissions set earlier. -
Save your changes to activate SSO. You receive a message stating that SAML was configured successfully.
Validate
-
Log out of Palette by selecting Logout in the User Menu at the top right.
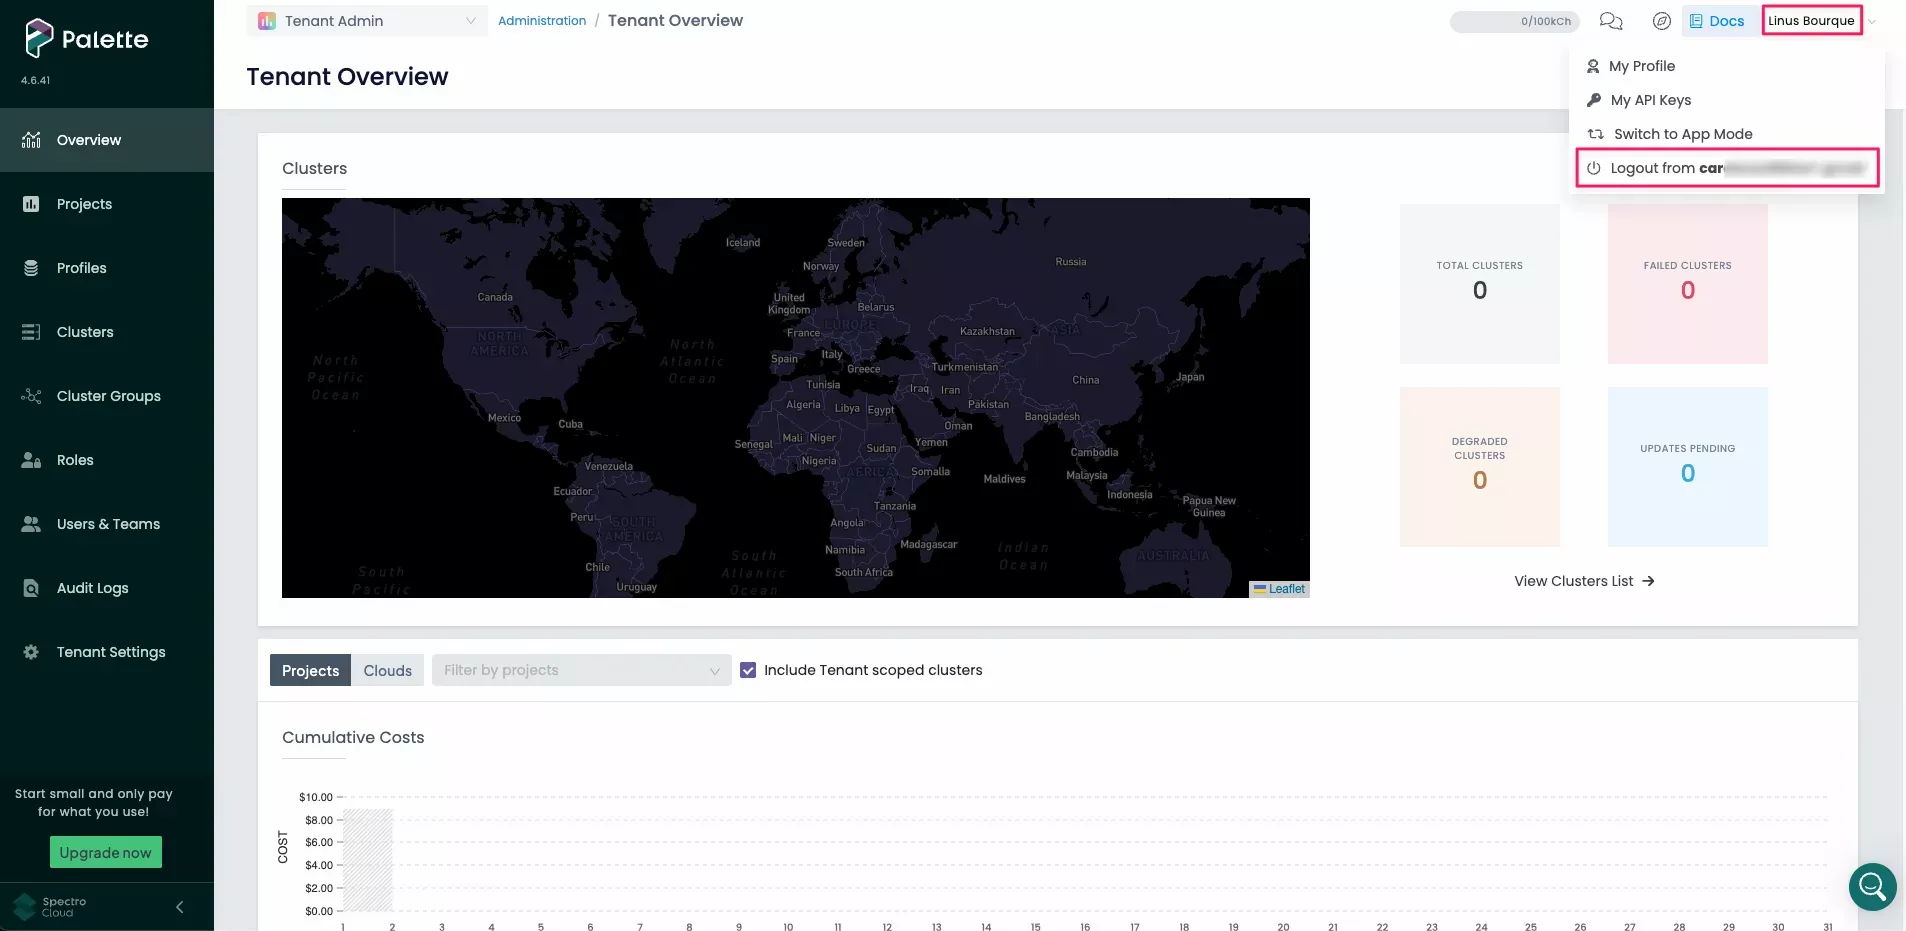
-
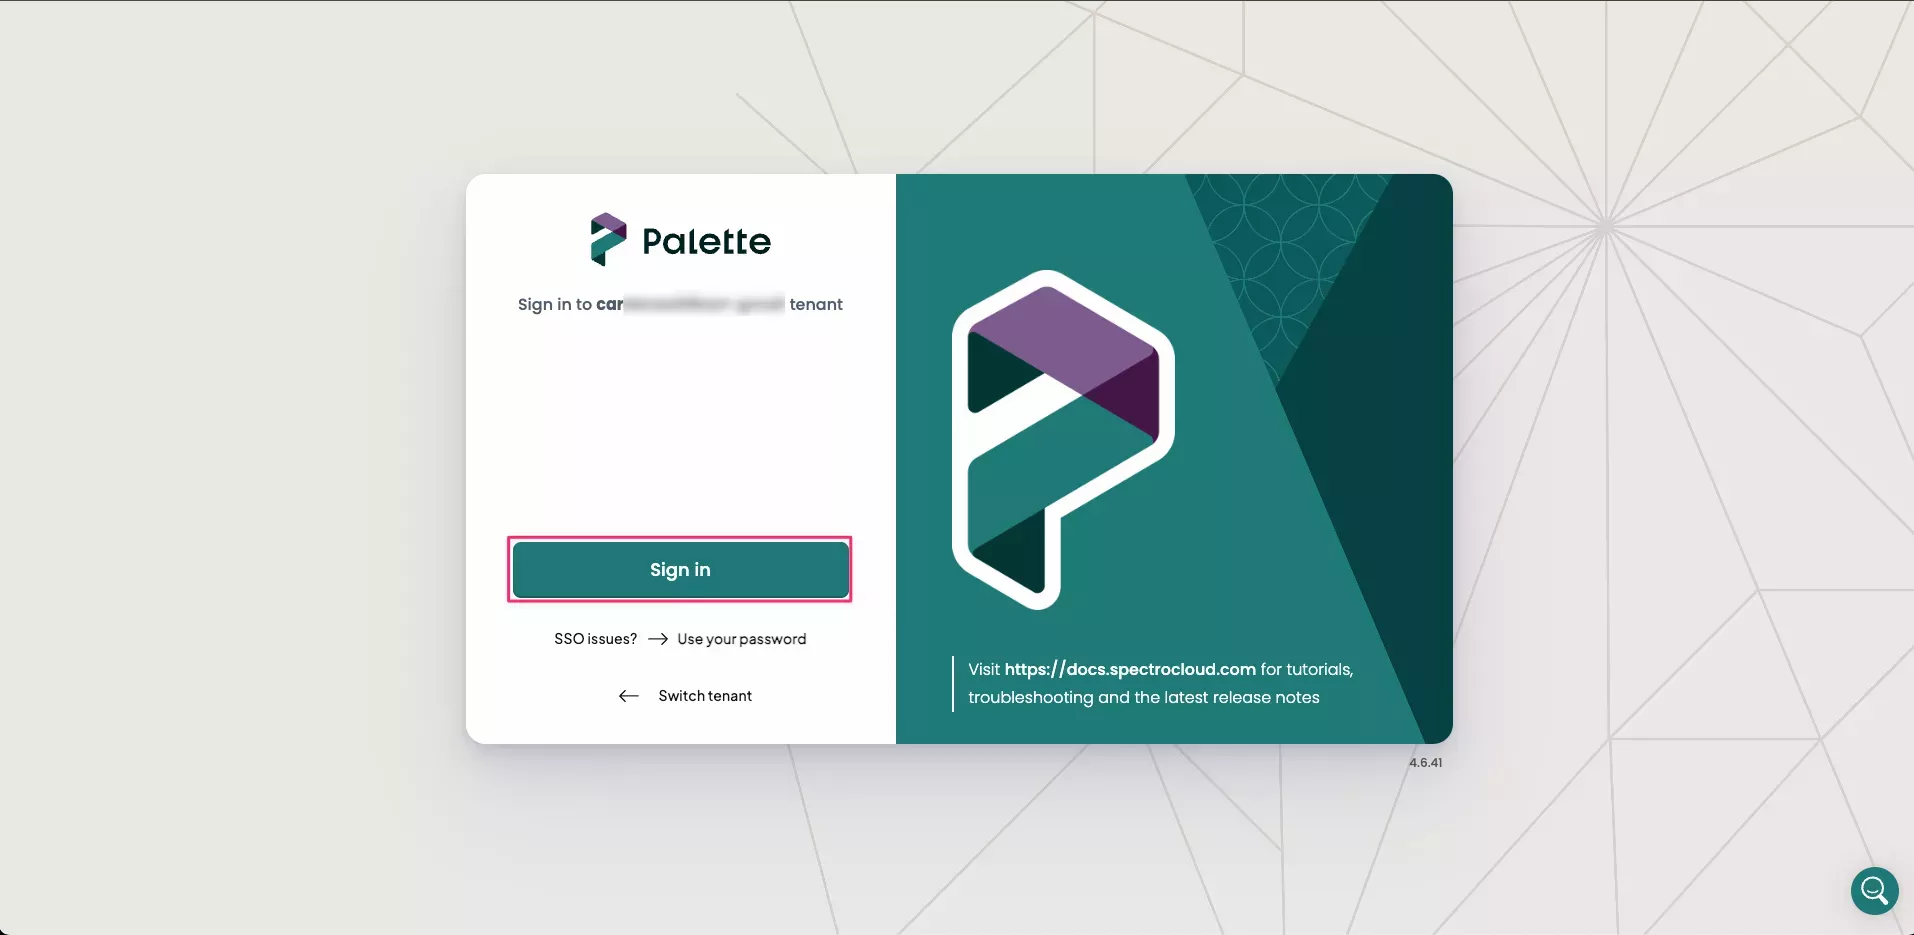
The Palette login screen now displays a Sign in button and no longer presents a username and password field. Click on the Sign in button to log in via SSO.
tipBelow the Sign in button, there is an SSO issues? Use your password link. Use this link if you need to bypass SSO and log in with your Palette account instead.
-
If this is the first time you are logging in with SSO, you will be redirected to the Okta login page. Depending on your organization's SSO settings, this could be a simple login form or require MFA (Multi-Factor Authentication).
-
Upon logging in, you are automatically added to the
Okta Teamin Palette. To verify, navigate to the left main menu, and select Users & Teams -
Select the Teams tab and choose
Okta Team. The list of Team Members is displayed on the left side of the Team Details.