Enable SSO with Okta OIDC
Single Sign-On (SSO) is an authentication method that enables users to log in to multiple applications and websites with one set of credentials. SSO uses certificates to establish and maintain a trust relationship between the Service Provider (SP) and an Identity Provider (IdP). Palette supports SSO based on either the Security Assertion Markup Language (SAML) or OpenID Connect (OIDC).
The following steps will guide you on how to enable Palette SSO with Okta Workforce Identity Cloud based on OIDC.
Prerequisites
-
For Okta SAML to work correctly with self-hosted Palette, ensure that HTTPS is enabled and TLS is configured. For additional information, refer to the appropriate Palette or VerteX System Address Management guide.
-
A free or paid subscription with Okta. Okta provides free developer subscriptions for testing purposes.
-
If you want to use the same Okta application for logging in to Palette and for accessing your Kubernetes cluster itself using OIDC-based SSO, you need to install kubelogin on your local workstation to handle the retrieval of access tokens for your cluster.
-
Palette requires the following claims to be present in the OIDC token:
Claim Name Default Value Description Email emailThe user's email address. First Name given_nameThe user's first name. Last Name family_nameThe user's last name. Spectro Team groupsThe user's group memberships in the Identity Provider. Change the claim names in your IdP if they are different from the default values. If the OIDC token does not contain these claims, toggle the Use userinfo endpoint option in the OIDC configuration to allow Palette to fetch the missing claims from the user information endpoint.
Okta with OIDC
Create the Okta Application
-
Log in to your Okta Admin console and navigate to Applications > Applications. Select Create App Integration.
infoYour Okta login URL follows the format
https://<your-okta-account-id>-admin.okta.com/admin/getting-started. Replace<your-okta-account-id>with your Okta account ID. -
Select OIDC - OpenID Connect for the sign-in method and Web Application for the application type, then click Next.
-
On the New Web App Integration page, change the name from
My Web ApptoSpectro Cloud Palette OIDC. Leave the Grant type set to its default value of Authorization Code.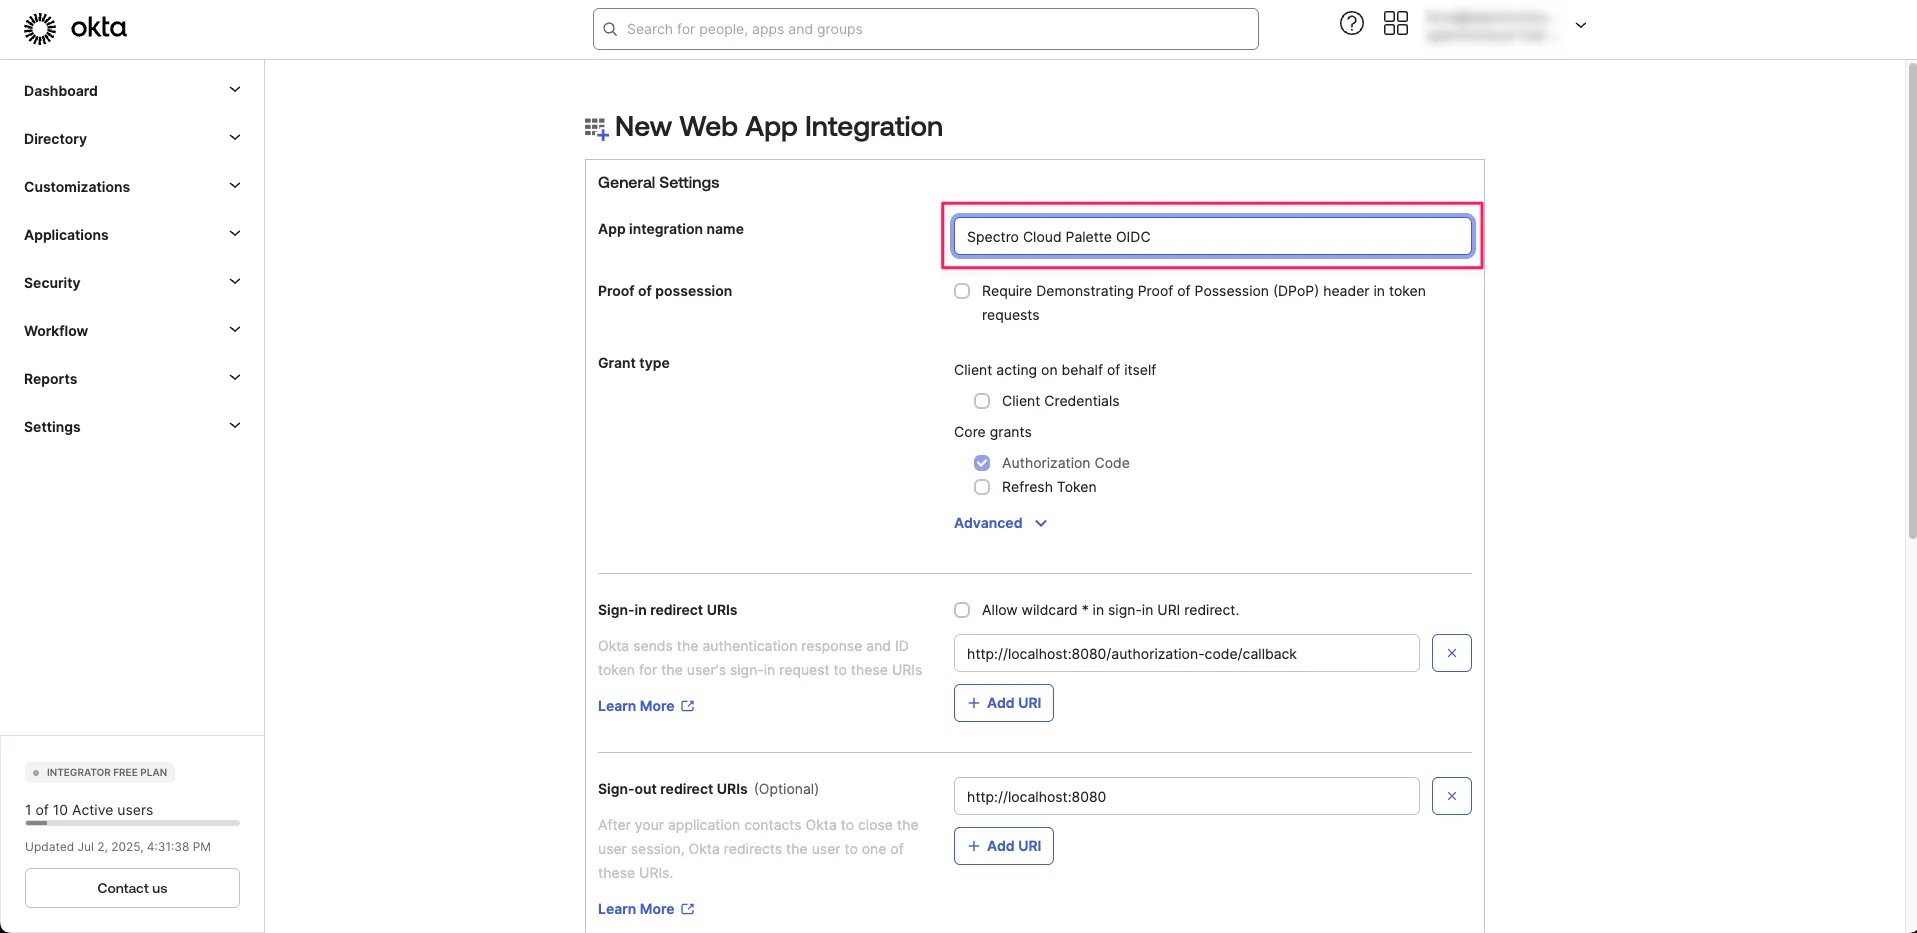
-
Open a new browser tab and log in to Palette as a tenant admin.
-
From the left main menu, select Tenant Settings.
-
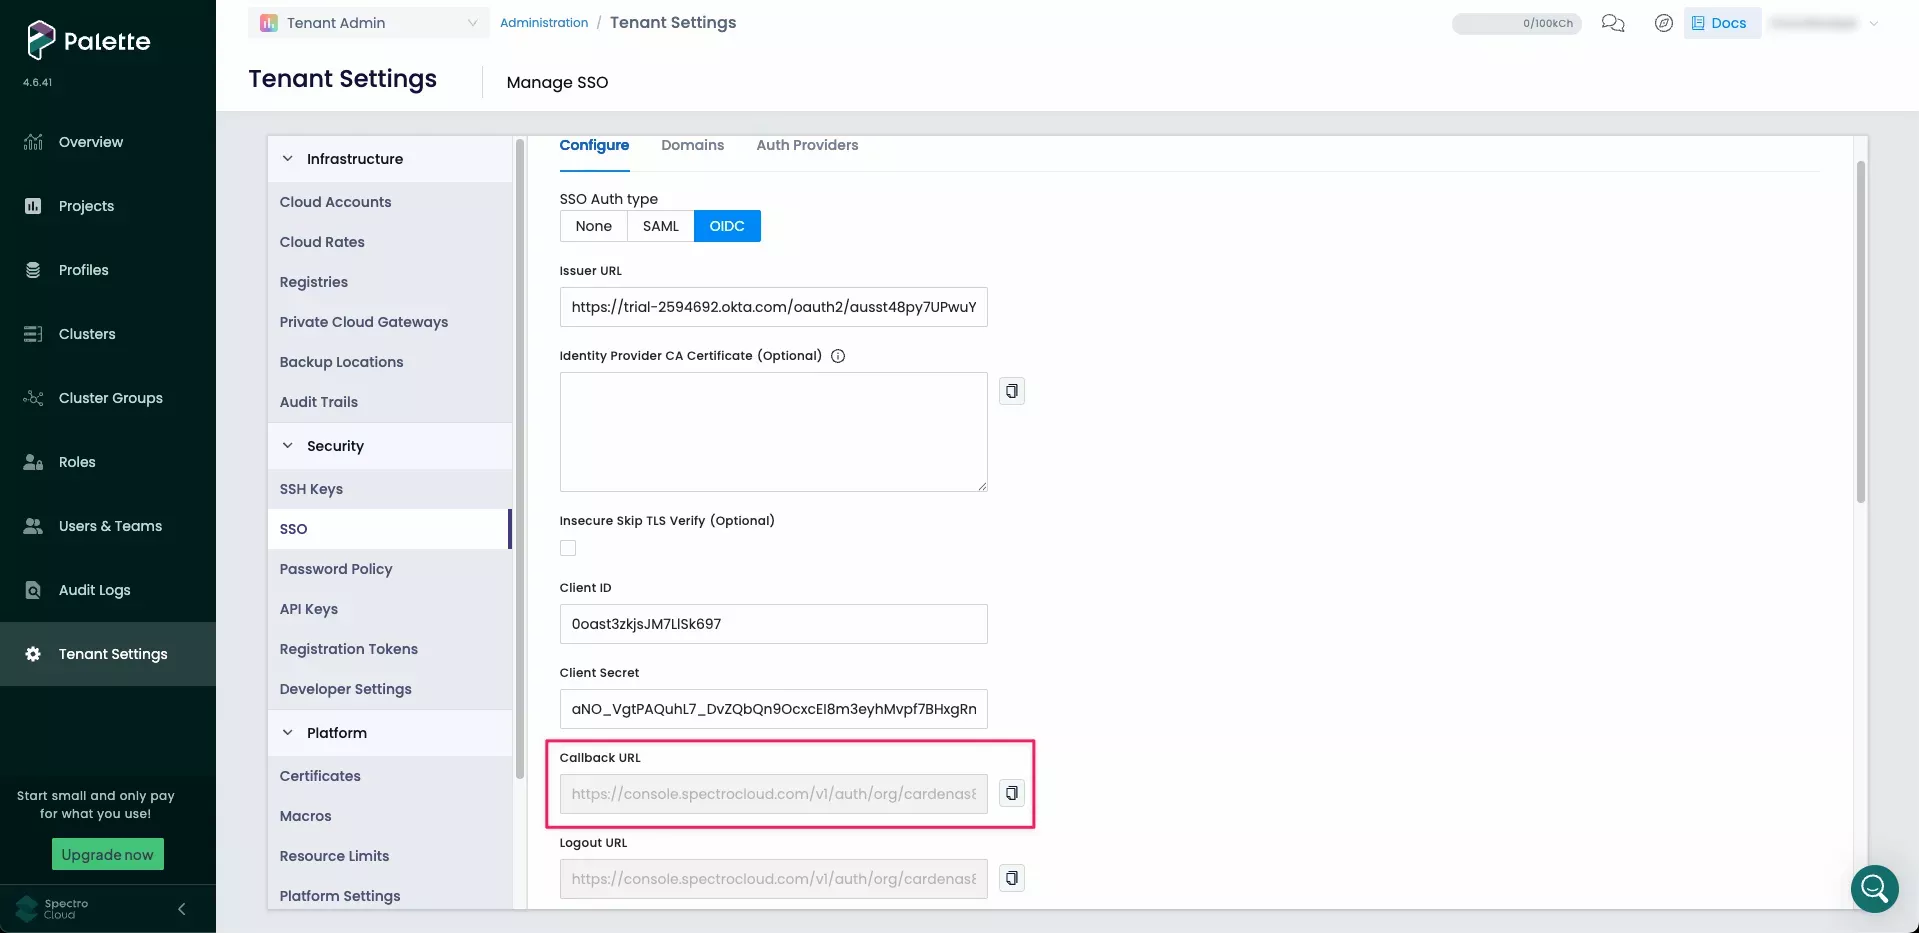
On the Tenant Settings Menu, select SSO, and choose an SSO Auth type of OIDC.
-
Scroll to the Callback URL field and select the clipboard icon to copy the URL.
-
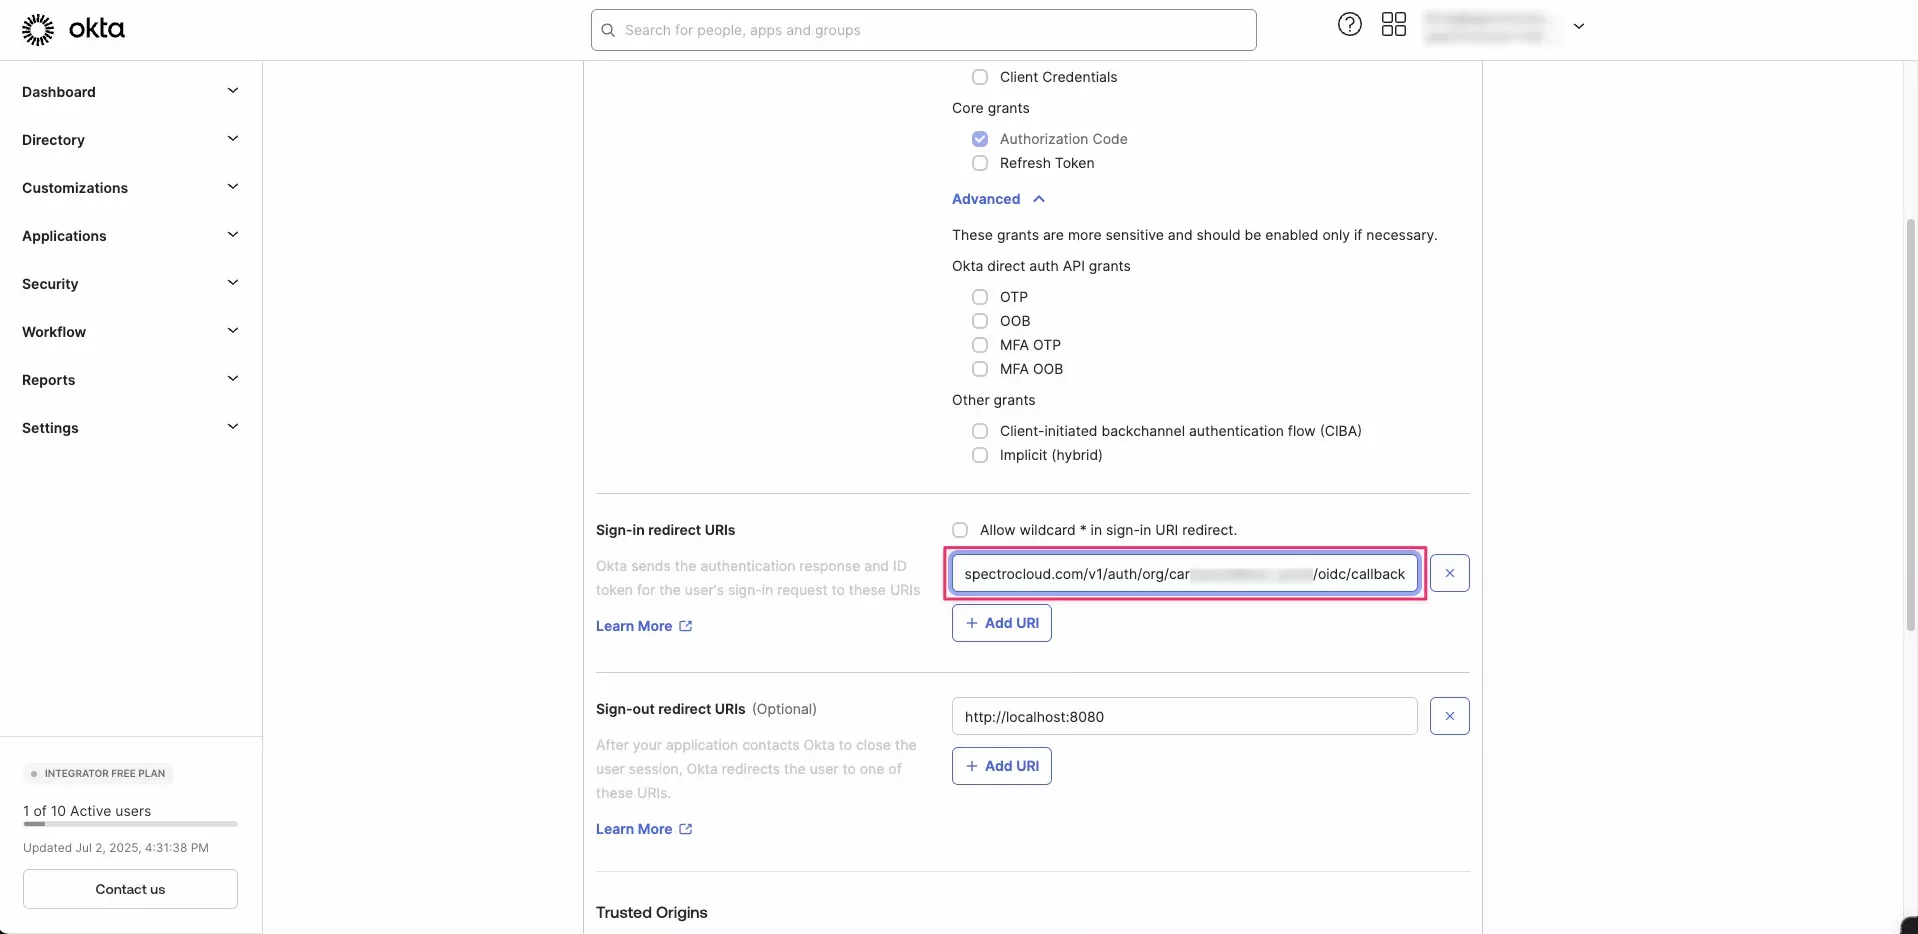
Return to your Okta Admin console and paste the copied value into the Sign-in redirect URIs field, replacing the existing value.
-
Return to Palette. On the Manage SSO page, select the Logout URL clipboard icon to copy the URL.
-
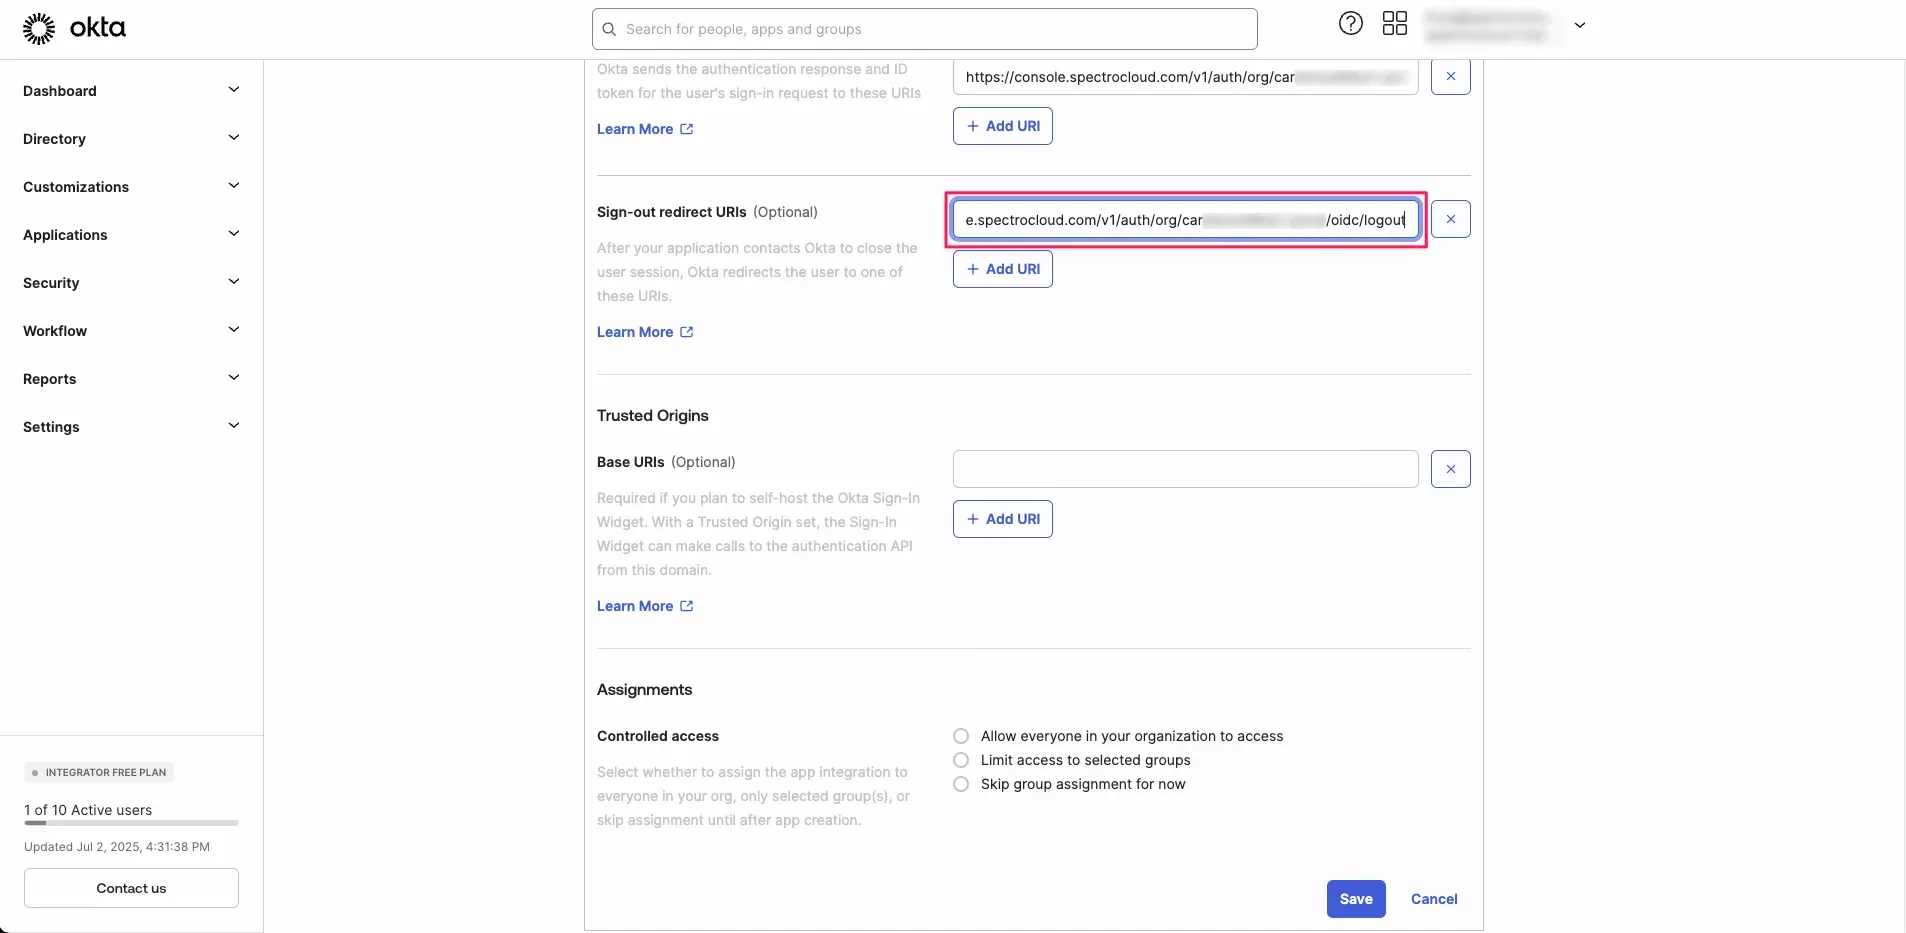
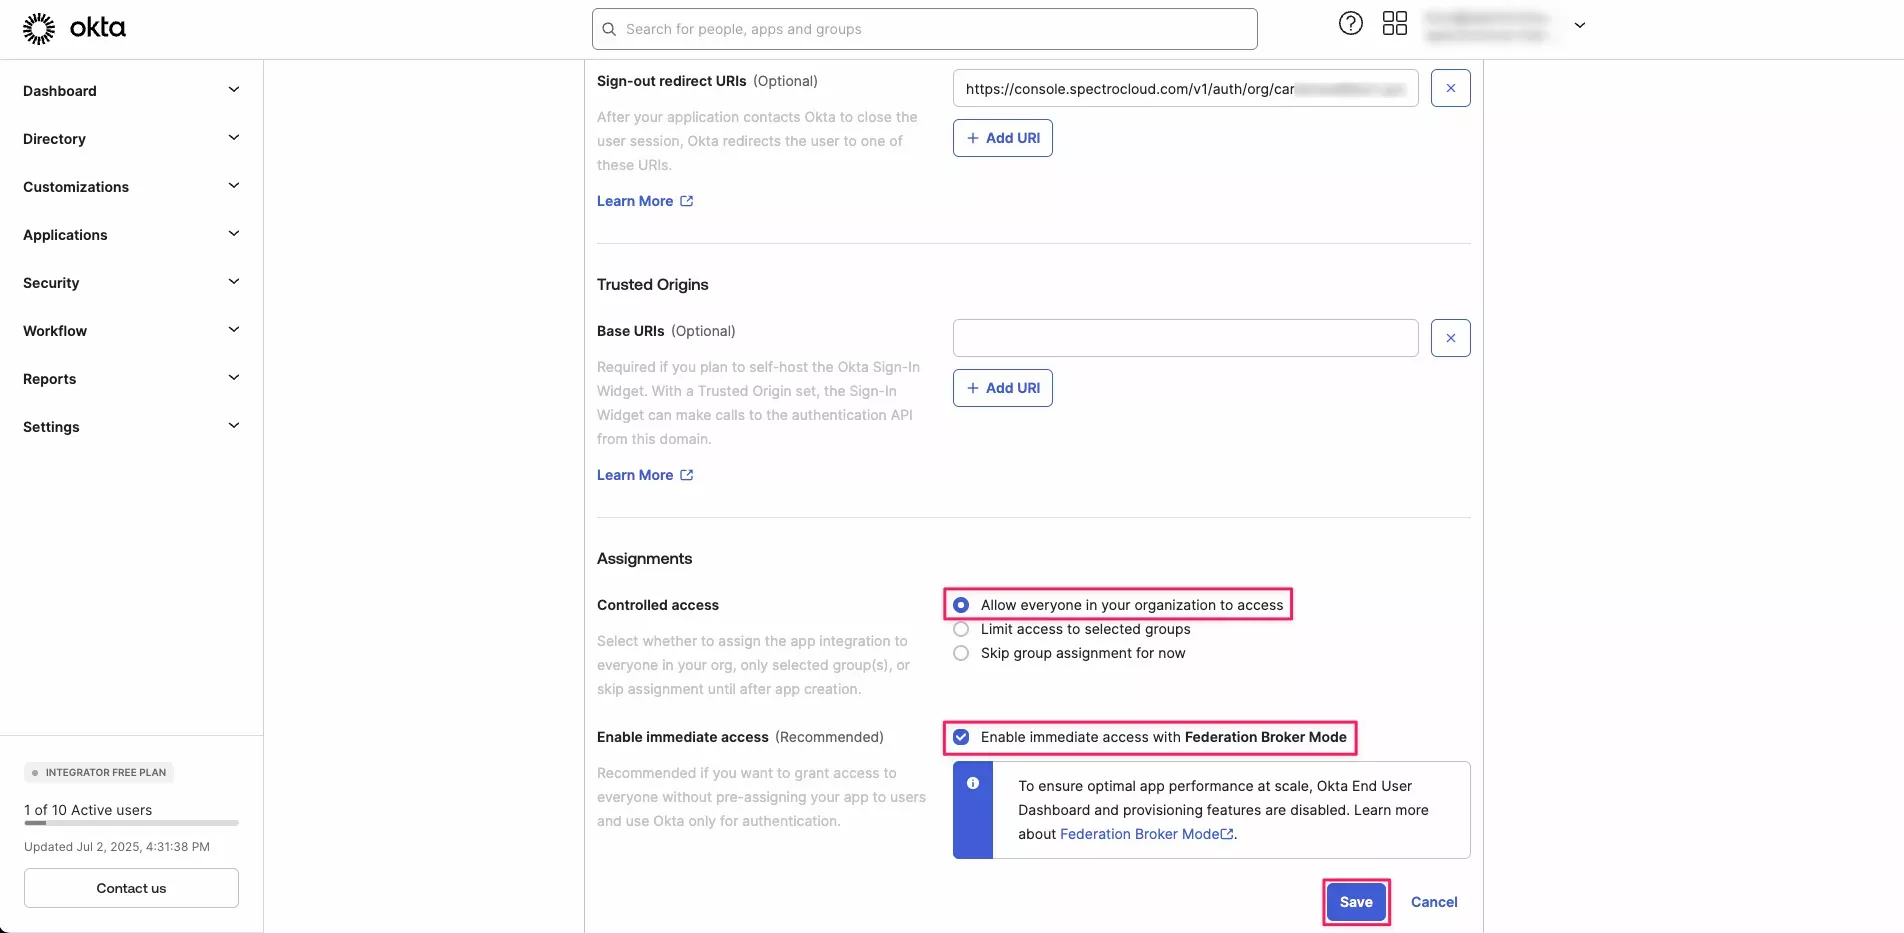
Return to your Okta Admin console and paste the copied value into the Sign-out redirect URIs field.
The sign-in and sign-out redirect URIs are required for SSO to work with Palette, but you can also add additional redirect URIs. The URIs in the table below are useful when you want to use Okta for OIDC authentication into your Kubernetes clusters.
| URL | Type of Access |
|---|---|
http://localhost:8000 | Using kubectl with the kube-login plugin from a workstation. |
https://<fqdn_of_k8s_dashboard>/oauth/callback | Using OIDC authentication into Kubernetes Dashboard. |
-
Scroll down to the Assignments section and select Allow everyone in your organization to access. Leave the Enable immediate access with Federation Broker Mode option enabled and click Save.
-
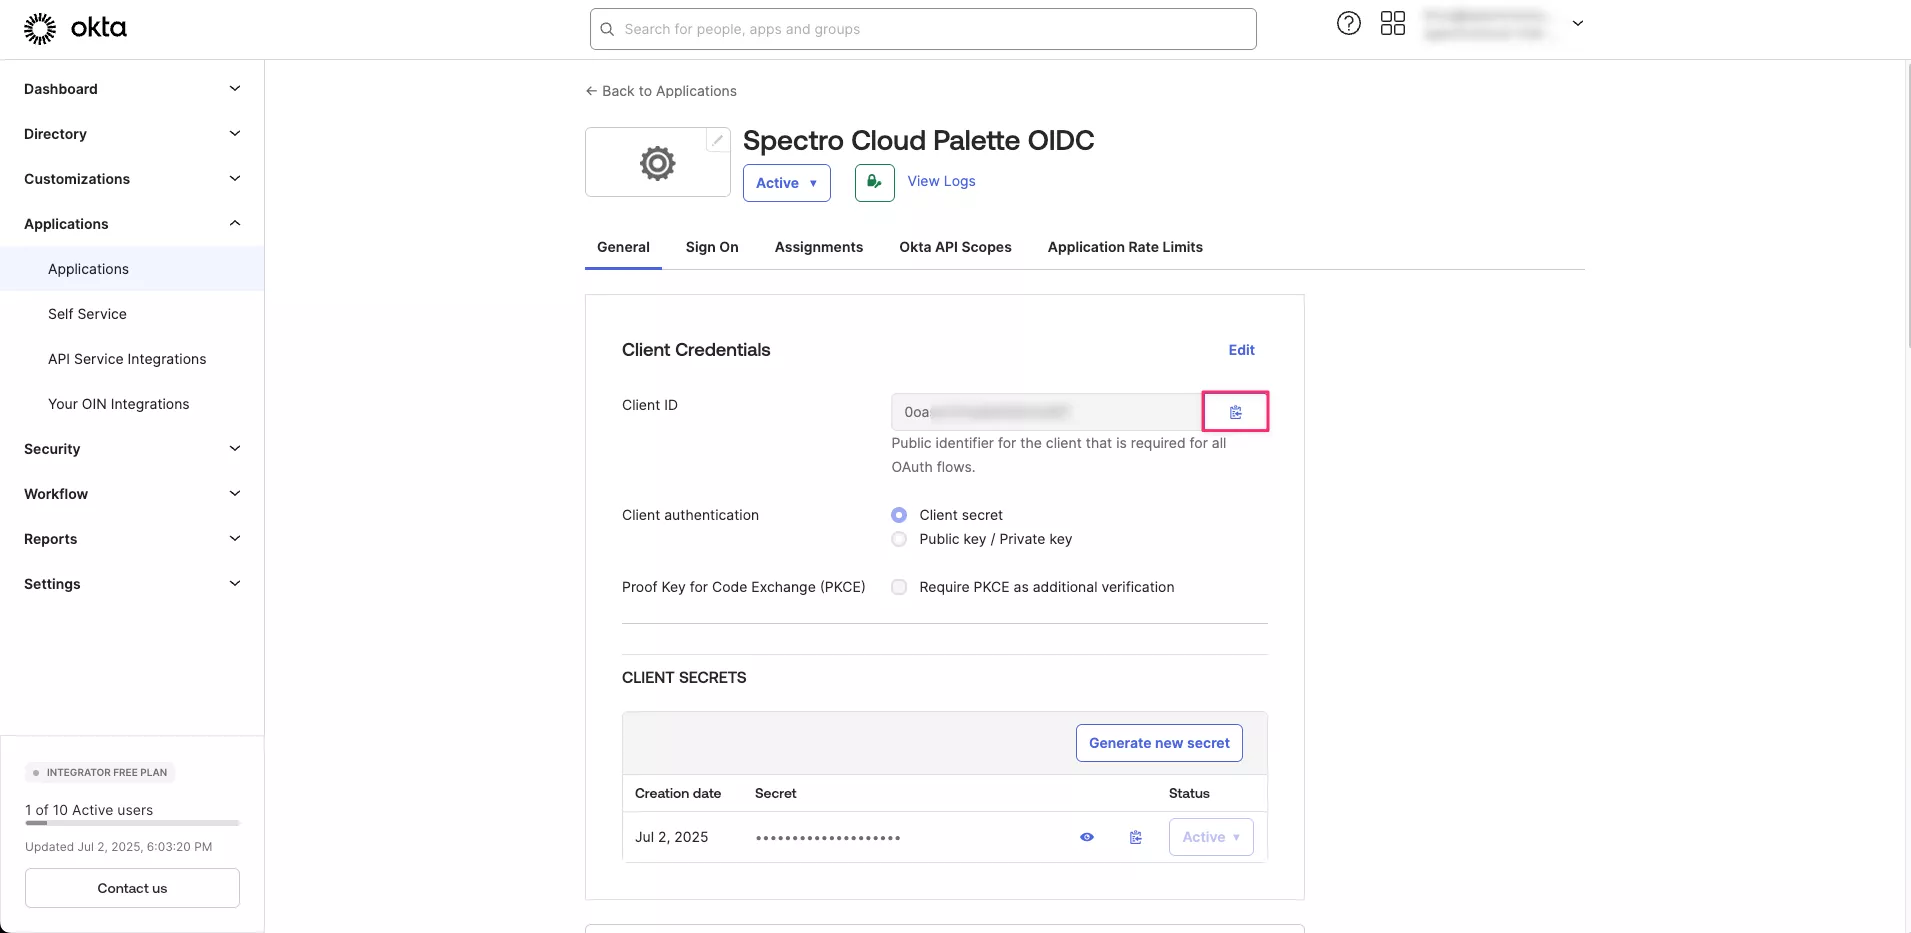
From the General tab of your Okta application, select the Copy to clipboard icon beside Client ID to copy the ID to your clipboard. Save this value, as you will need it later.
-
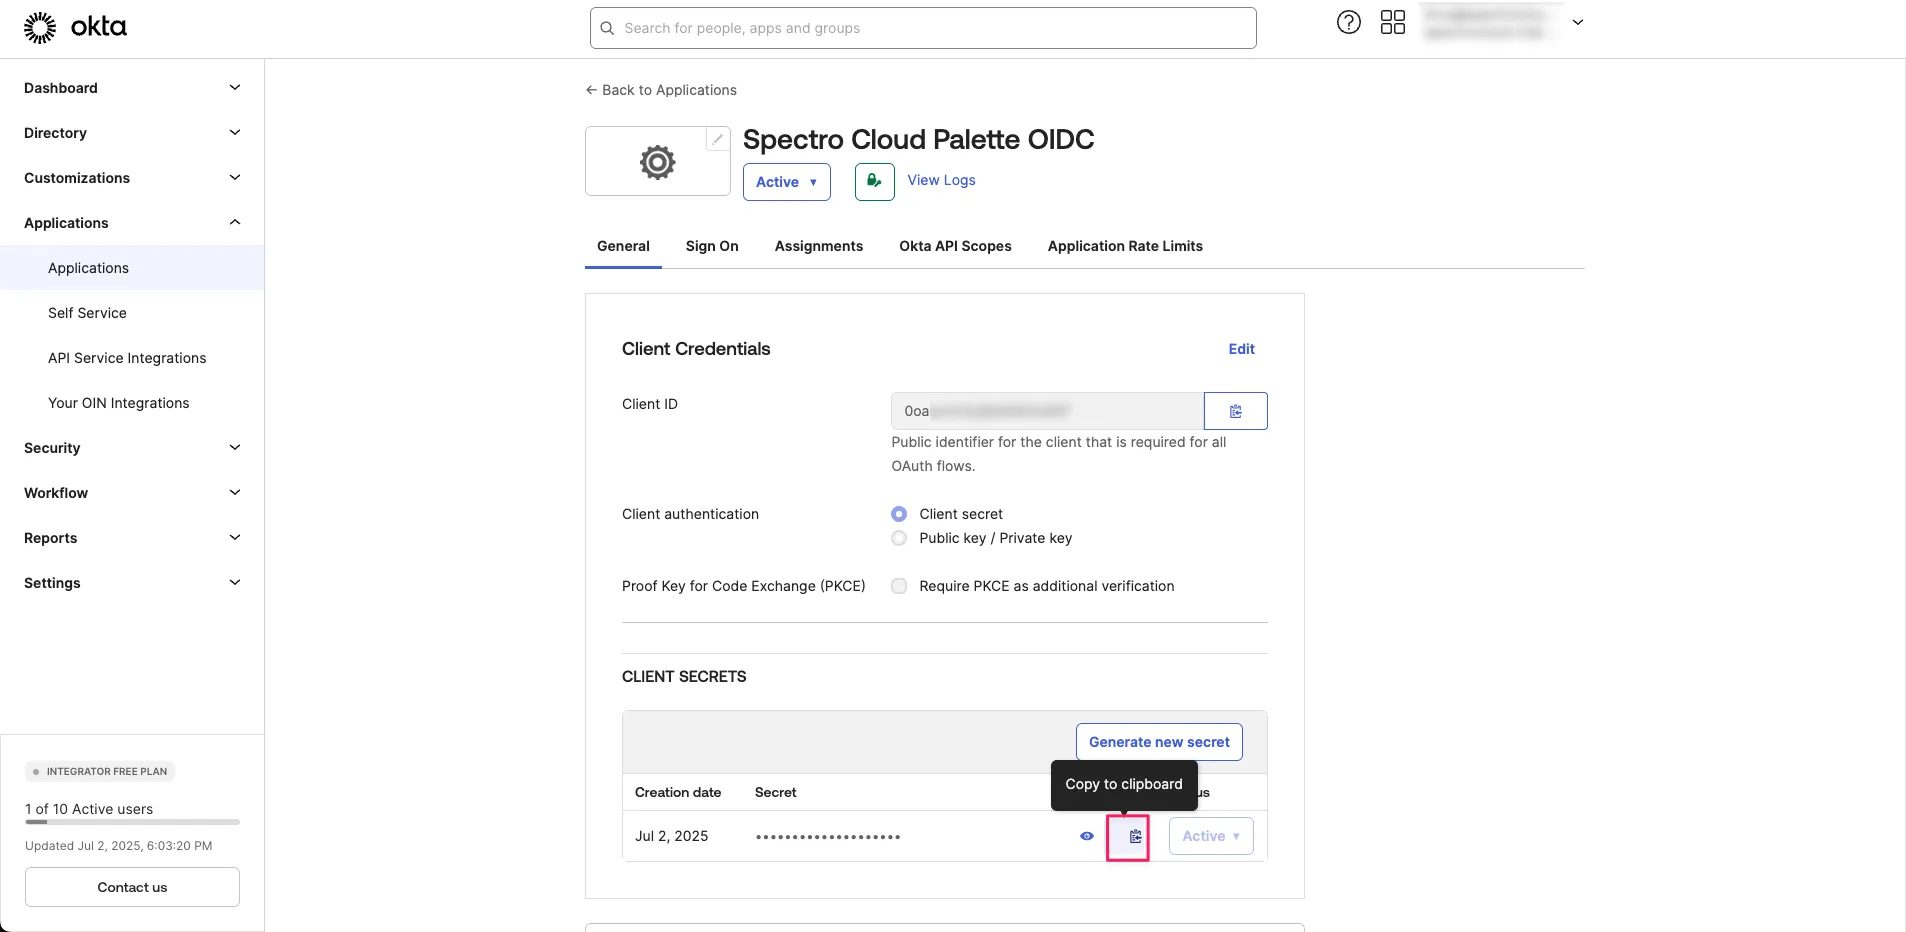
Select the Copy to clipboard icon beside Client Secret to copy the secret to your clipboard. Save this value, as you will need it later.
Create an Okta Authorization Server
To ensure Okta issues OIDC tokens with the correct claims, you must create a custom Authorization Server. A custom Authorization Server is required to customize the authorization tokens issued by Okta so that they contain the necessary OIDC claims required by Palette and Kubernetes.
-
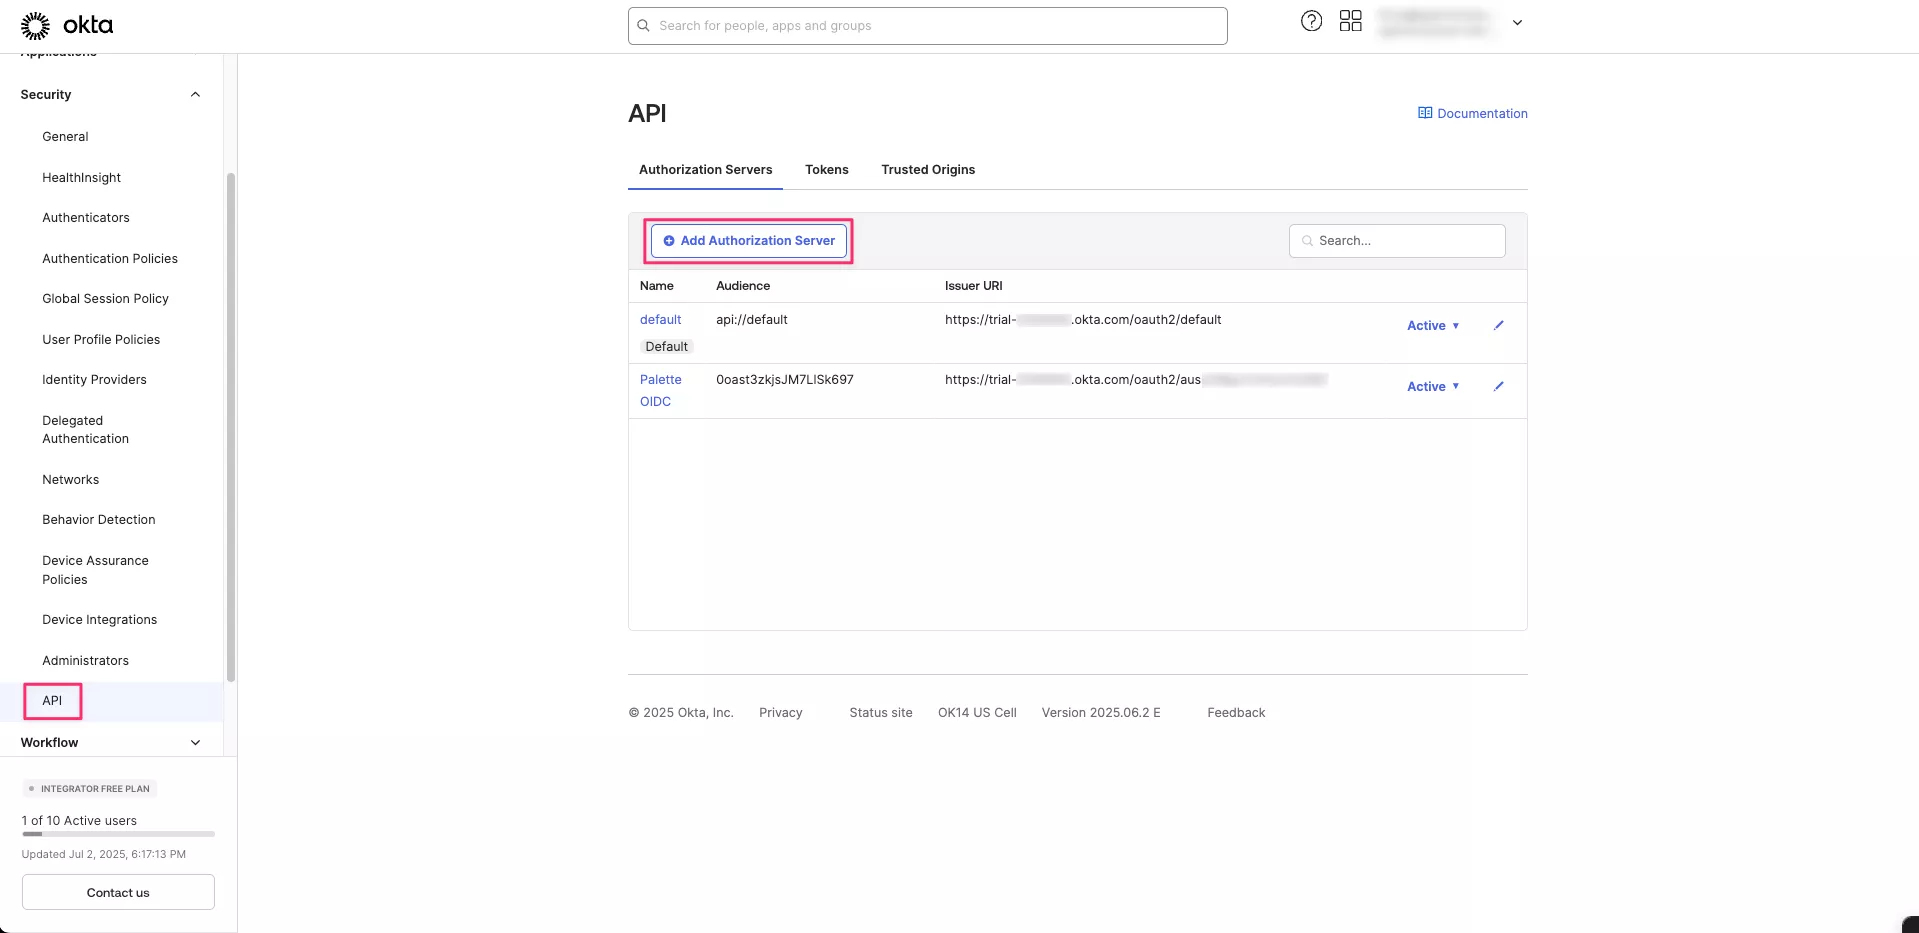
From the left main menu of your Okta admin console, select Security > API.
-
On the Authorization Servers tab, select Add Authorization Server.
-
Enter a name for the server, for example,
Palette OIDC. For the Audience field, paste the Client ID that you saved in step 12 of Create the Okta Application. Optionally, provide a description, and Save your changes.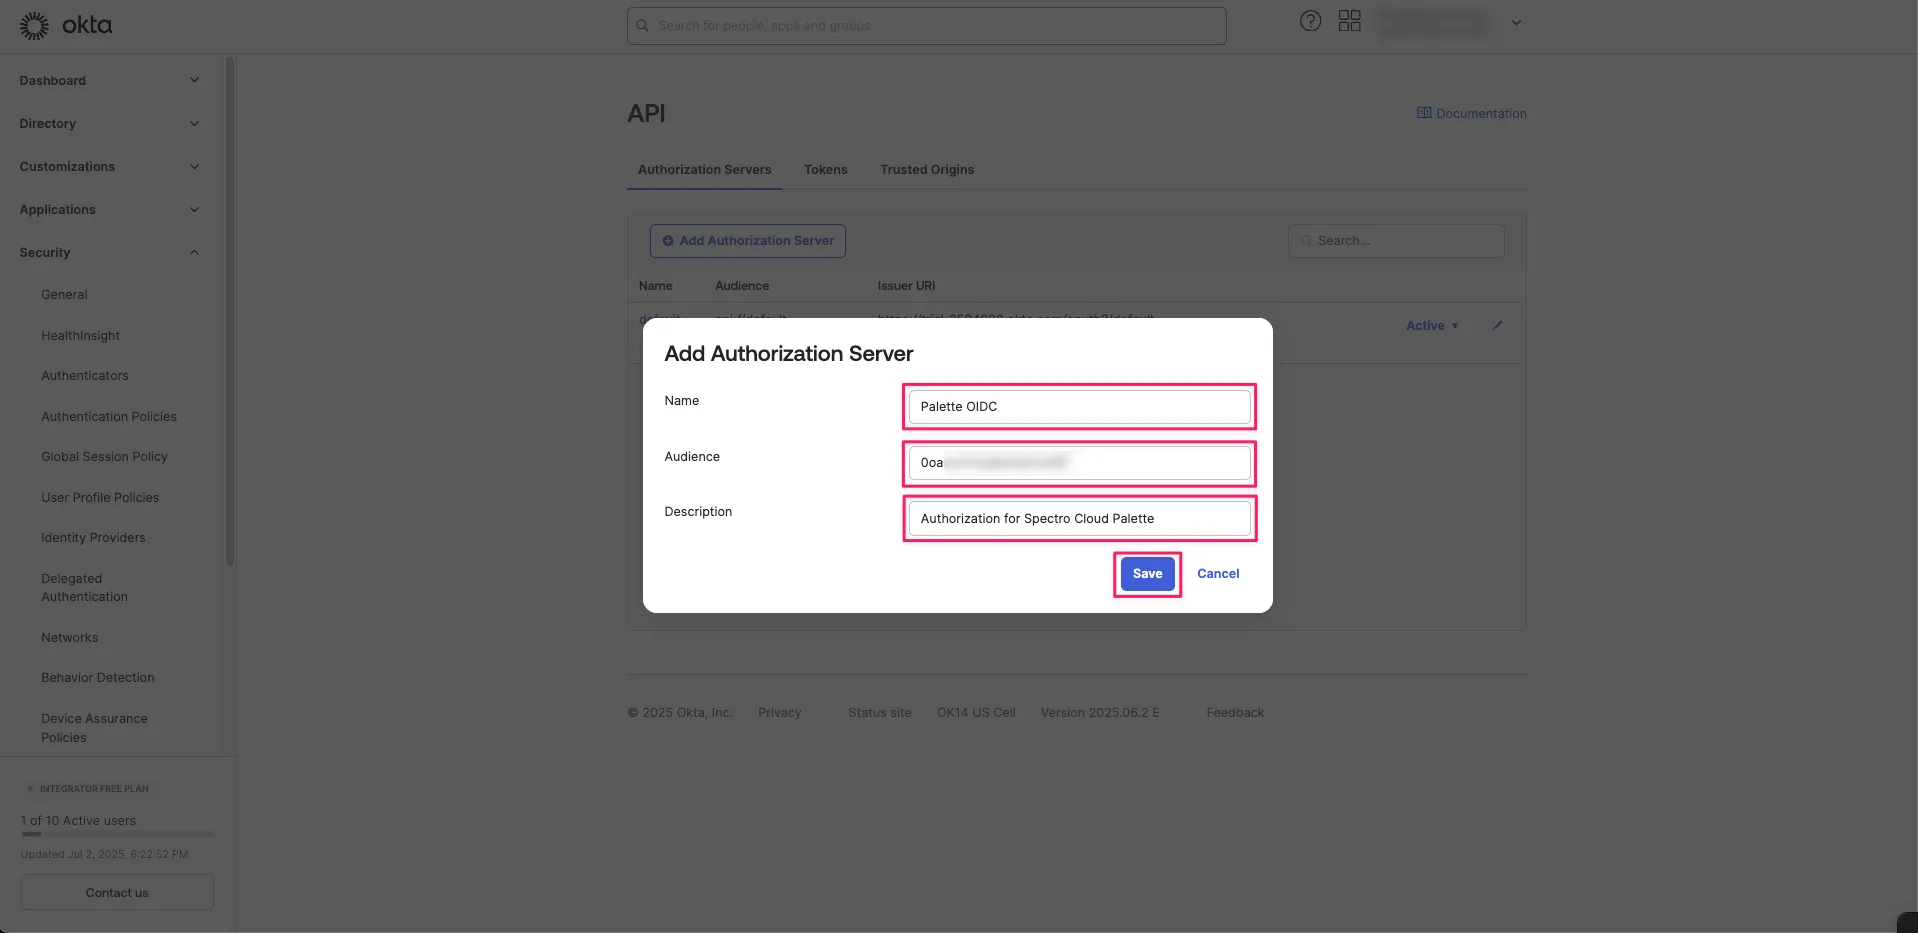
-
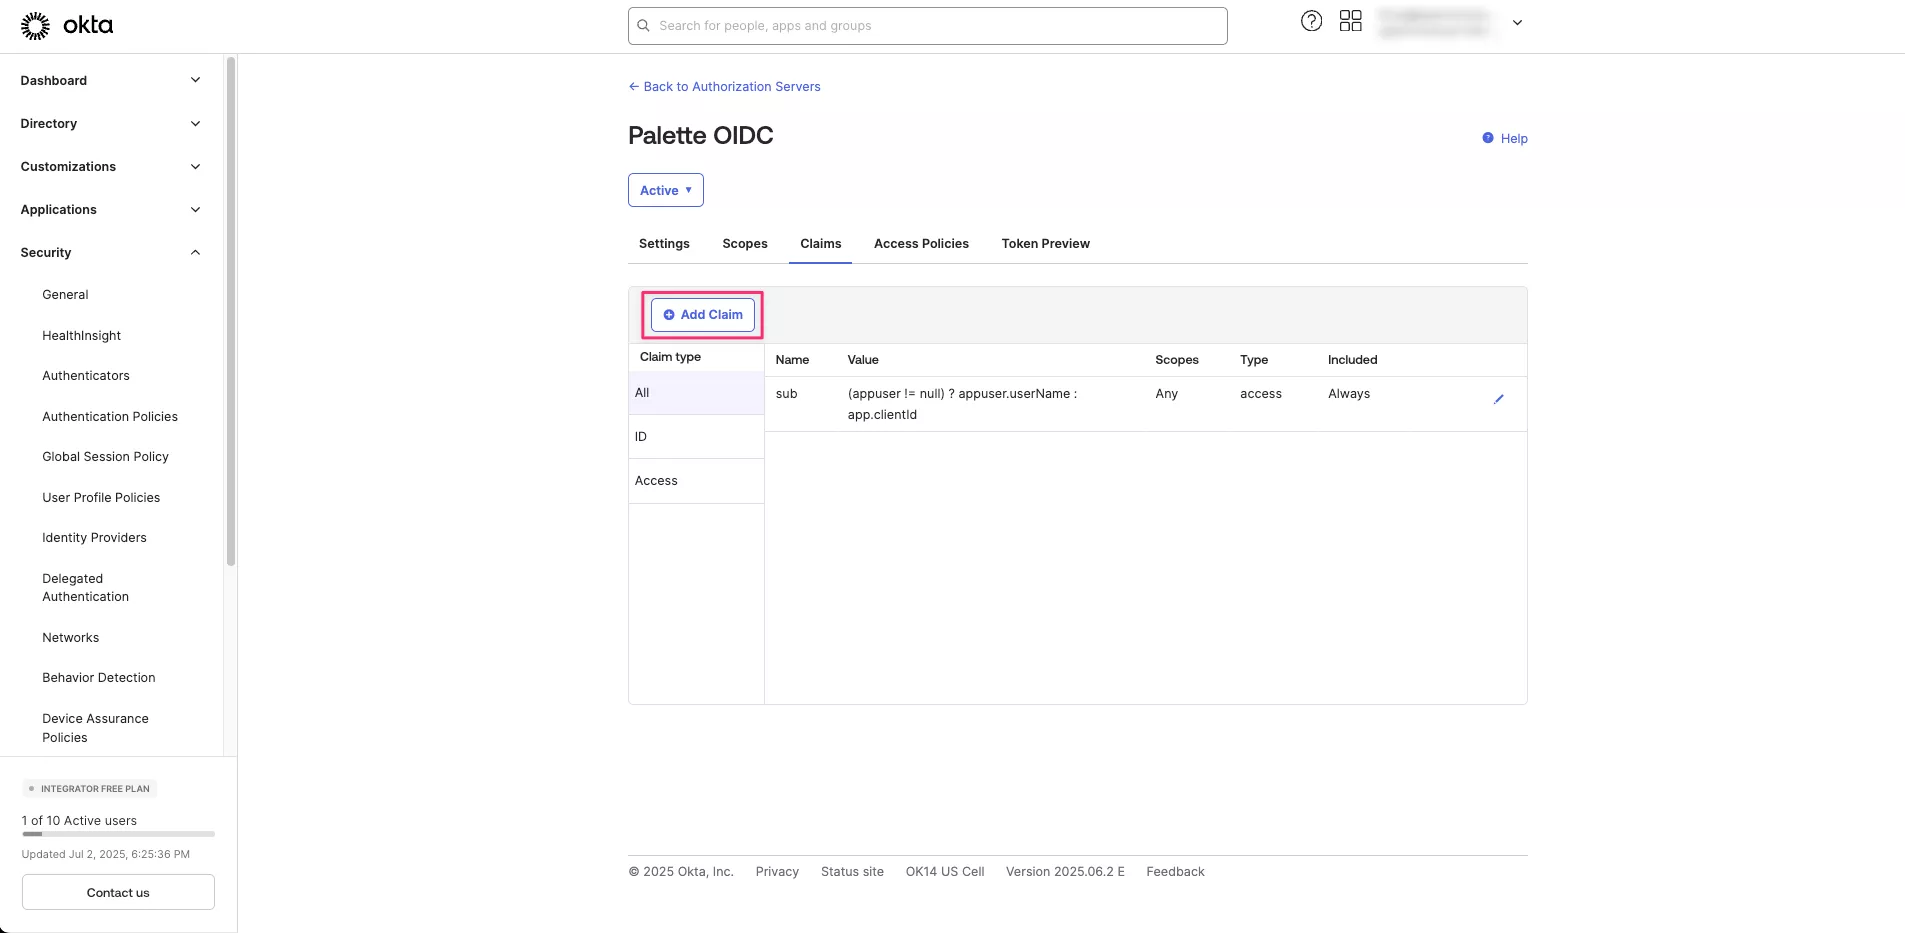
Navigate to the Claims tab and select Add Claim.
-
Create two user information claims using the information in the following table, with each row being one claim. Select Create to save each claim.
Claim Name Include in token type Value Type Value Disable claim Include In u_first_nameID Token (Always) Expression user.firstNameUnchecked Any scope u_last_nameID Token (Always) Expression user.lastNameUnchecked Any scope -
Next, create a claim for group membership. The example below includes the names of any groups that the Okta user is a member of that start with
palette-in thegroupsclaim of the ticket. For Palette SSO, Palette makes the user a member of a Palette team that has an identical name.Claim Name Include in token type Value Type Filter Disable claim Include In groupsID Token (Always) Groups Starts with: palette-Unchecked Any scope 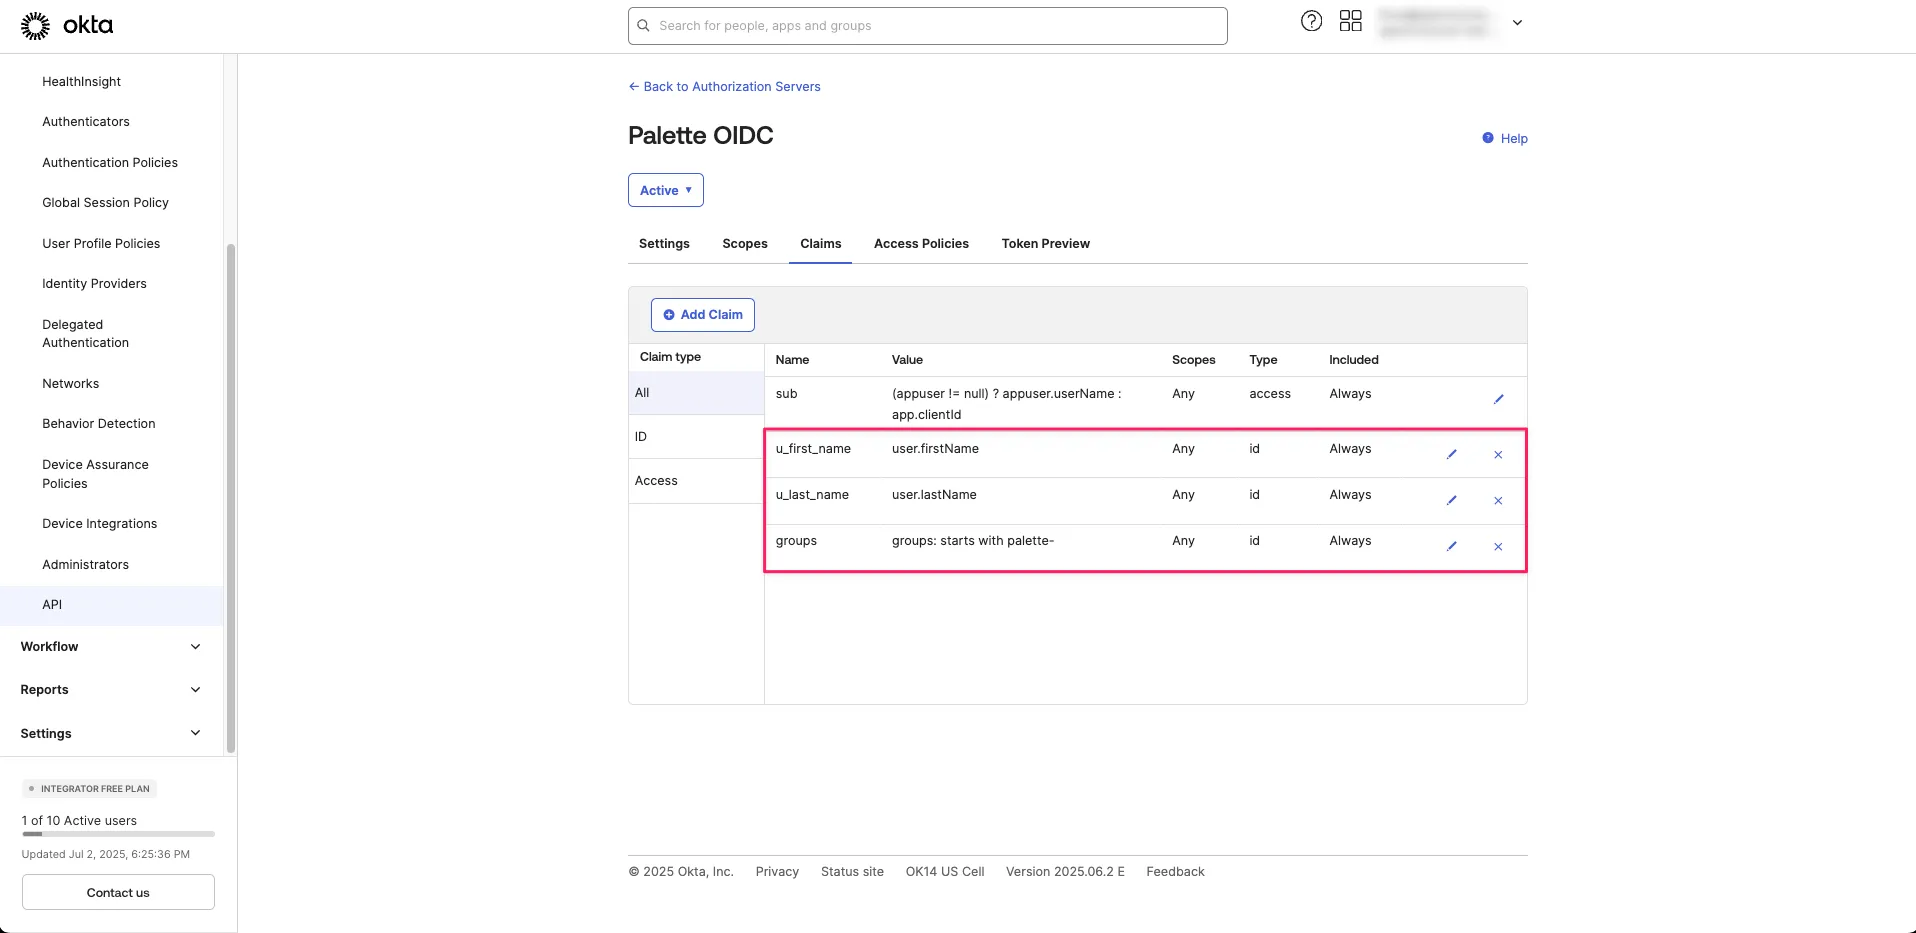
-
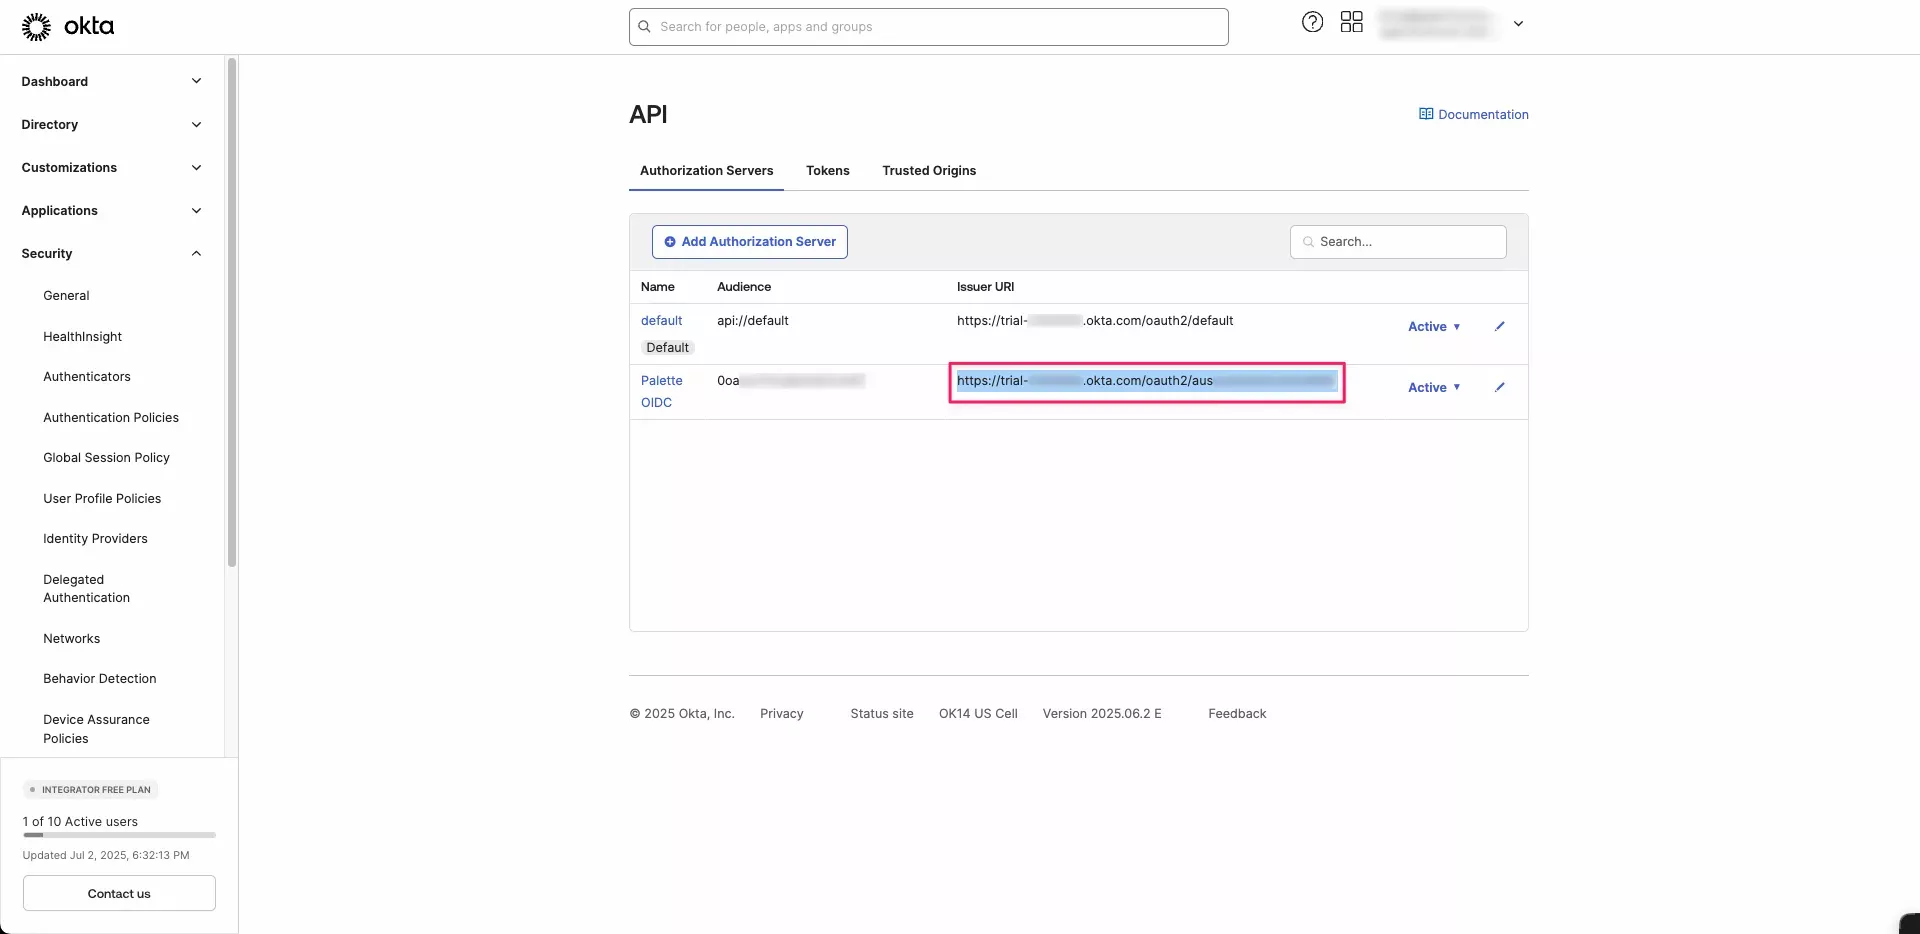
At the top of the page, select the Back to Authorization Servers breadcrumb to return to your list of servers.
-
The authorization server you created is displayed in the list. Select the Issuer URI shown and copy it to the clipboard. Save this value, as you will need it later.
-
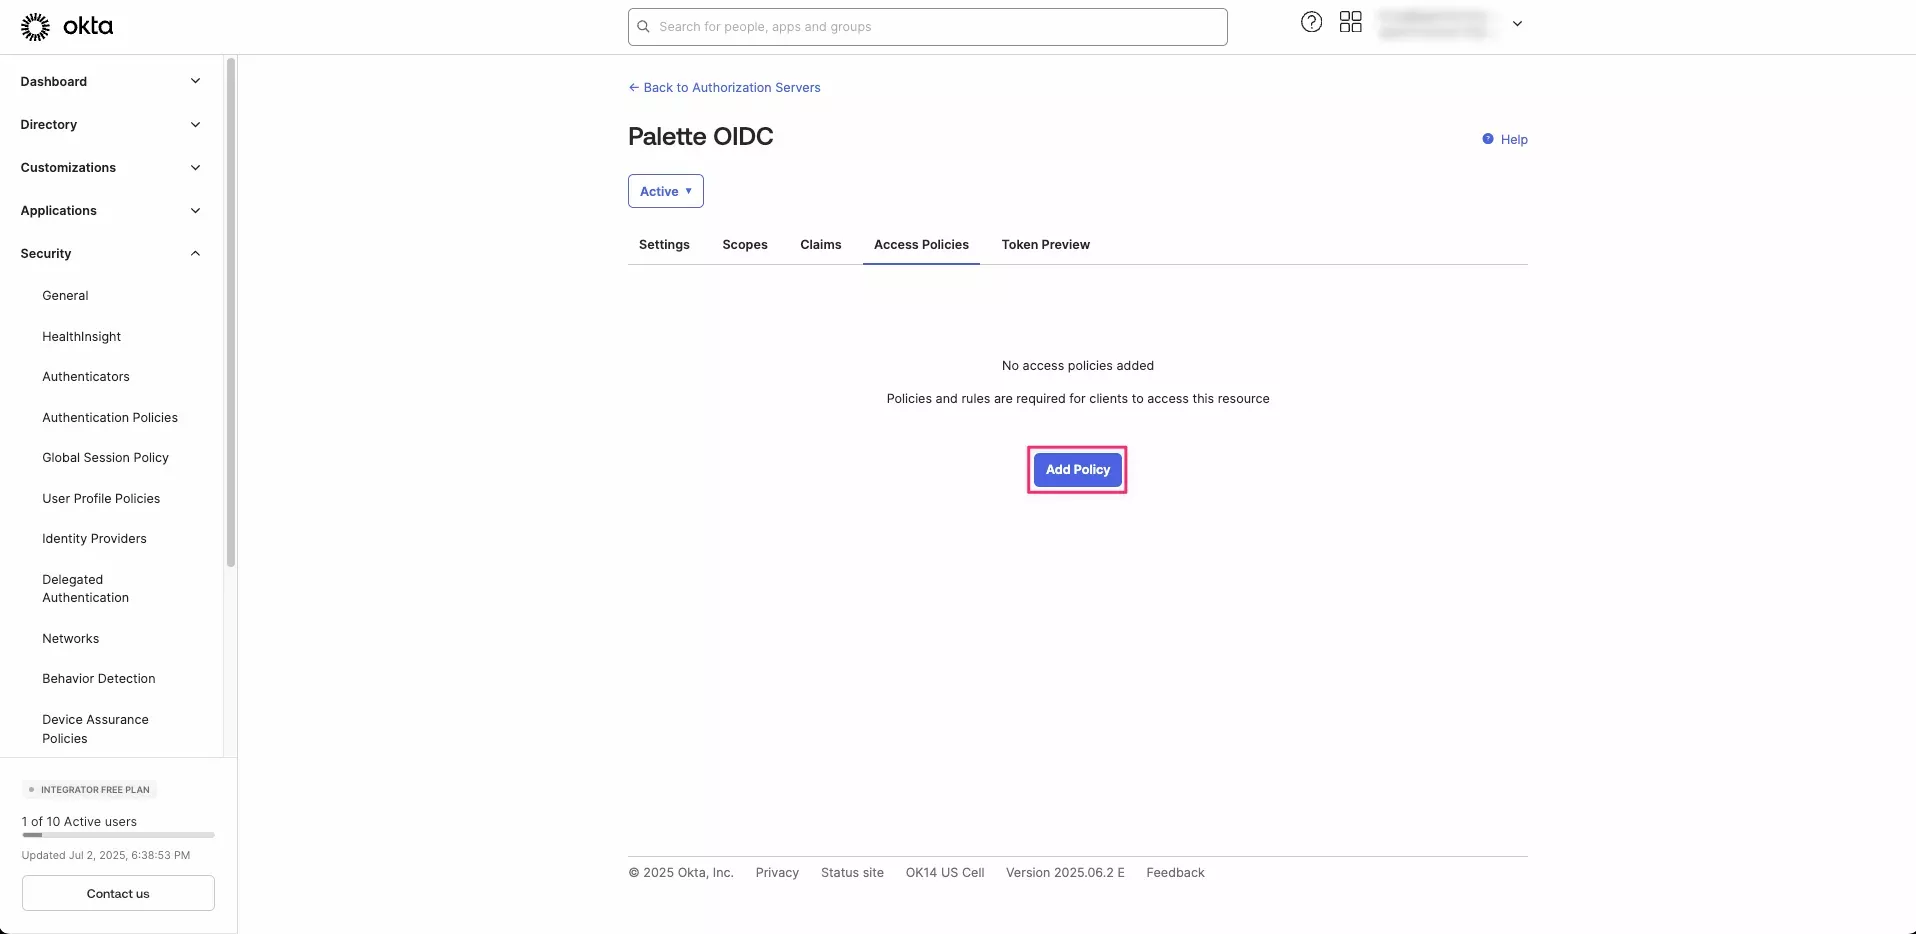
Select the Palette OIDC application and navigate to the Access Policies tab. Select Add Policy.
-
Set the Name and Description fields to
Palette, then change the Assign to option to The following clients. In the drop-down, search for the Okta application you created in step 3 of Create the Okta Application; in our example, we usedSpectro Cloud Palette OIDC. Once selected, click Create Policy.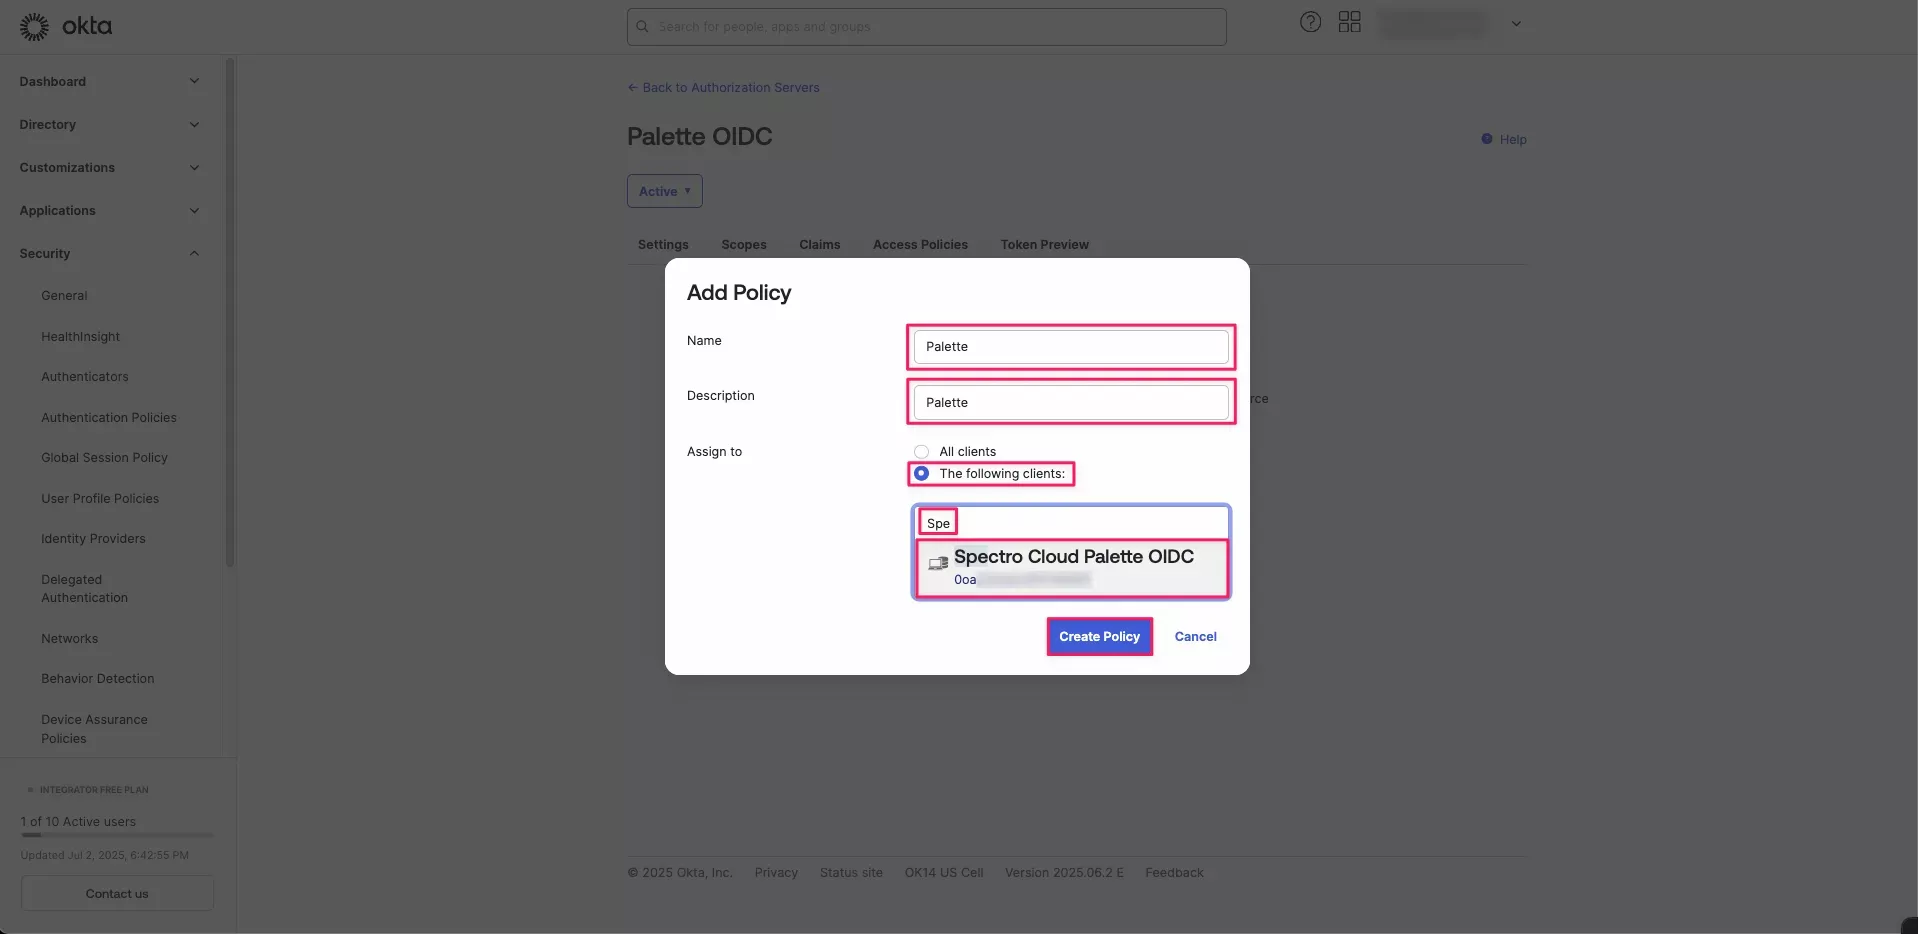
-
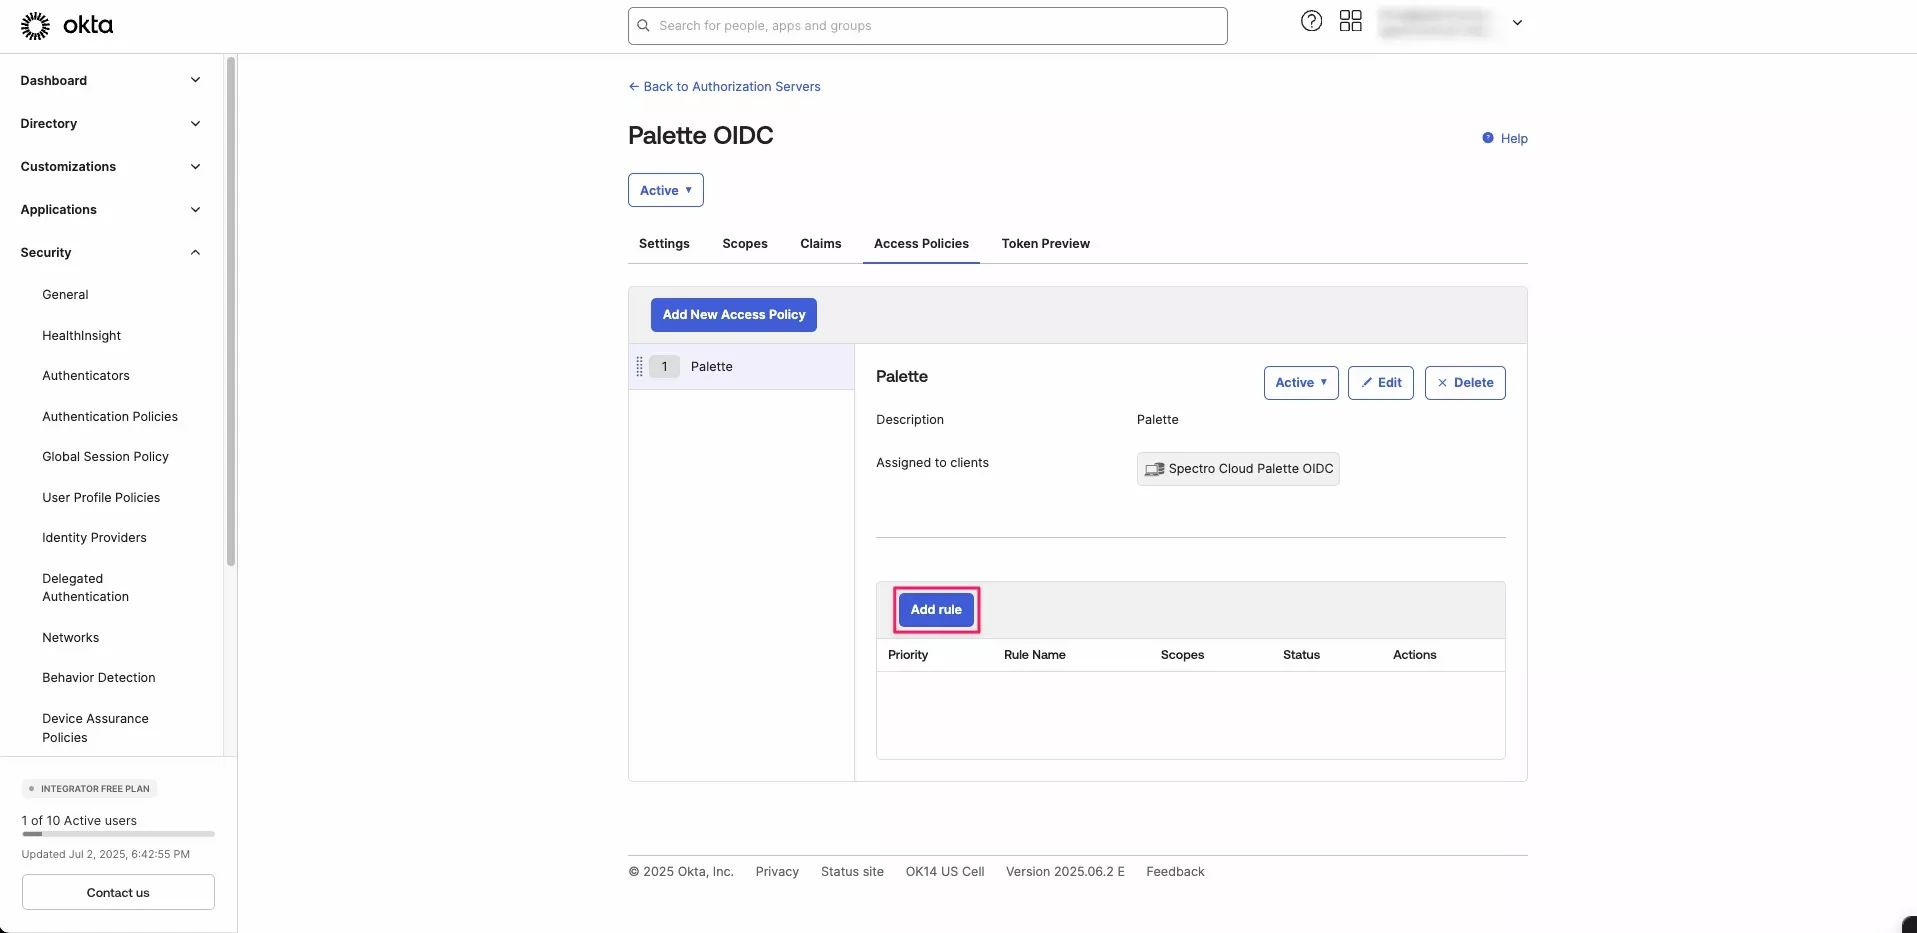
Select Add rule to add a rule to this Access Policy.
-
Set the Rule Name to
AuthCodeand deselect all Core Grant options except Authorization Code. When finished, select Create Rule.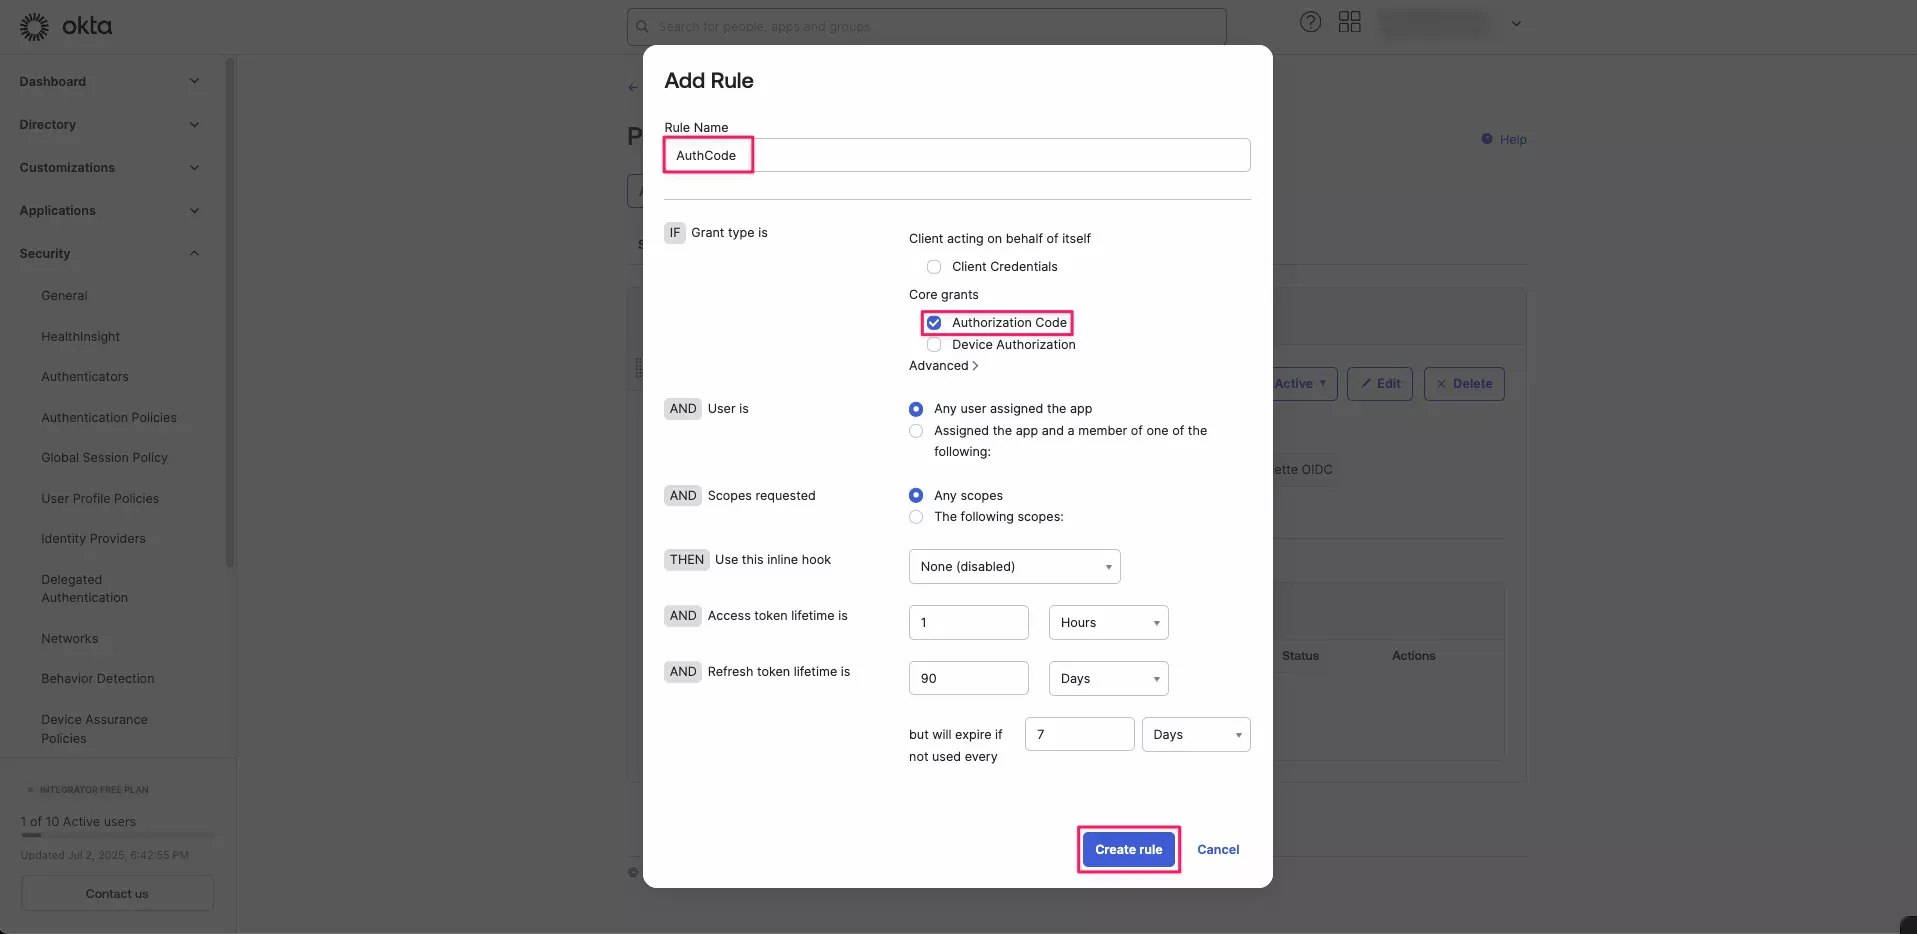
Enable OIDC SSO in Palette
-
Return to Palette. If you have been logged out, sign in again as a tenant admin.
-
From the left main menu, select Tenant Settings.
-
On the Tenant Settings Menu, select SSO, and choose an SSO Auth type of OIDC.
-
Enter the following OIDC information.
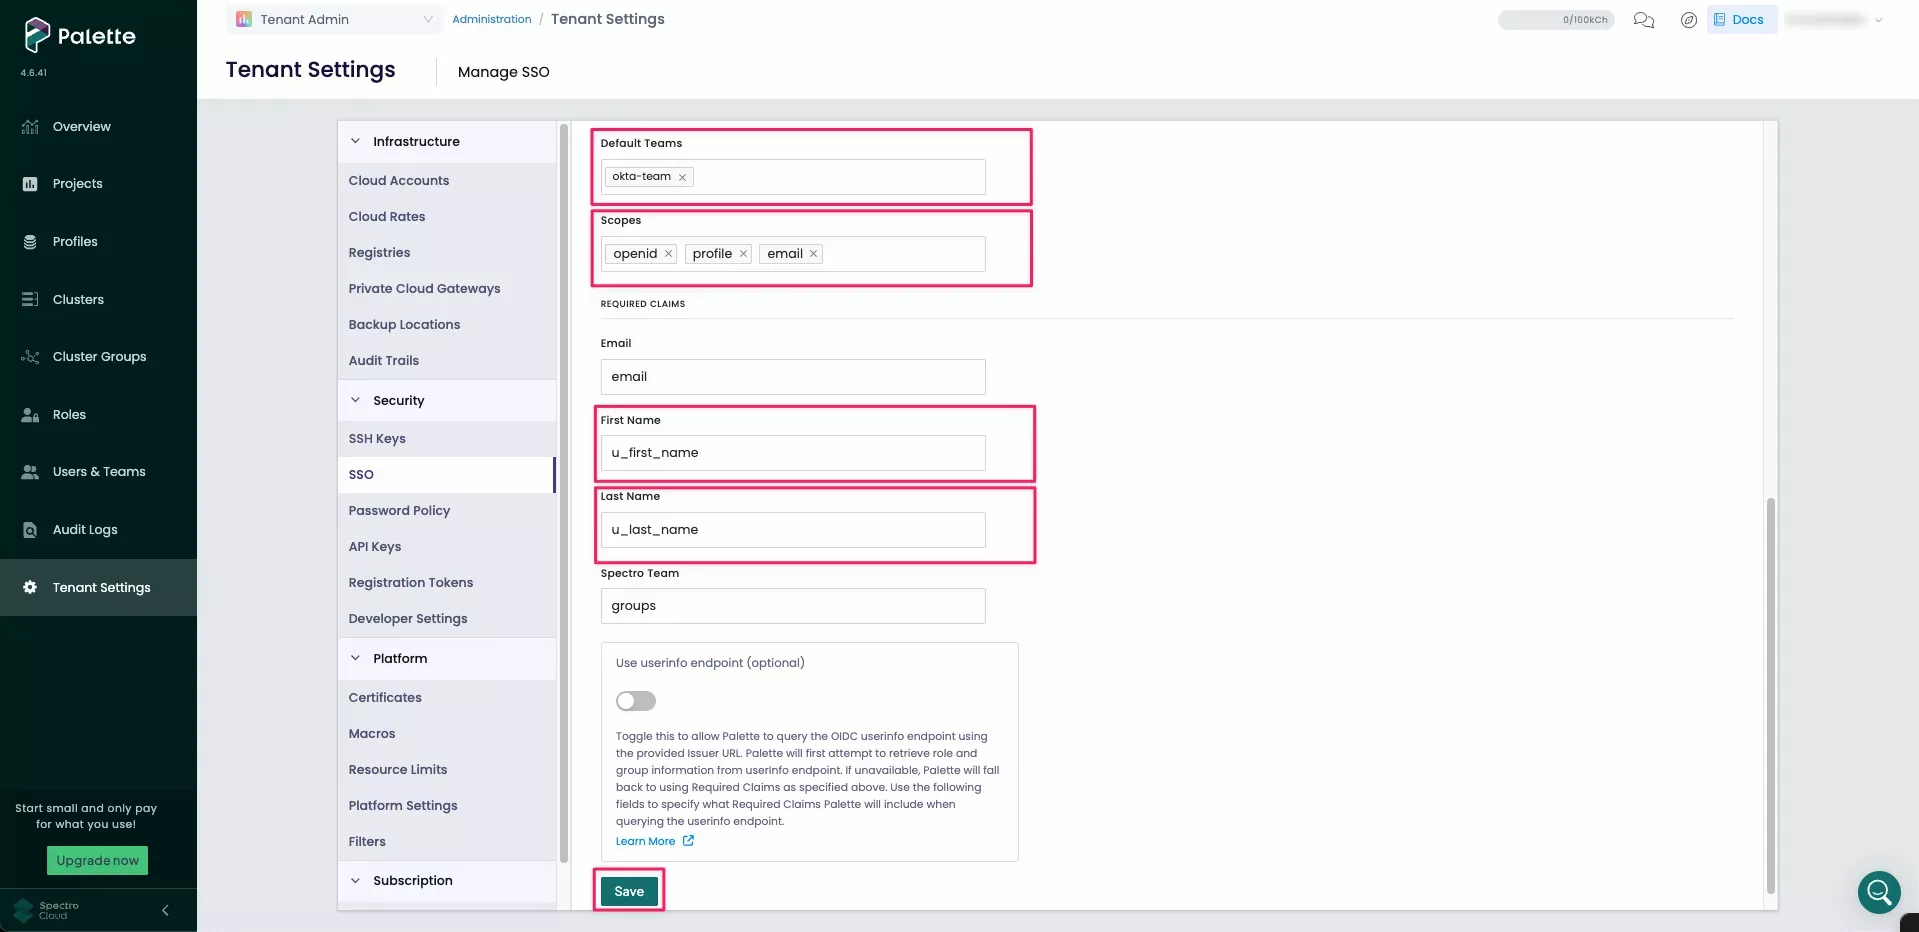
Parameter Value Issuer URL The Issuer URI that you saved in step 8 of Create an Okta Authorization Server. Client ID The client identifier that you saved in step 12 of Create the Okta Application. Client Secret The shared secret that you generated in step 13 of Create the Okta Application.. Default Teams Leave blank if you do not want users without group claims to be assigned to a default group. If you do, enter the desired default group name. If you use this option, be careful with how much access you assign to the group. Scopes Keep openid,profile, andemailas the default.Email Keep emailas the default.First Name Set this to u_first_name.Last Name Set this to u_last_name.Spectro Team Keep groupsas the default.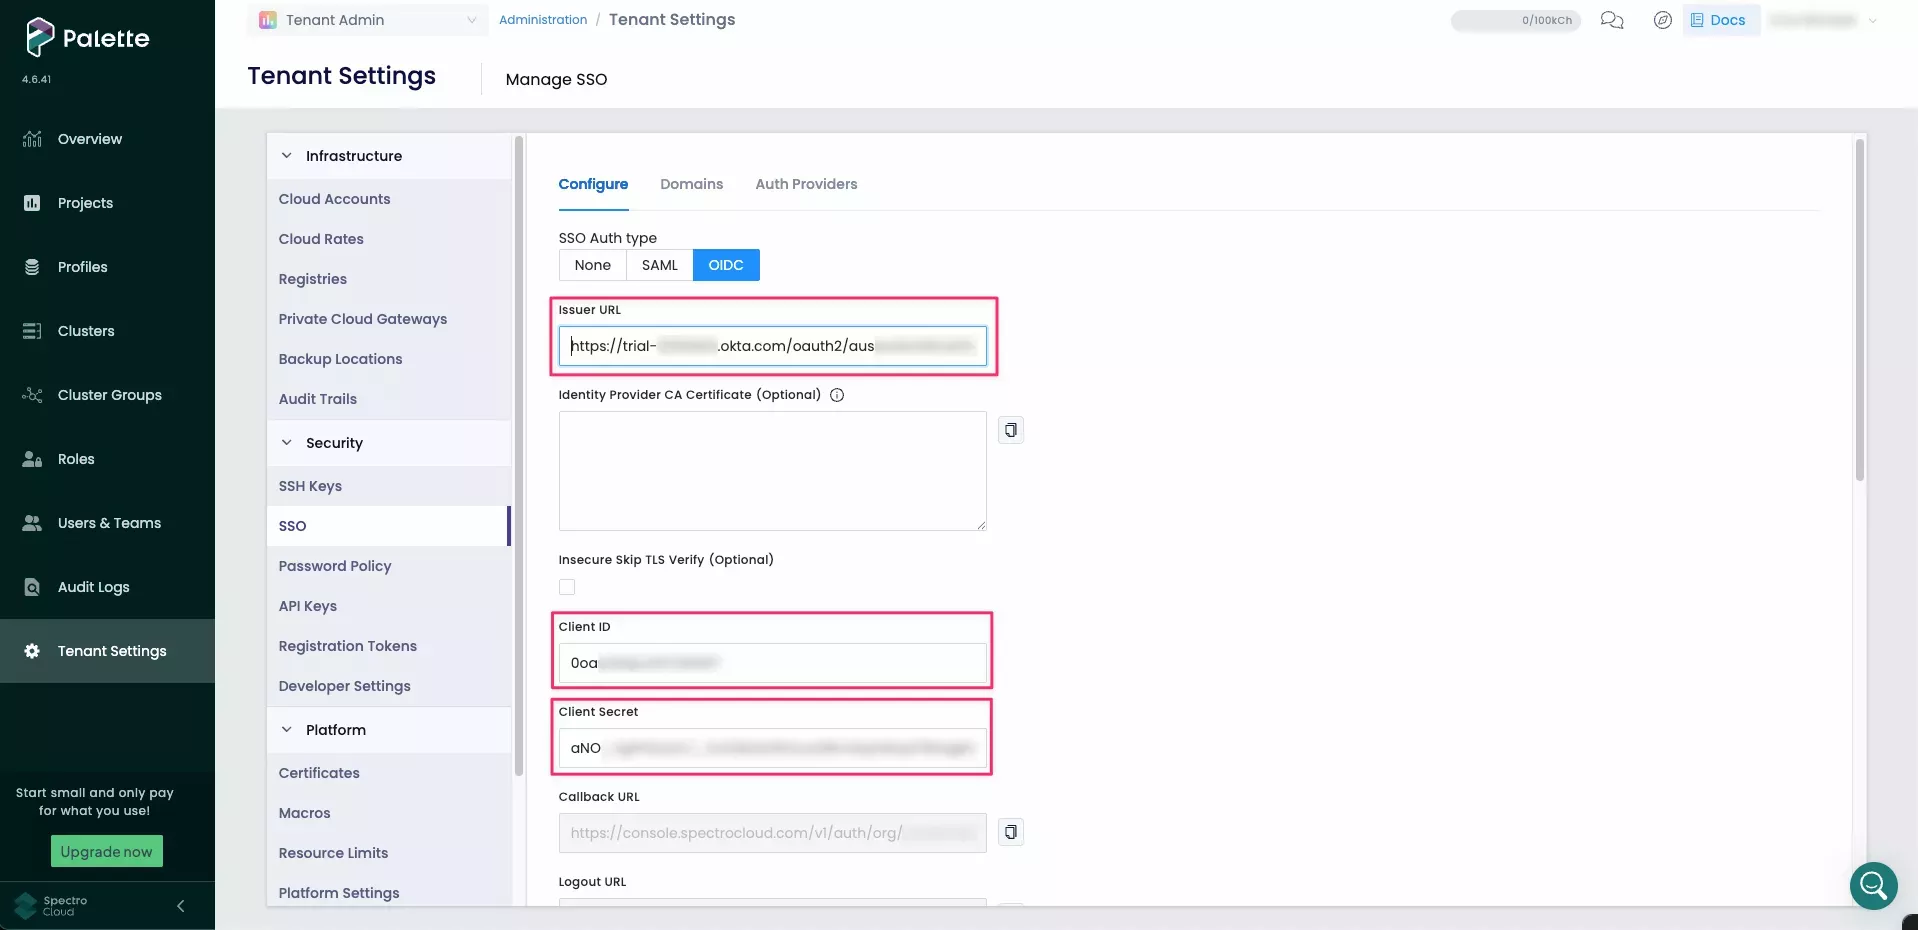
-
When all the information has been entered, click Save to activate SSO. You receive the message OIDC configured successfully.
Create Teams in Palette
The final step is to create teams in Palette for the group that you will allow to be passed in the OIDC ticket in Okta
and give that group the appropriate permissions. For this example, you will create the palette-tenant-admins team and
give it Tenant Admin permissions. You can repeat this for any other team that you have a matching Okta group for.
-
Log in to Palette as a tenant admin.
-
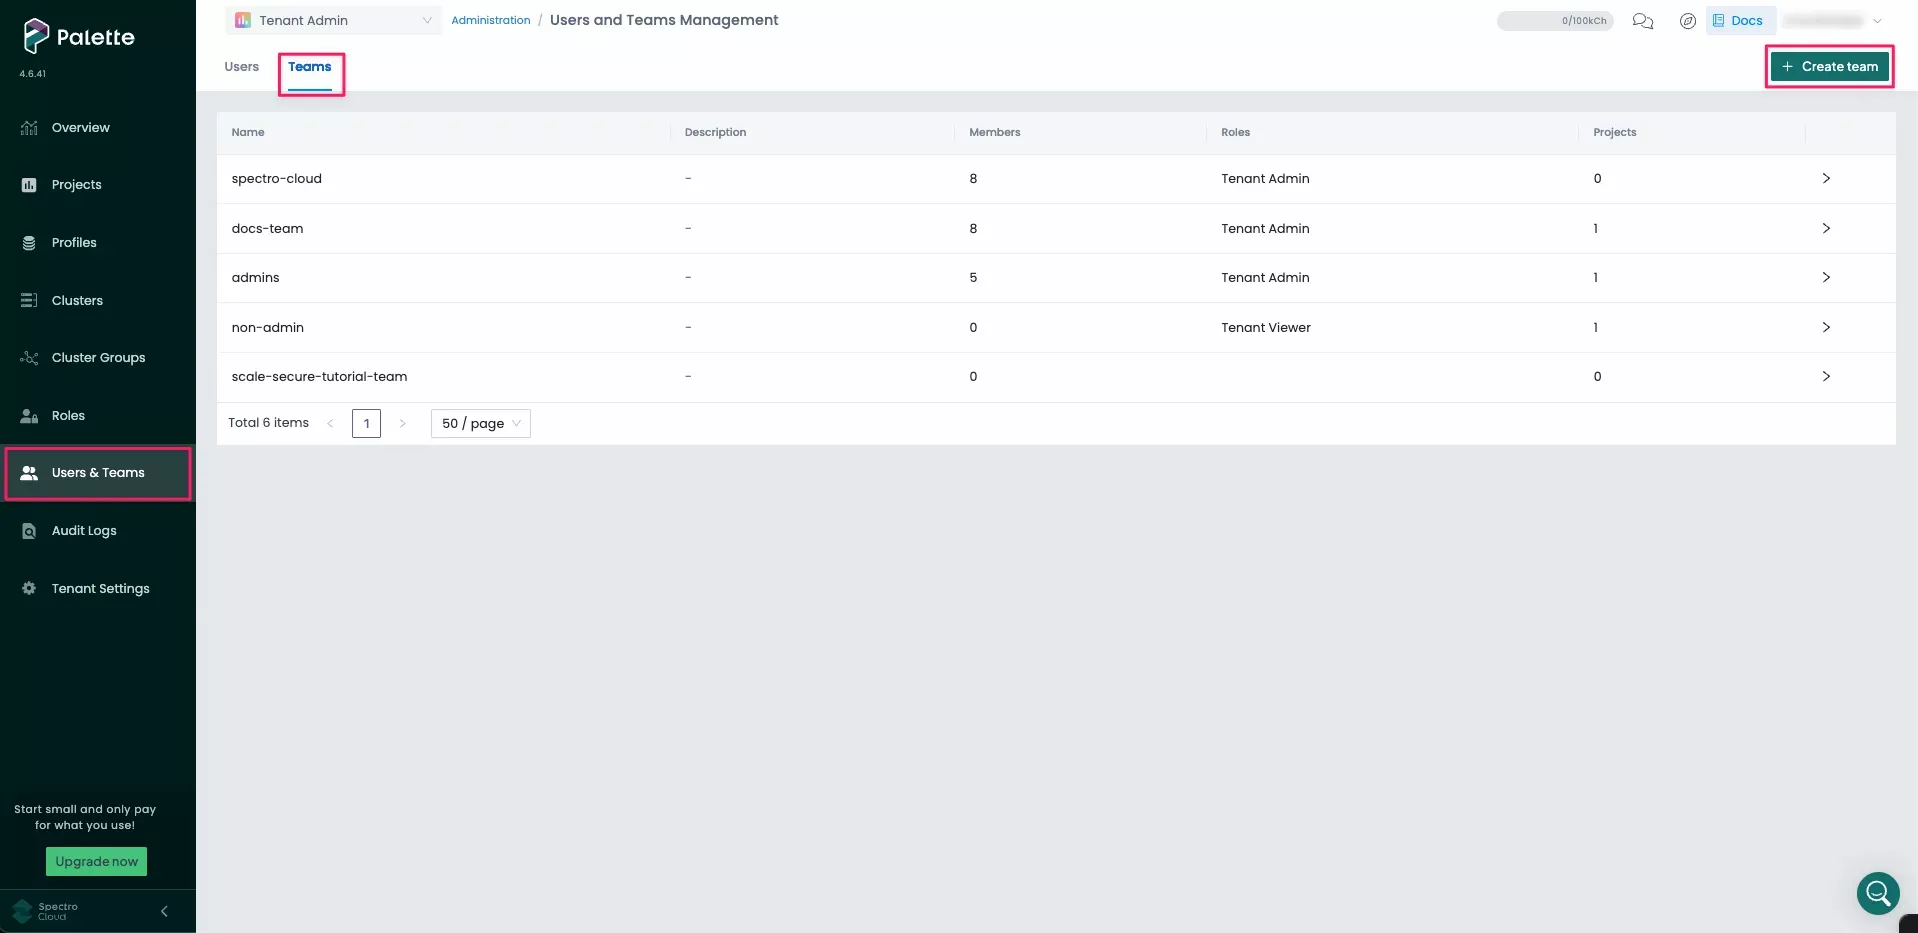
From the left main menu, select Users & Teams.
-
Navigate to the Teams tab and select Create Team.
-
Enter
palette-tenant-adminsfor the Team name. You do not need to add any members, as members will be added automatically with SSO. Select Confirm to create the team.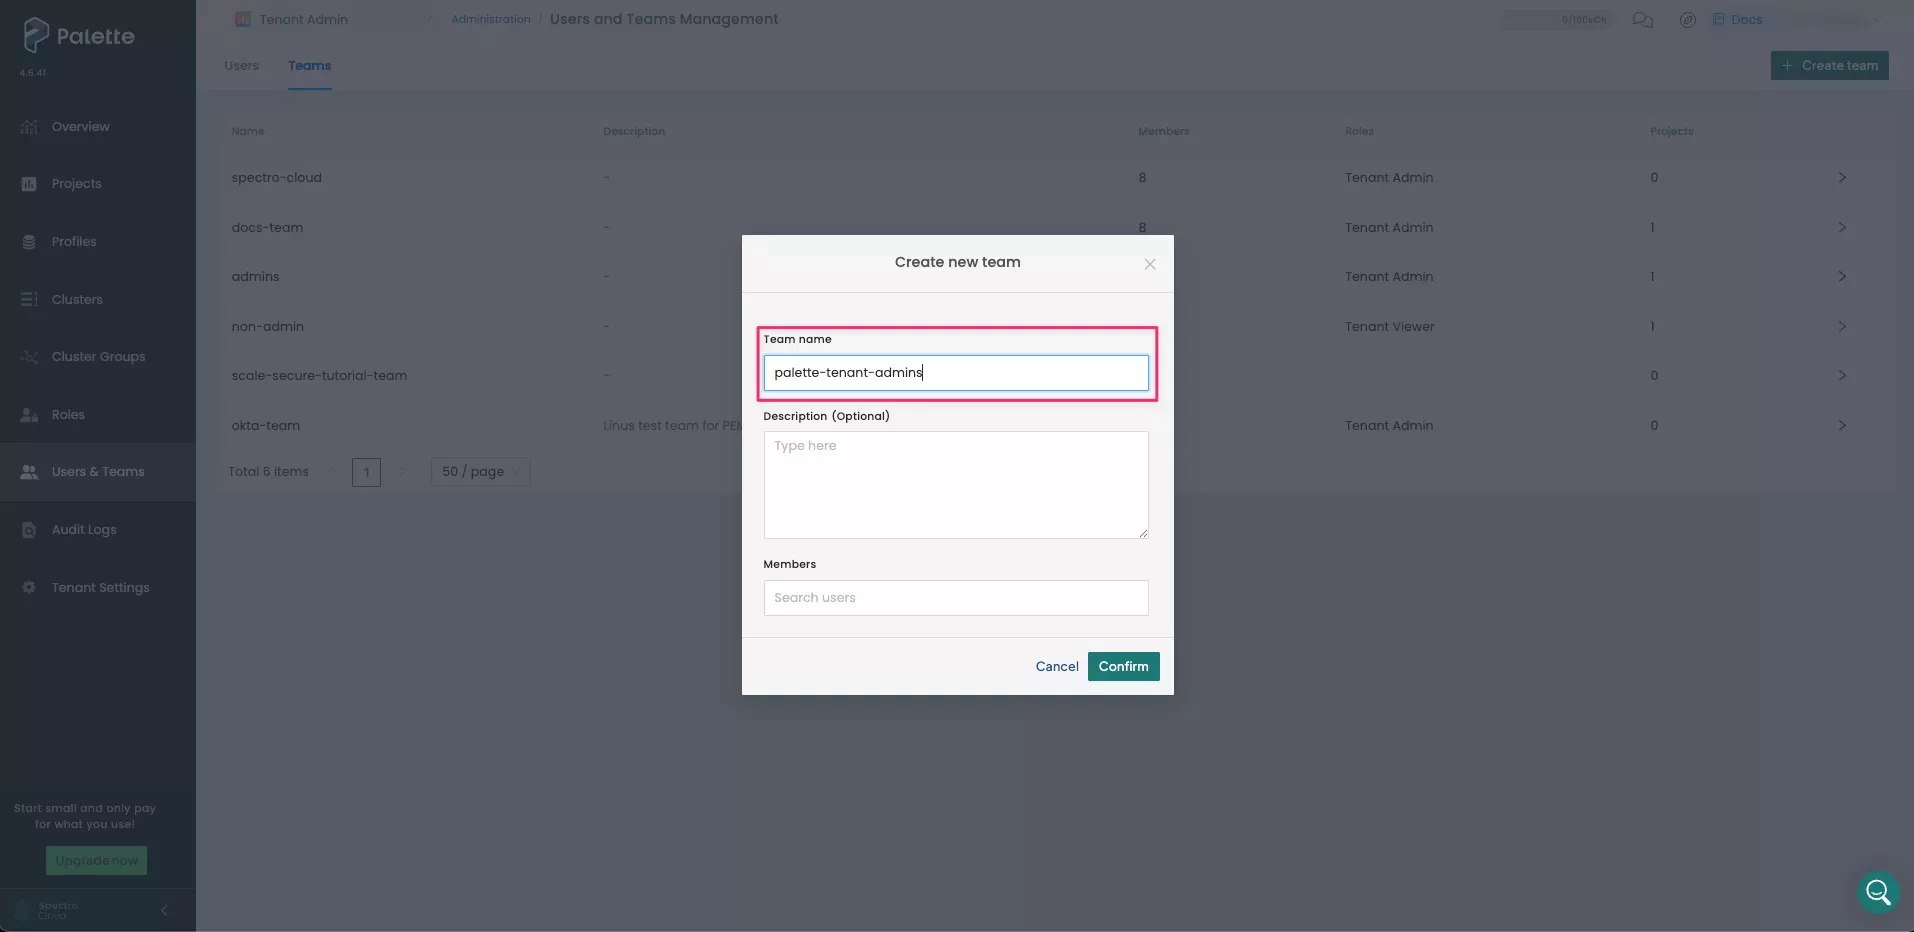
-
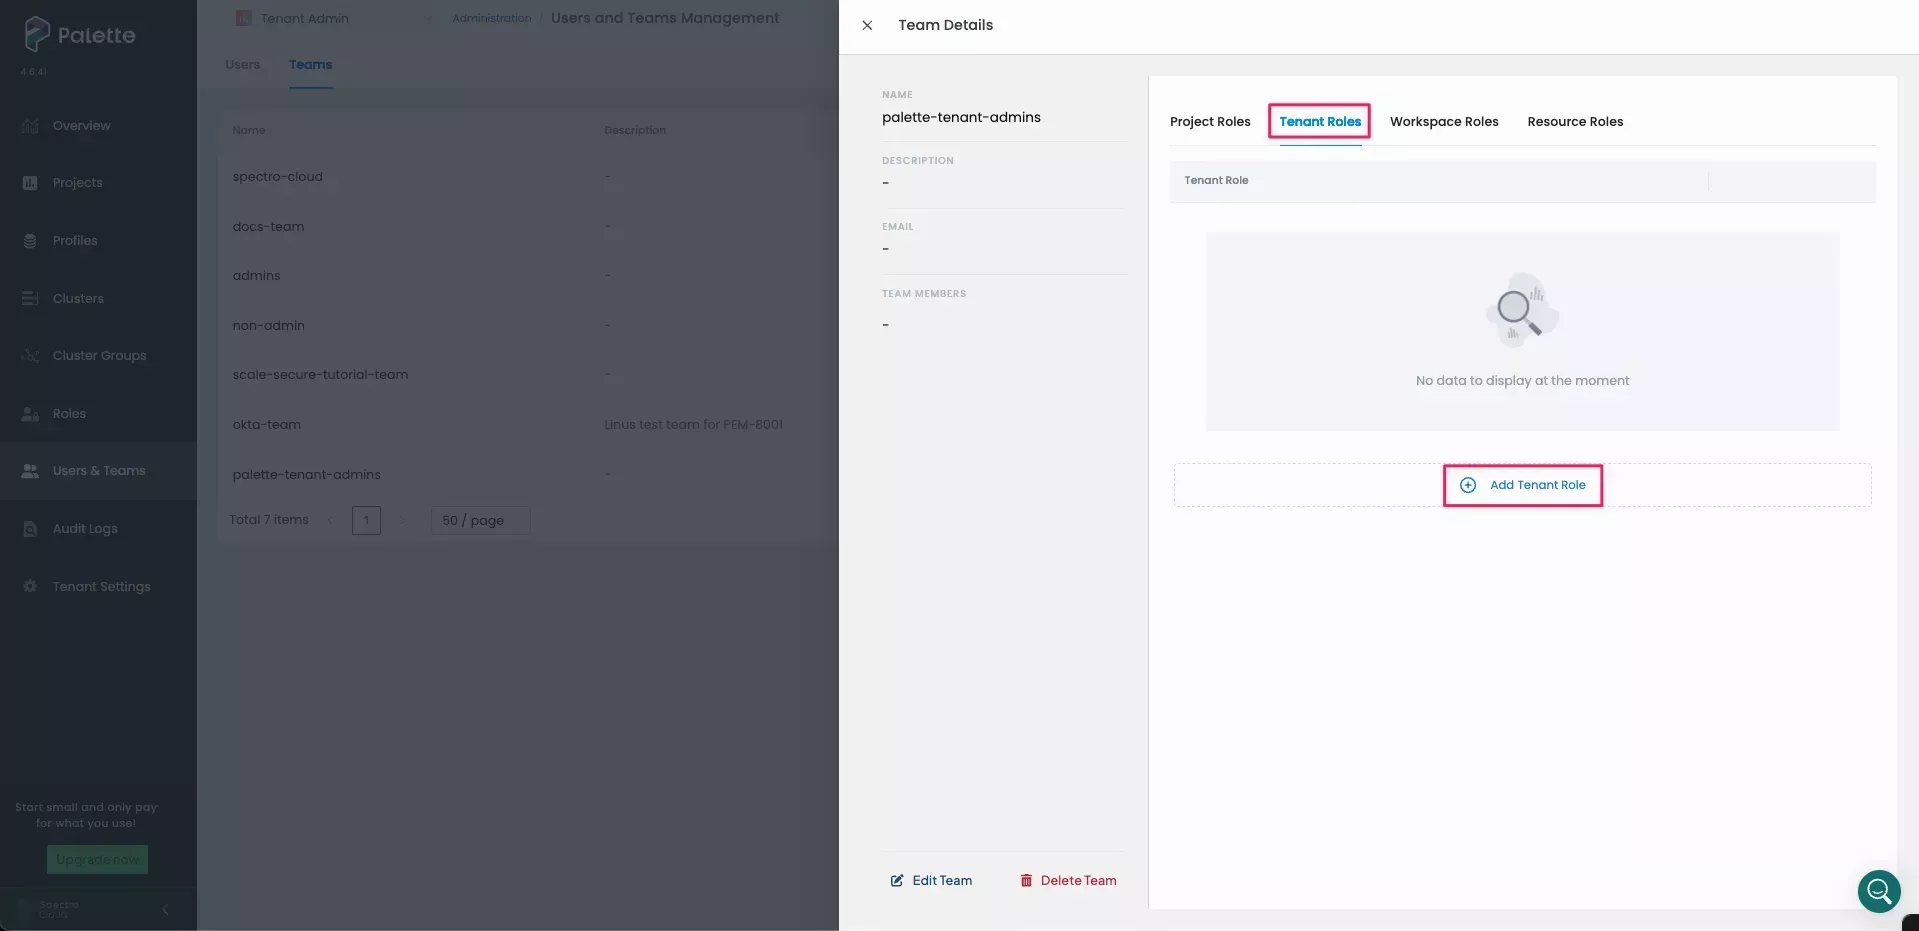
A message states that the team was created. Select the newly created
palette-tenant-adminsteam to review the team's details. -
To give the team administrative access to the entire tenant and all projects within the tenant, select the Tenant Roles tab and click Add Tenant Role.
-
In the Add Roles dialog, select Tenant Admin. Click Confirm to add the role.
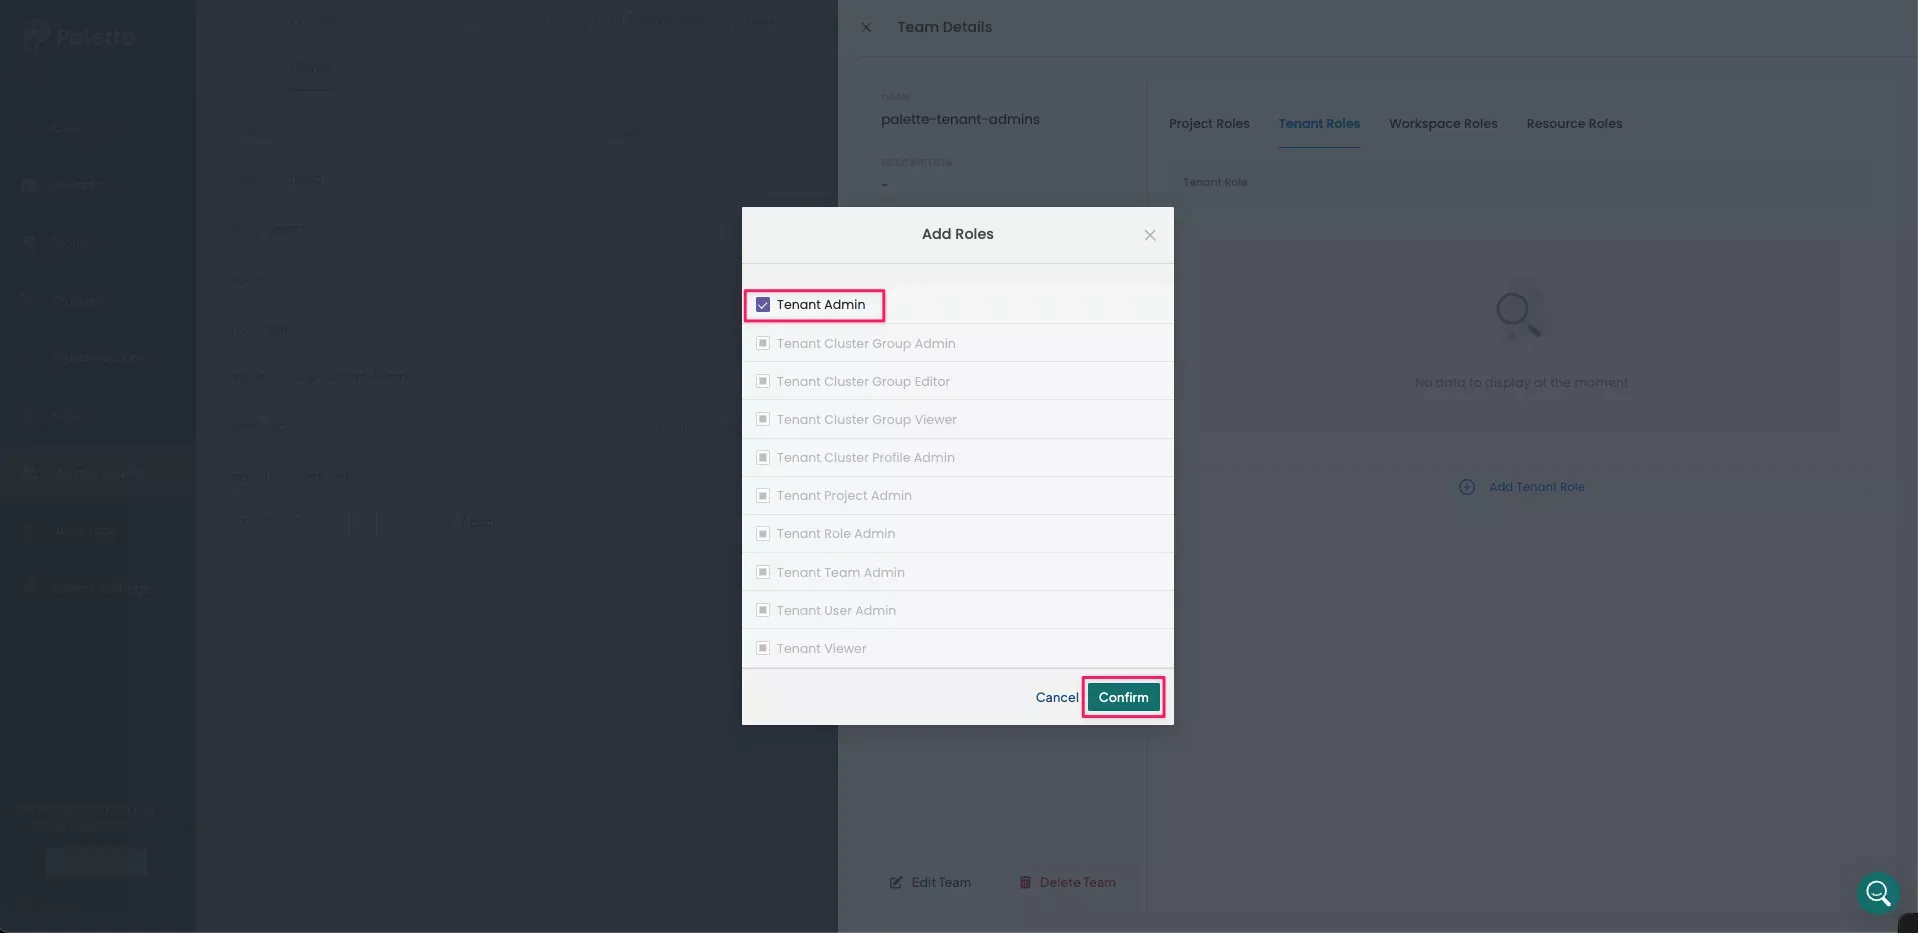
A message states that Roles have been updated. Repeat this procedure for any other necessary teams, taking care to ensure they are given the appropriate permissions.
Validate
-
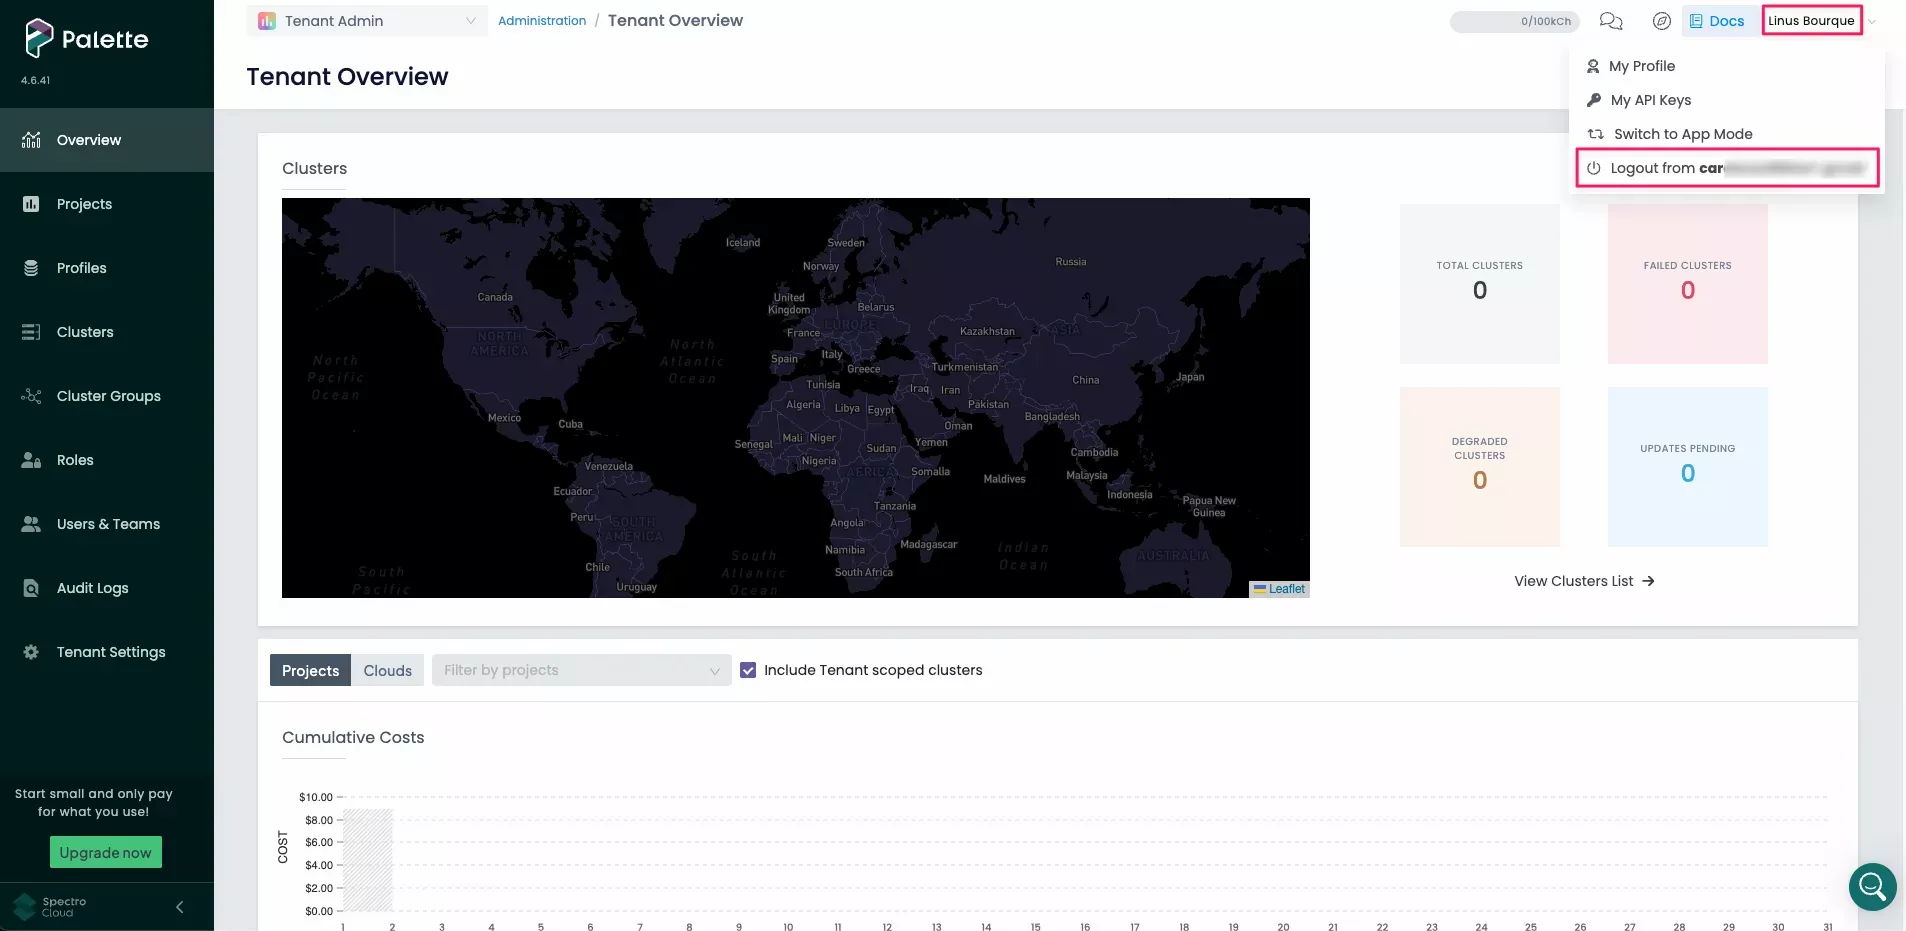
Log out of Palette by selecting Logout in the User Menu at the top right.
-
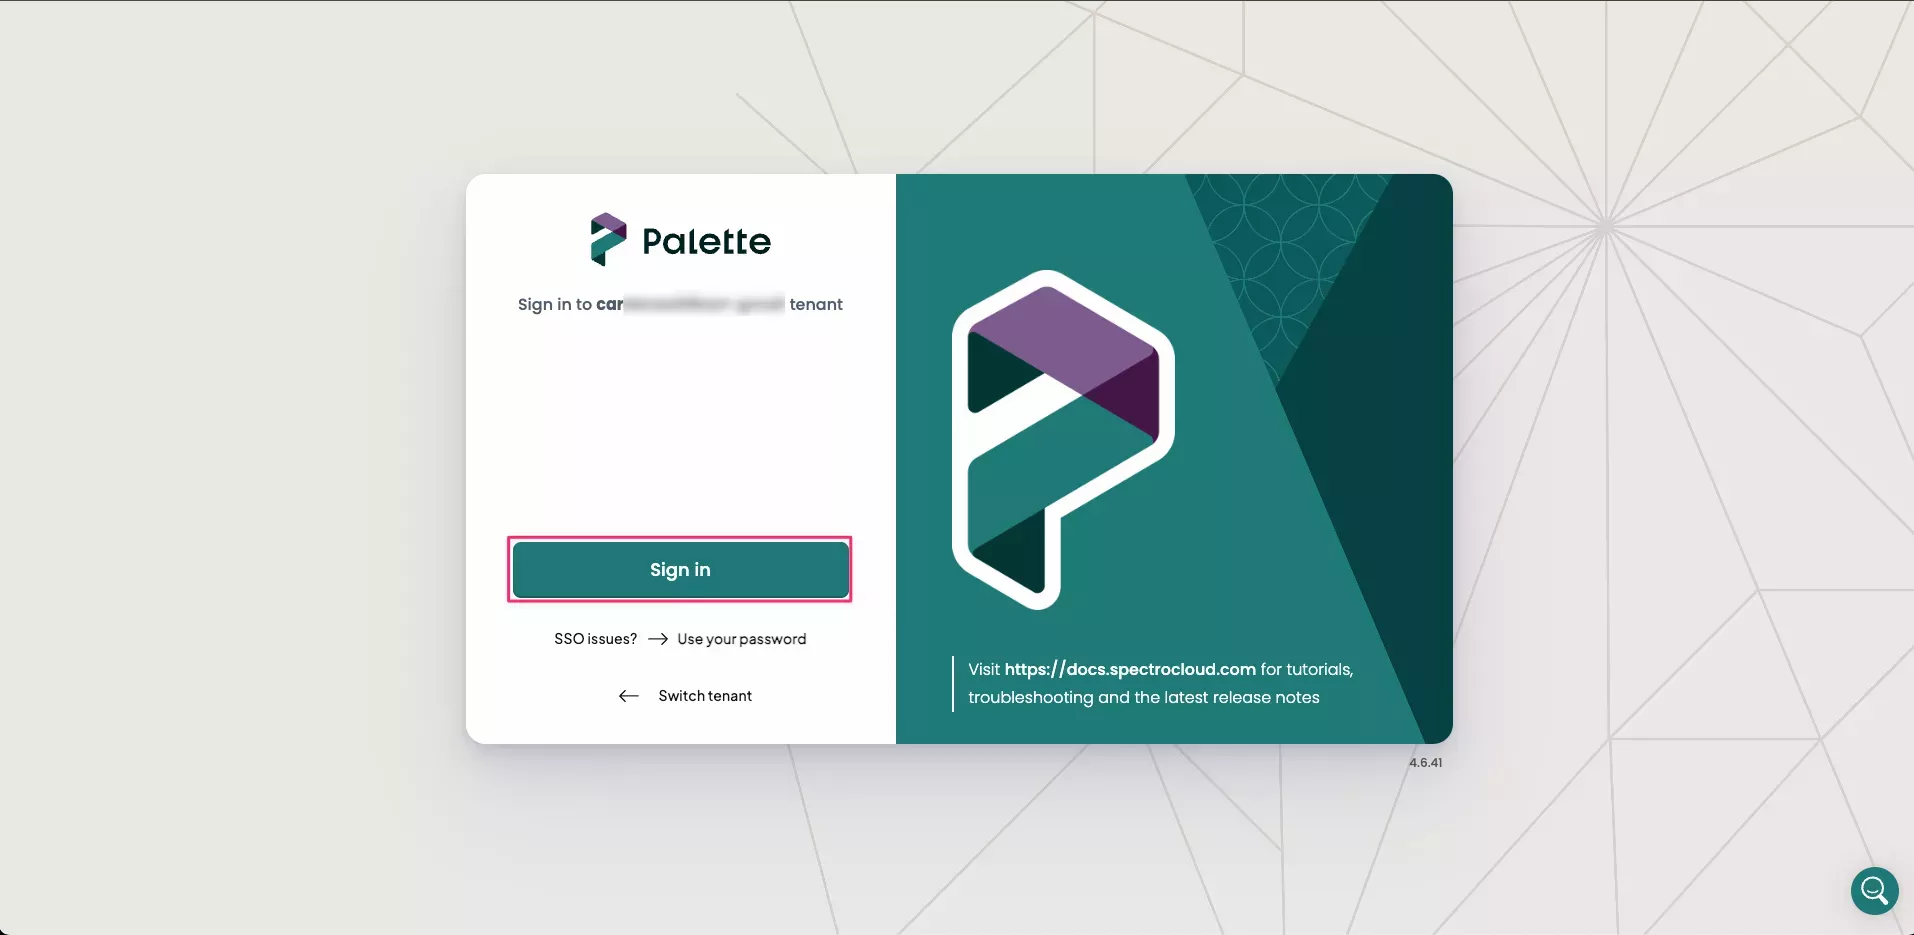
The Palette login screen now displays a Sign in button and no longer presents a username and password field. Click on the Sign in button to log in via SSO.
tipBelow the Sign in button, there is an SSO issues? Use your password link. Use this link if you need to bypass SSO and log in with your Palette account instead.
-
If this is the first time you are logging in with SSO, you will be redirected to the Okta login page. Depending on your organization's SSO settings, this could be a simple login form or require MFA (Multi-Factor Authentication).
infoMake sure you log in as a user that is a member of the
palette-tenant-adminsgroup in Okta. Once authenticated, you will automatically be redirected back to Palette and logged into Palette as that user. -
Upon logging in, you are automatically added to the
palette-tenant-adminsteam in Palette. To verify, navigate to the left main menu, and select Users & Teams. -
Select the Teams tab and choose palette-tenant-admins team.The list of Team Members is displayed on the left side of Team Details.