Model Edge Native Cluster Profile
Cluster profiles contain the desired specifications for your Edge cluster. All Edge profiles require you to provide an Operating System (OS) pack, a Kubernetes pack, and a Container Network Interface (CNI) pack. Unlike other types of profiles, Edge profiles does not require you to use a Container Storage Interface (CSI) pack. This is because many Edge deployments are subject to hardware limitations and do not require persistent storage. However, if your cluster needs to use persistent storage, you need to include a CSI pack.
As with any other environment in Palette, you can define additional add-on cluster profiles. You can use add-on profiles to define integrations or applications that must be included when Palette deploys the cluster.
The following steps will guide you on how to create an Edge-type cluster profile.
This page covers modeling cluster profiles in Appliance Mode. You can also deploy a cluster at the Edge using agent mode. Refer to Agent Mode for more information.
Prerequisites
- The OS layer expects a provider image reference, which is Kairos-based container image for specific OS and Kubernetes
combinations you build during EdgeForge. You do not need to have built
the provider image at the cluster profile modeling stage, but you need to know where the uploaded image will be and
specify the image location in the
system.uriparameter.
Enablement
-
Log in to Palette.
-
Choose the desired scope, project or Tenant Admin.
-
Navigate to the left Main Menu and select Profiles.
-
Click on Add Cluster Profile.
-
Provide Basic Information, such as profile name, description, and tags. Select Full and click on Next.
-
Select Edge Native as the Cloud Type and click on Next.
-
Select either Public Repo or Palette Registry (OCI) in the Registry field.
-
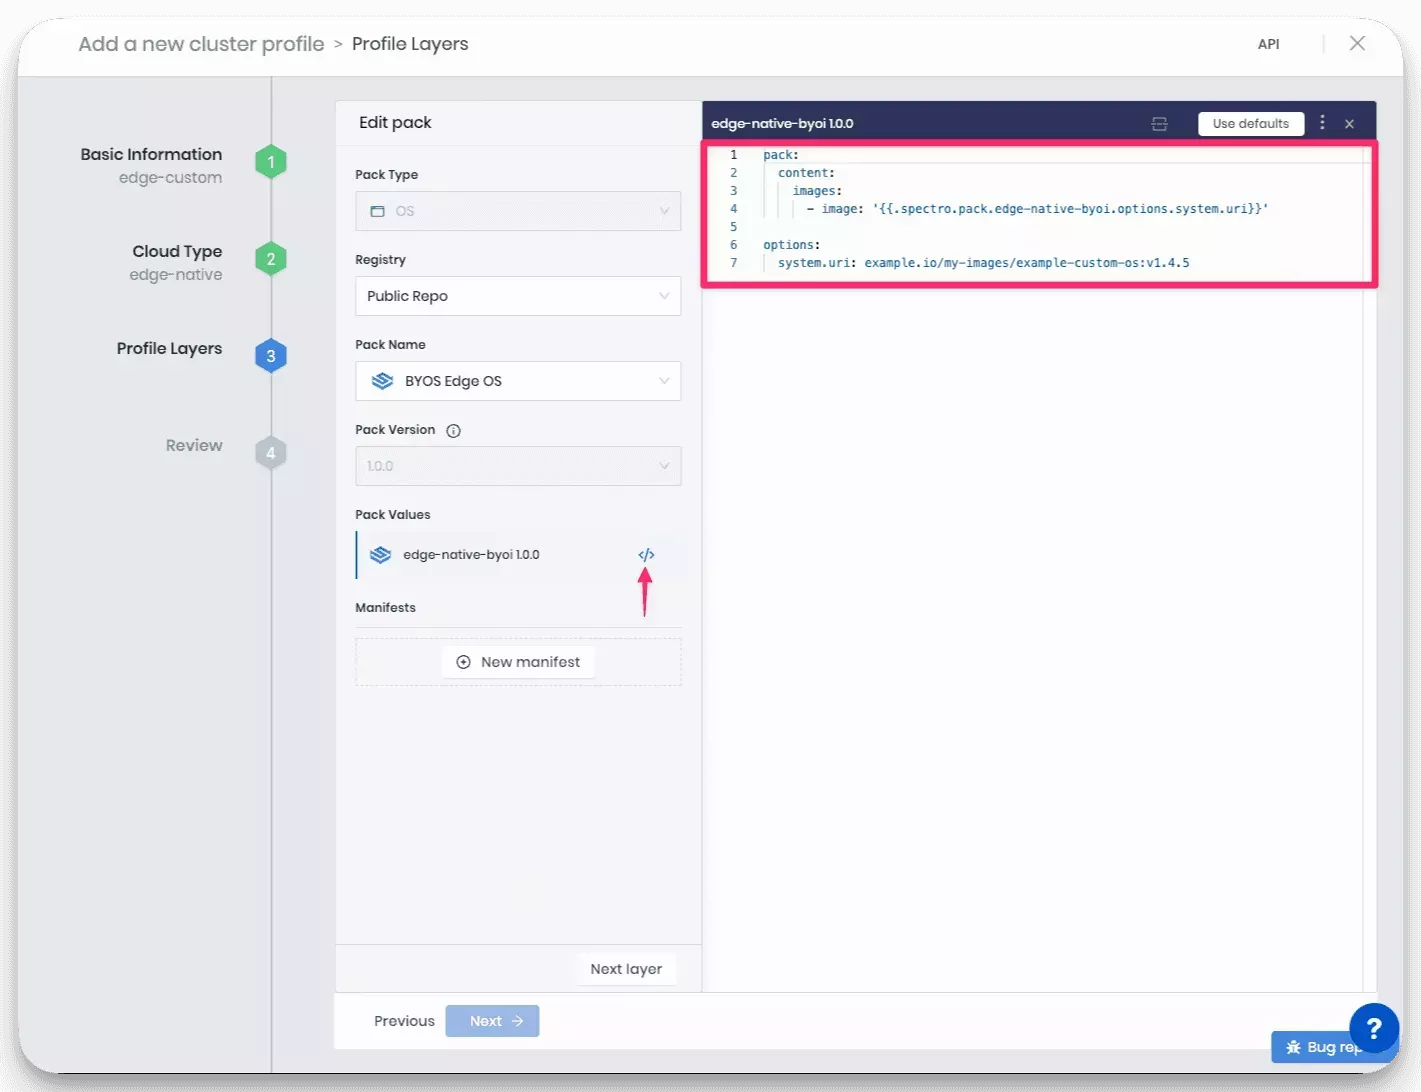
Select BYOS Edge OS in the Pack Name field and the pack version.
-
Click on the code editor button </> to open up the editor
-
Update the
system.uriparameter in the pack editor. Use the provider image you created in the EdgeForge process. If you have not built the image yet, fill the parameter with where the image will be uploaded to or fill it with a placeholder value and update it when you upload the image.Refer to the EdgeForge Build Images guide for more information. The following snippet is an example where your cluster will expect a provider image at
example.io/my-images/example-custom-os:v1.4.5. You must ensure that the image is uploaded to this location when you create the cluster.pack:
content:
images:
- image: "{{.spectro.pack.edge-native-byoi.options.system.uri}}"
# - image: example.io/my-other-images/example:v1.0.0
# - image: example.io/my-super-other-images/example:v1.0.0
#drain:
#cordon: true
#timeout: 60 # The length of time to wait before giving up, zero means infinite
#gracePeriod: 60 # Period of time in seconds given to each pod to terminate gracefully. If negative, the default value specified in the pod will be used
#ignoreDaemonSets: true
#deleteLocalData: true # Continue even if there are pods using emptyDir (local data that will be deleted when the node is drained)
#force: true # Continue even if there are pods that do not declare a controller
#disableEviction: false # Force drain to use delete, even if eviction is supported. This will bypass checking PodDisruptionBudgets, use with caution
#skipWaitForDeleteTimeout: 60 # If pod DeletionTimestamp older than N seconds, skip waiting for the pod. Seconds must be greater than 0 to skip.
options:
system.uri: example.io/my-images/example-custom-os:v1.4.5infoYou can customize the node drainage behavior and specify additional images that you may have created that are part of the content bundle. Specify any additional image required by the cluster profile in the
imagessection. Add an- image:entry for each image you need to specify. Refer to theBYOOS Pack resource to learn more about the pack details.
-
Specify any cloud-init stages in your OS pack. Cloud-init stages allow you to configure your OS declaratively. For more information about cloud-init stages, refer to Cloud-init Stages.
-
Click on the Next layer button to continue.
-
Complete the cluster profile creation process by filling out the remaining layers.
You have successfully created a cluster profile that you can use to deploy Edge clusters.
Validate
Verify you created a cluster profile for Edge hosts by using the following steps.
-
Log in to Palette.
-
Choose the desired scope, project or Tenant Admin.
-
Navigate to the left Main Menu and select Profiles.
-
Use the Cloud Types drop-down Menu and select Edge Native.
-
Your newly created cluster profile is displayed along with other cluster profiles of the same type.
Next Steps
Your next step in the deployment lifecycle is to prepare the Edge host for the installation. Use the Installation guide to continue.